Theme Customizer
Opening the Customizer
Section titled “Opening the Customizer”Nixe uses the WordPress Customizer for its theme settings. You change a setting and see the result in the live preview right away. You can open the Customizer in two ways:
- Go to Appearance › Customize in the WordPress admin.
- Go to Nixe › Customize, the menu that the theme adds.
Both menu items open the same screen, where you adjust the theme settings visually:
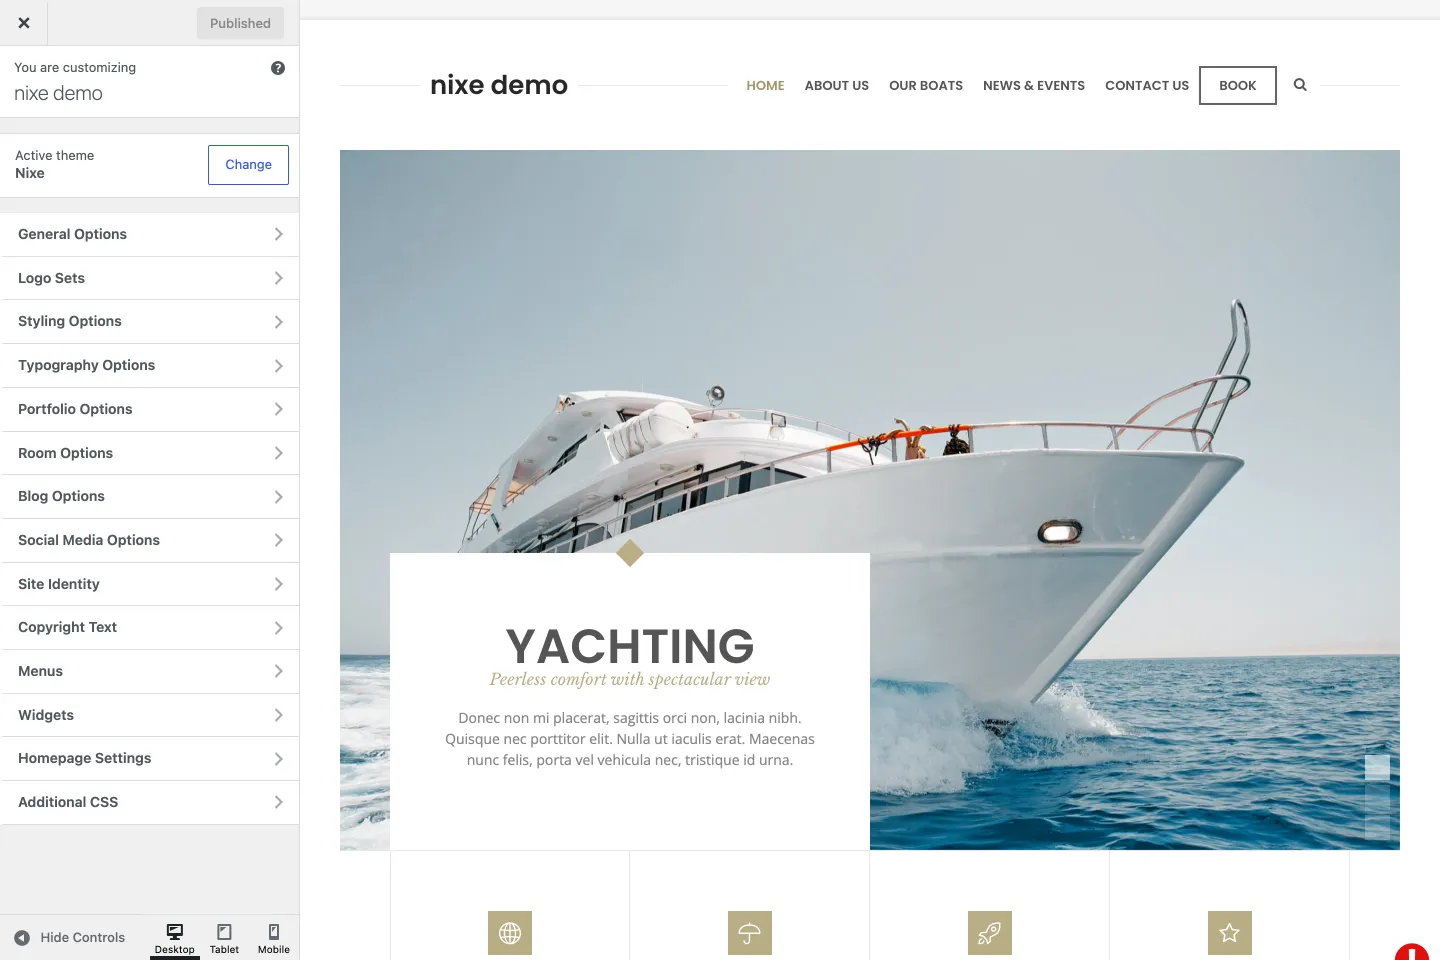
You adjust the settings on the left and see the result in the preview on the right (on the left in RTL mode).
Customizer menu
Section titled “Customizer menu”The Customizer groups the theme settings into panels and sections.
- To leave the Customizer, click the close button at the top left (top right in RTL). Unsaved settings are lost.
- To adjust settings, open one of the panels.
- To save your settings, click Publish.
- An arrow to the right of a menu item means it opens a submenu with more options.
Customizer active area indicator
Section titled “Customizer active area indicator”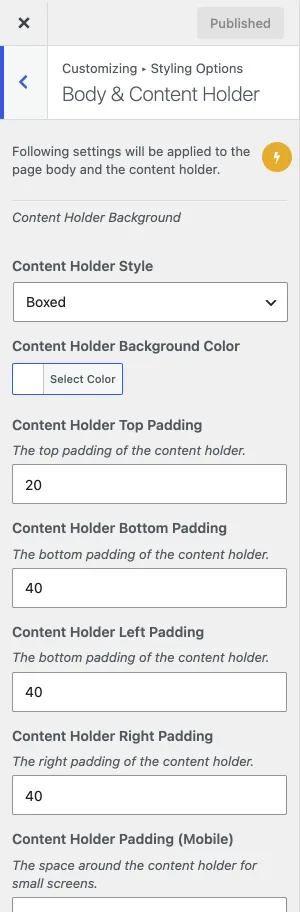
While you work in the Customizer, you may see a yellow flash icon next to a setting. Click it, and the preview shows a flashing overlay on the part of the page you are adjusting. If nothing flashes, that area is outside the visible part of the preview: scroll the preview on the right to see it.
Theme settings import, export and reset
Section titled “Theme settings import, export and reset”The Nixe › Customizations page has three tools for your theme settings:
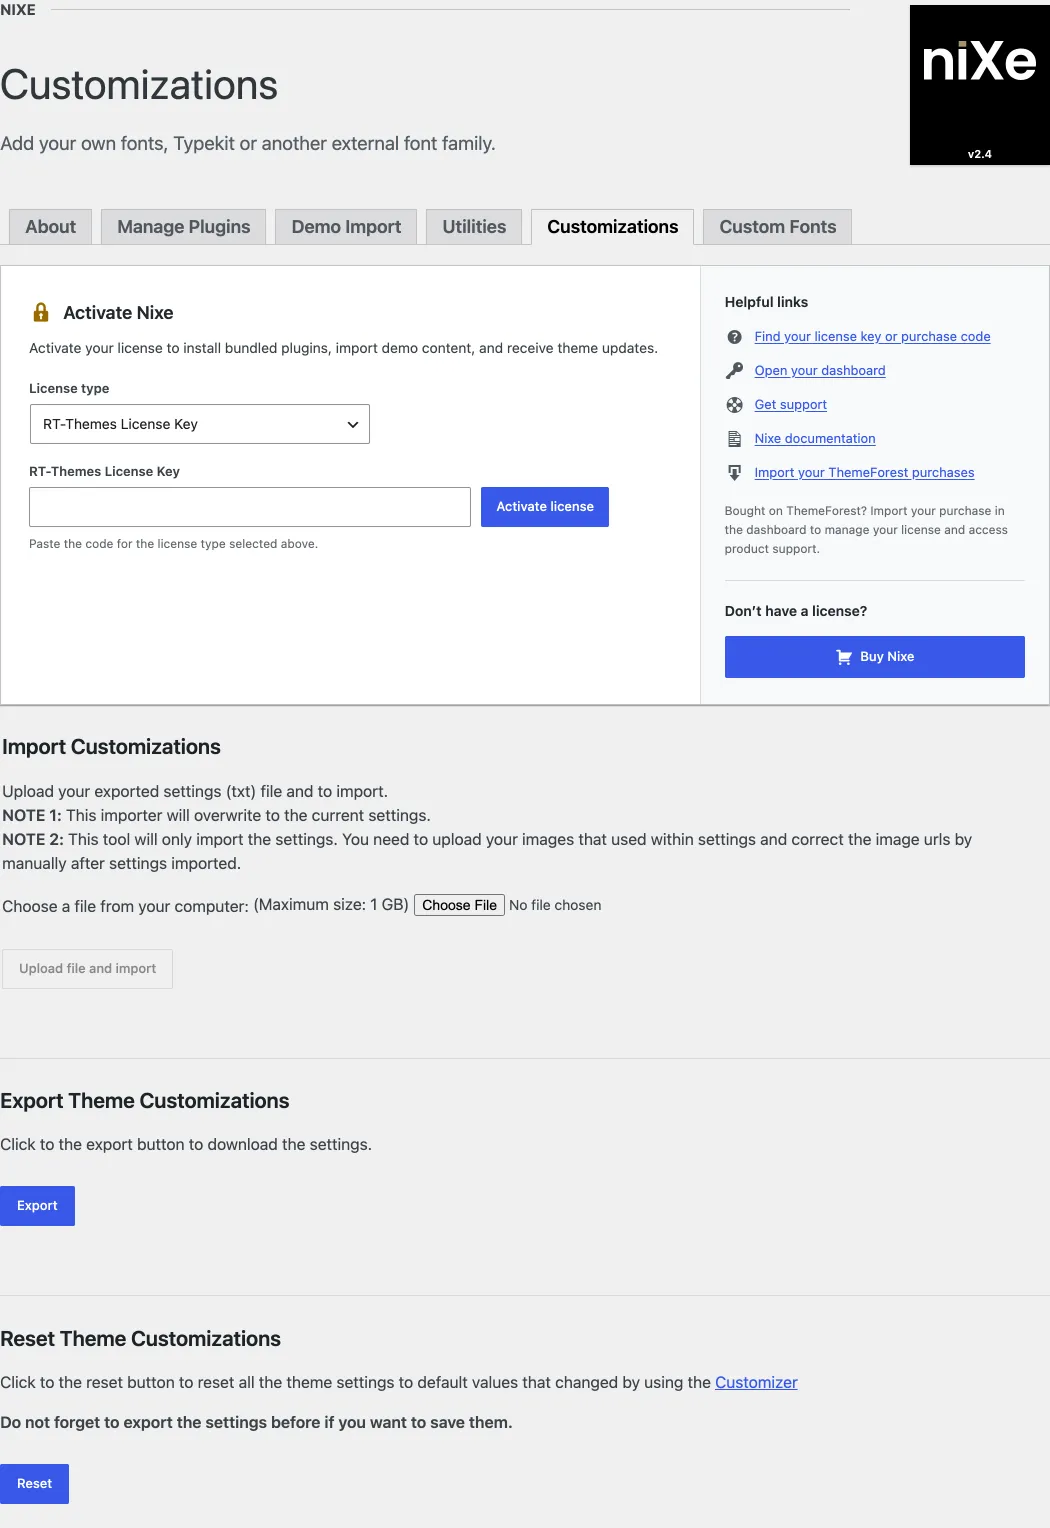
- Import Customizations: upload a
.txtsettings file that you exported before. The import overwrites your current settings. It imports only the settings, so upload the images the settings use yourself and correct their addresses. On a WordPress Multisite network, the network admin must first allow thetxtfile type in the network settings. - Export Theme Customizations: download the current theme settings as a
.txtfile. - Reset Theme Customizations: reset all theme settings to their defaults.
Customizer and child themes
Section titled “Customizer and child themes”WordPress stores Customizer settings per theme, so a child theme starts with its own, empty settings. You export your settings in the parent theme and import them in the child theme on the same Nixe › Customizations page (see Theme settings import, export and reset). If you do not import them, reset the settings in the child theme. The full steps are in Child themes and Customizer settings.
General options
Section titled “General options”The General Options panel holds the breadcrumb, sidebar, comments and page loading settings below. It also has the Google Maps section for your API key (see Google Maps) and the Go to Top Button setting.
Performance settings
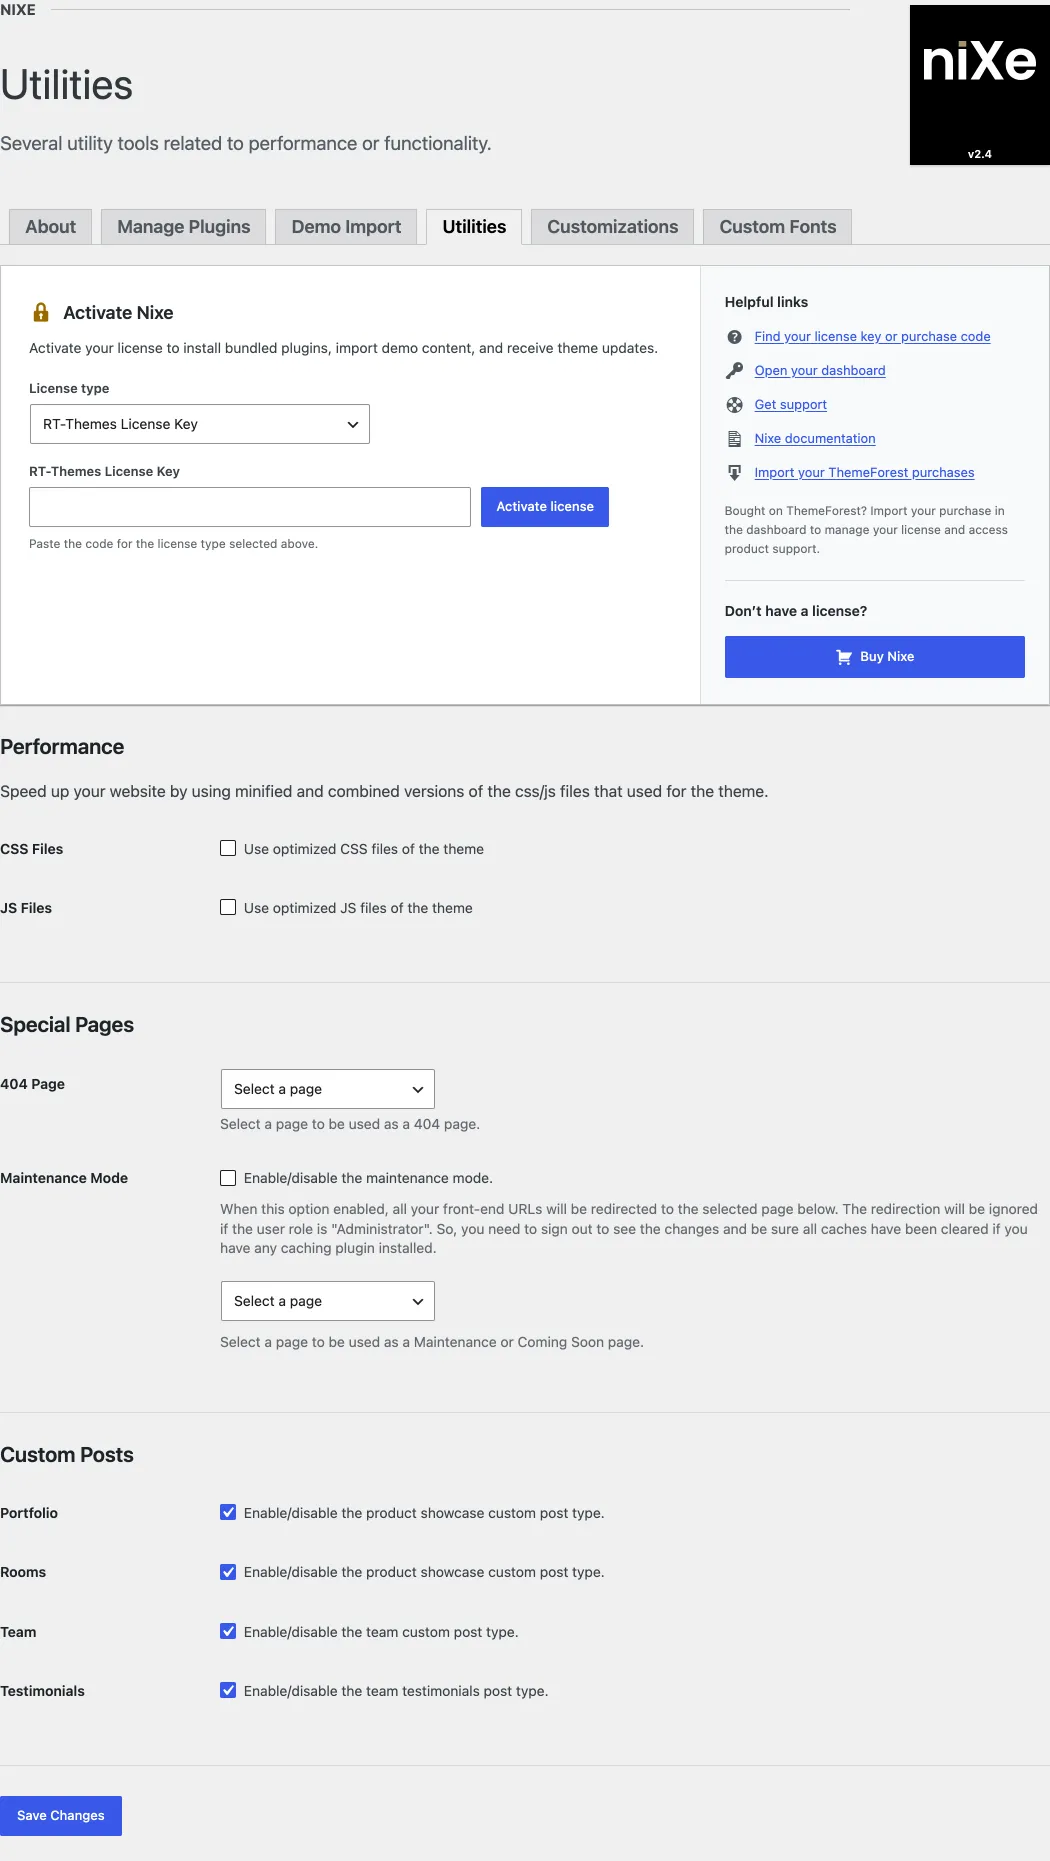
Section titled “Performance settings”These two settings are not in the Customizer. You find them in the Performance section of Nixe › Utilities:
- CSS Files: use the optimized CSS files of the theme.
- JS Files: use the optimized JS files of the theme.
Breadcrumb settings
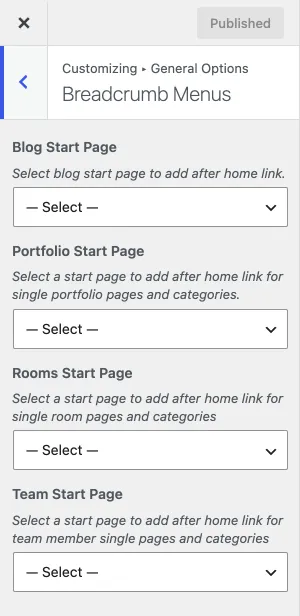
Section titled “Breadcrumb settings”Select a page to add after the home link in the breadcrumb path of single posts and categories. You can set one for the blog and for the built-in Portfolio, Rooms and Team post types. Only the theme’s built-in post types have this setting.
Sidebar options
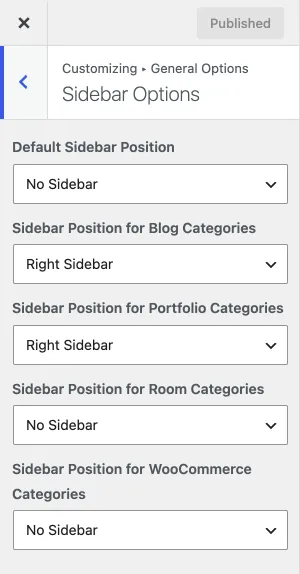
Section titled “Sidebar options”Set the sidebar position (left sidebar, right sidebar or no sidebar) for:
- Pages and posts (Default Sidebar Position)
- Blog categories
- Portfolio categories
- Room categories
- WooCommerce categories
Comments on pages
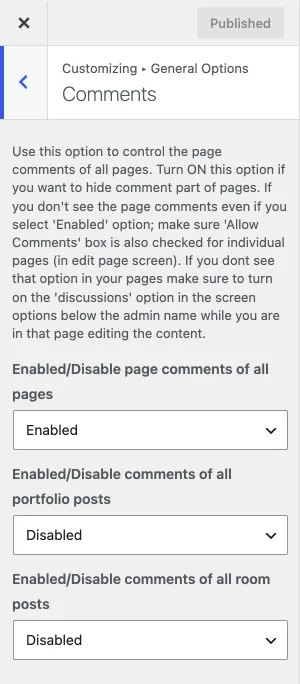
Section titled “Comments on pages”By default, WordPress allows comments on posts only, not on pages. Nixe has a built-in setting that turns on comments for pages. The same section turns comments on or off for all portfolio posts and all room posts.
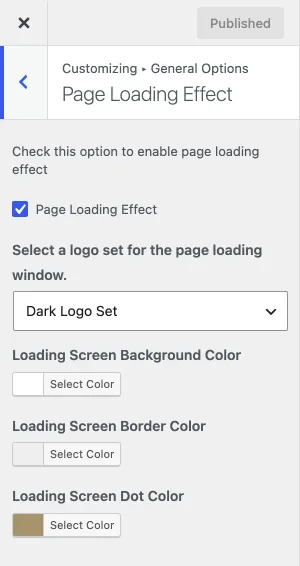
Page loading effect
Section titled “Page loading effect”Turn the page loading animation on or off for every page of your site. You can also customize its look and choose which logo set it uses.
Styling options
Section titled “Styling options”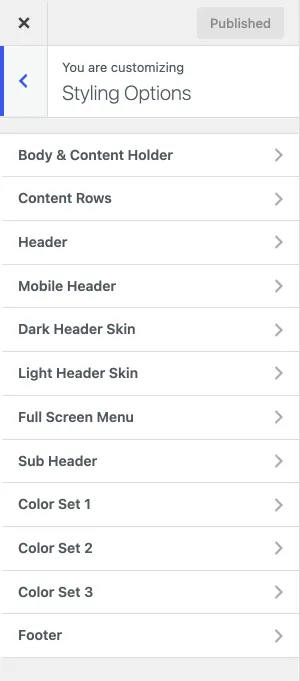
-
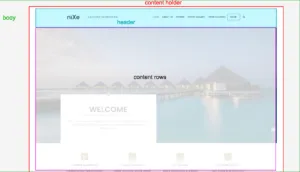
Body & Content Holder: settings for the page body and the content holder. These settings are global, and each page and post has the same settings in its Design Options box. The page body shows only on wide screens (over 1300px) when Content Holder Style is set to boxed.
-
Content Rows: the default width of the content rows.
-
Header: the header width, the header skin and sticky header skin to use, and switches for the overlapped header, the sticky header, the main menu and the header slogan.
-
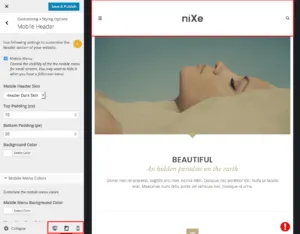
Mobile Header: the colours of the header on small screens, such as phones and tablets.
-
Dark Header Skin and Light Header Skin: two colour sets for the header. Each holds the same header colours, such as text, border and navigation item colours. The dark skin is for dark logo images on a light background; the light skin is for light colours on a dark background. Two logo sets work the same way and are linked to these skins. For example, the demo home page 4 uses the light header skin, with the page’s header background set to transparent in its Design Options, because the header sits on a dark slider image. When you scroll down, the sticky header switches to the dark skin on a white background. Use the header skins to customize:
- menu colours
- sub-menu colours
- header line colours
- header font colours
-
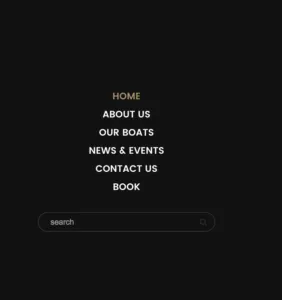
Full Screen Menu: the colours of the full-screen menu, which also contains the search form.
-
Sub Header: the band with the page title and the breadcrumb menu.
-
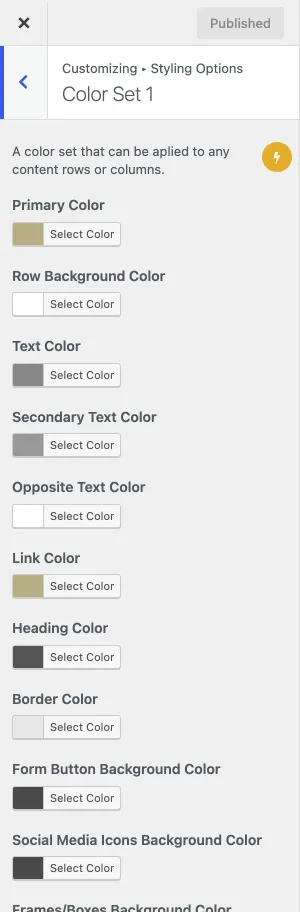
Color Set 1, Color Set 2 and Color Set 3: colour schemes for content rows and columns, so each content block can have its own look. The first is the theme’s default. You select a colour set for a row or column when you edit a page with WPBakery Page Builder.
-
Footer: customize the footer area.
Typography options
Section titled “Typography options”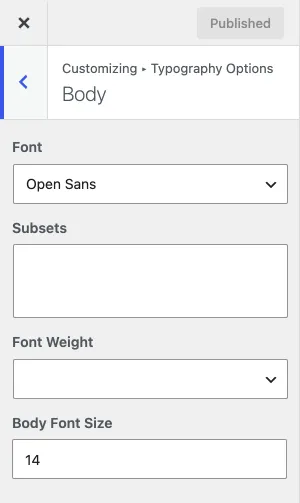
In Typography Options you customize the fonts of the body, the secondary font, the headings, the main menu on desktop and on mobile, and a few other areas. For example, to change the body font size for the whole site, open Body and change its settings. Each group has these settings:
- Font: the font family. Click the list to browse and select a font family.
- Subsets: hold Ctrl (Cmd on a Mac) while you click to select or deselect one or more subsets.
- Font Weight: Thin (200), Normal (400), Thick (600), Thicker (700), Bold (800/900) or Italic.
- The font size in pixels.
Custom fonts
Section titled “Custom fonts”The font list contains web-safe fonts and Google Fonts by default. To add your own font to the list, use Nixe › Custom Fonts.
Portfolio options
Section titled “Portfolio options”In Portfolio Options you can adjust:
- The global layout: the default column layout of portfolio category and archive pages, as a grid or masonry layout.
- The listing parameters: the number of items per page and the sort order.
- The featured images: resizing, cropping and size.
- The comments: turn on commenting for single portfolio items.
The Room Options panel has the same three groups for rooms: Global Layout Options, Listing Parameters and Featured Images.
Global portfolio options
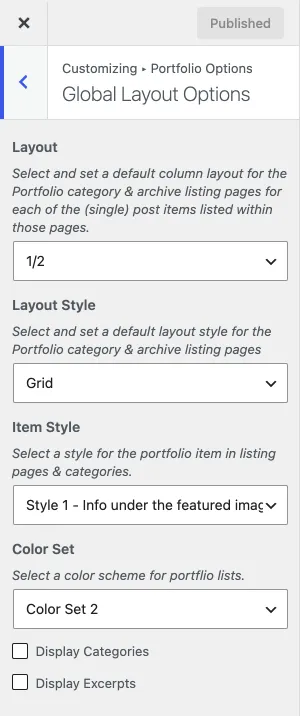
Section titled “Global portfolio options”You can adjust:
- The default column layout of portfolio category and archive pages, for each item listed on them.
- The default layout style of portfolio category and archive pages: grid or masonry.
- The item style.
- The colour set of portfolio lists.
- Whether listing pages show the categories and the excerpts.
Portfolio listing parameters
Section titled “Portfolio listing parameters”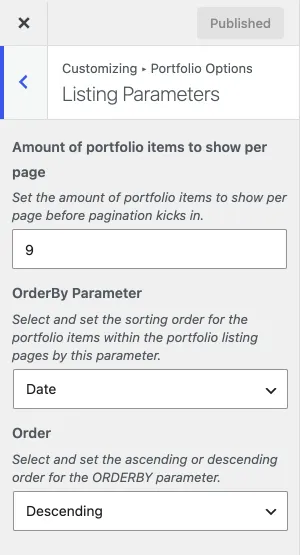
You can adjust:
- The number of portfolio items per listing page. Do not show too many items on one page, or it loads slowly.
- What to sort by: author, date, title, modified date, ID or random.
- The sort order: ascending or descending.
Portfolio featured image settings
Section titled “Portfolio featured image settings”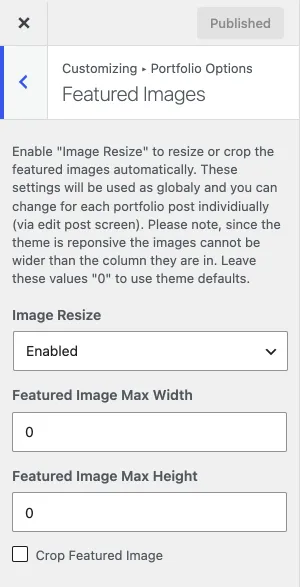
You can:
- Turn automatic resizing (Image Resize) on or off.
- Set the maximum width in pixels.
- Set the maximum height in pixels.
- Turn cropping of the featured image on or off.
Blog options
Section titled “Blog options”In Blog Options you can adjust:
- The global layout: the default column layout of blog category and archive pages, as a grid or masonry layout.
- The featured images: resizing, cropping and size.
- The excerpts: use excerpts, or turn them off and use more tags.
- The post meta: show or hide meta information on single posts and blog listing pages.
- The single post page: the default title in the header area of single blog posts, and the author info box.
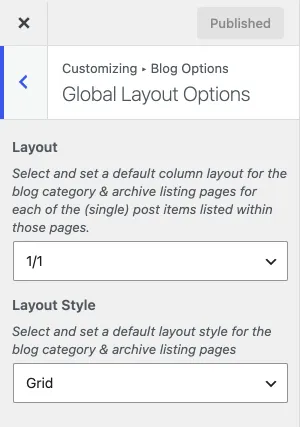
Global blog layout options
Section titled “Global blog layout options”You can adjust:
- The default column layout of blog category and archive pages, for each post listed on them.
- The default layout style of blog category and archive pages: grid or masonry.
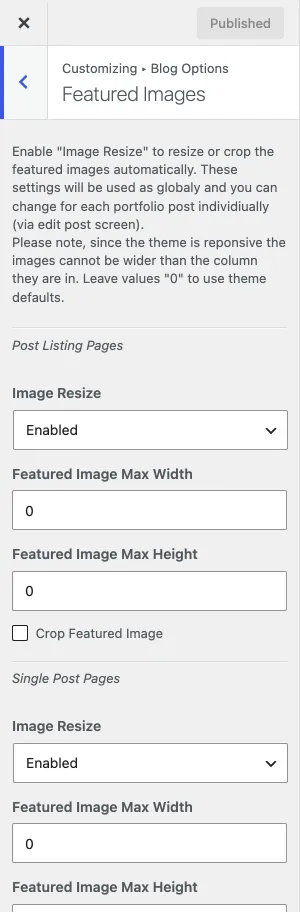
Blog featured image settings
Section titled “Blog featured image settings”The section has the same settings twice, once for post listing pages and once for single post pages. You can:
- Turn automatic resizing (Image Resize) on or off.
- Set the maximum width in pixels.
- Set the maximum height in pixels.
- Turn cropping of the featured image on or off.
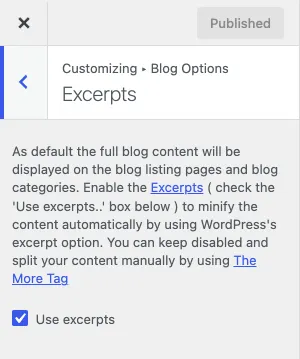
Blog excerpts
Section titled “Blog excerpts”In the blog excerpt settings, choose between excerpts and more tags.
- If you turn excerpts off, blog listing pages show the full content of each post, unless you added a more tag to the post.
- You can change the excerpt length with the WordPress
excerpt_lengthfilter. - If you do not see the Excerpt field in a post, turn it on in Screen Options at the top right of the screen.
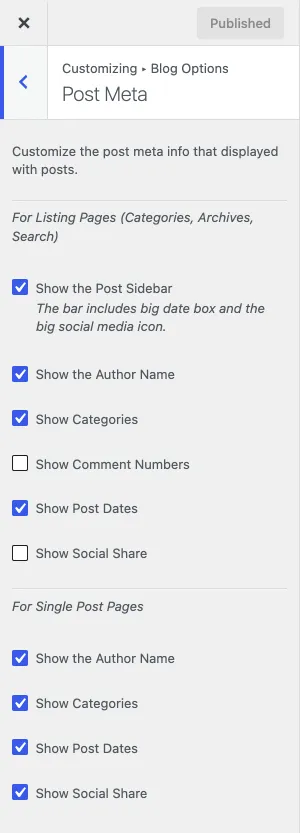
Blog post meta options
Section titled “Blog post meta options”Choose which meta information shows on:
- Blog listing pages: the post sidebar with the big date box and social icon, author name, categories, number of comments, post date and social share.
- Single blog posts: author name, categories, post date and social share.

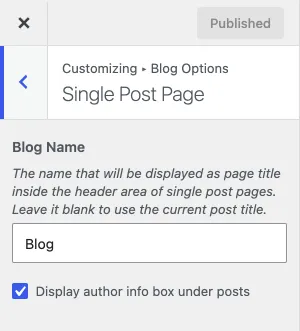
Blog single post title
Section titled “Blog single post title”In Single Post Page, use Blog Name to set a default title for the header area of all single blog posts. If you leave it empty, Nixe shows the post title instead. The same section has a checkbox that shows the author info box under posts.
Social media
Section titled “Social media”Nixe has about 45 social icons, including Phone, Airbnb, TripAdvisor and Skype. You set them in Social Media Options.
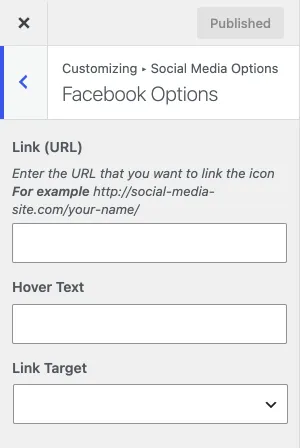
Settings per social icon
Section titled “Settings per social icon”For each social icon you can set:
- Link (URL): the page that opens when someone clicks the icon.
- Hover Text: the text that shows when someone hovers over the icon.
- Link Target: the same window or a new browser tab.
Two icons need extra attention:
- Email: enter a URL or an email address.
- Skype: enter a valid Skype link, for example
skype:skypeid?callorskype:phonenumber?call. Skype was retired in May 2025, so the link only works for people who still have the app.
Site identity
Section titled “Site identity”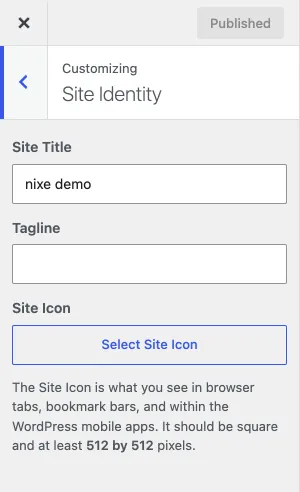
- Site Title: shows only when no logo image is set.
- Tagline: Nixe uses it as the header slogan.
- Site Icon: the icon in browser tabs and bookmarks. It should be square and at least 512 by 512 pixels.
Click Publish at the top of the Customizer to save your changes.
Copyrights
Section titled “Copyrights”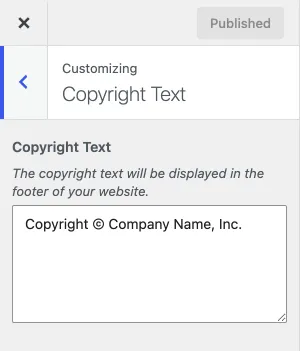
Copyright text
Section titled “Copyright text”The Copyright Text section has one setting: a text field for the copyright line in the footer of your site.
Widgets
Section titled “Widgets”Widgets and sidebars
Section titled “Widgets and sidebars”The Widgets panel of the Customizer works like this:
- Click the back arrow to return to the parent menu.
- Click Publish to save your changes.
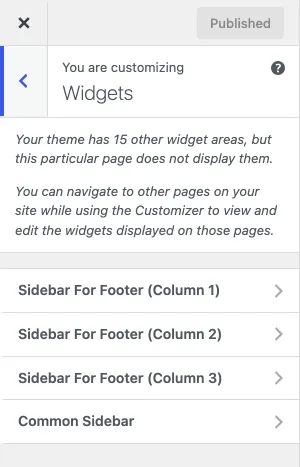
In the Widgets panel you can add widgets to the widget areas that Nixe registers:
- Footer Column 1, 2, 3 and 4
- Common Sidebar
- Pages, Portfolio, Single Portfolio Item, Portfolio Categories
- Rooms, Single Room Item, Room Categories
- Blog, Blog Categories, Blog Single Post
- Search Results, WooCommerce, Archives, Tags
The panel lists only the widget areas of the page shown in the preview. To edit the others, open a page that uses them in the preview, or use Appearance › Widgets.
Adding widgets in the Customizer
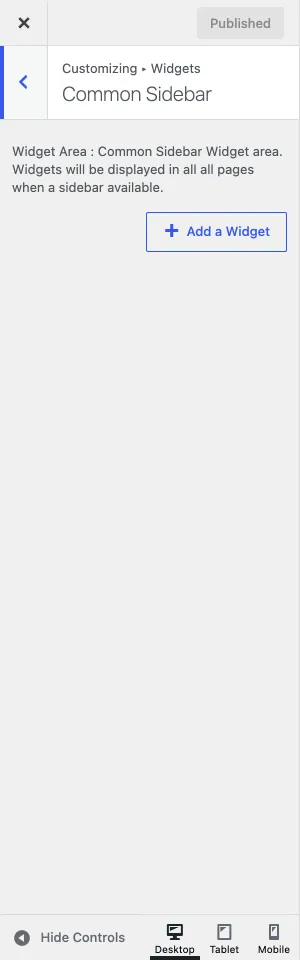
Section titled “Adding widgets in the Customizer”Open a widget area and click Add a Widget: search for a widget or select one from the list. The widget is added to the widget area you started from, and its settings appear. Set them the way you want the widget to behave, then click Publish.
Customizing widget areas for one page
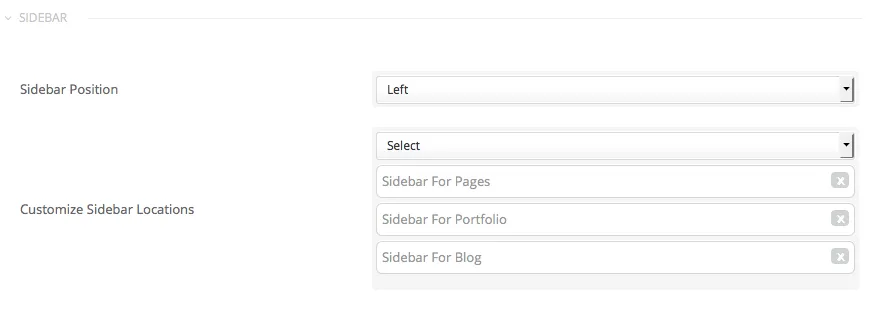
Section titled “Customizing widget areas for one page”Edit a page or post and choose Right or Left in the Sidebar Position list. Then choose the sidebars for the page and their order. Leave the list empty to use the default settings.
Creating new sidebars
Section titled “Creating new sidebars”To create a new sidebar, install a plugin such as Stag Custom Sidebars or Custom Sidebars. After you create a sidebar, you can select it in the list of sidebar locations.
Static front page
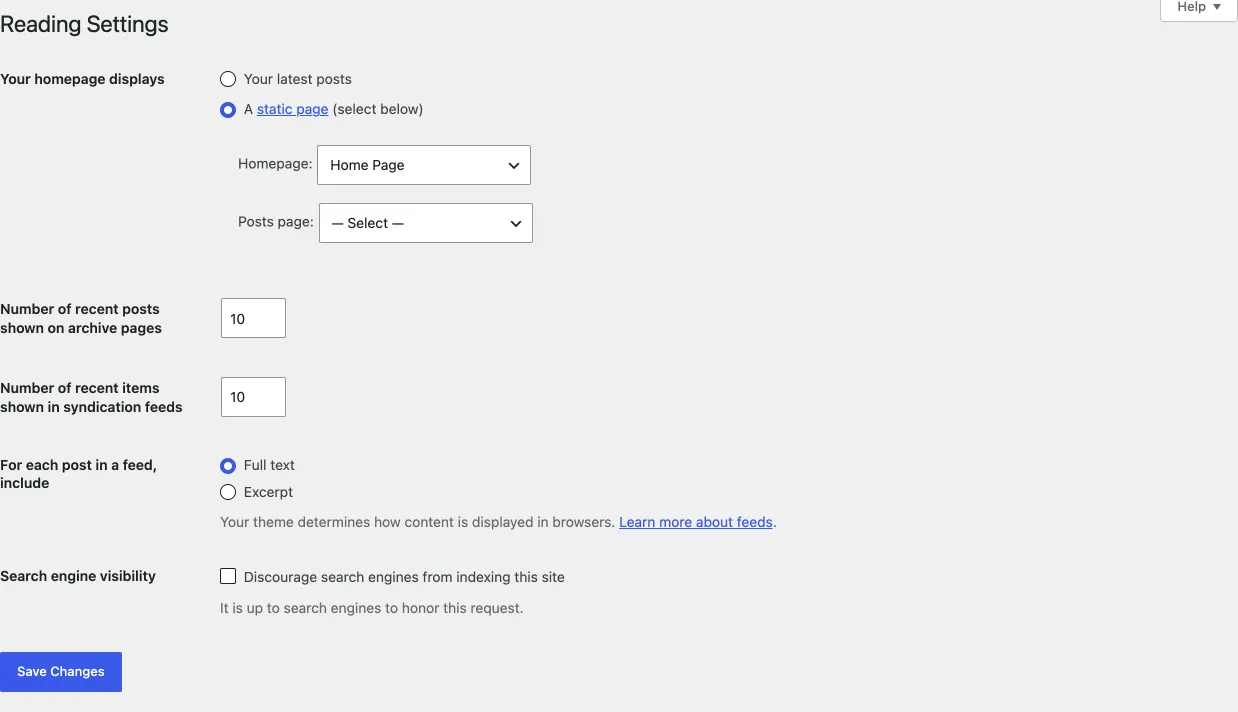
Section titled “Static front page”In the Customizer’s Homepage Settings you choose which page is your homepage and, optionally, which page lists your blog posts. These are the same settings as Settings › Reading. How they work is in Homepage and blog page.
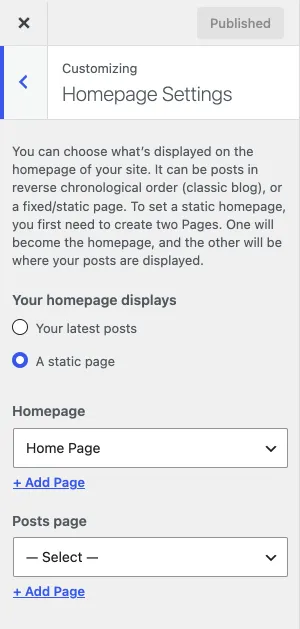
- Homepage: the page visitors land on when they open your site. Any page can be your homepage.
- Posts page: the default blog page. You do not need to set it.
The same choices in Settings › Reading: