Products Showcase
About Product Showcase
Section titled “About Product Showcase”Product Showcase is a built-in tool for creating an online product catalogue. Use it to present your products or services in an organised way. Product Showcase has no payment or cart. To sell online, use WooCommerce instead, an e-commerce plugin that the theme also supports.
Creating a product
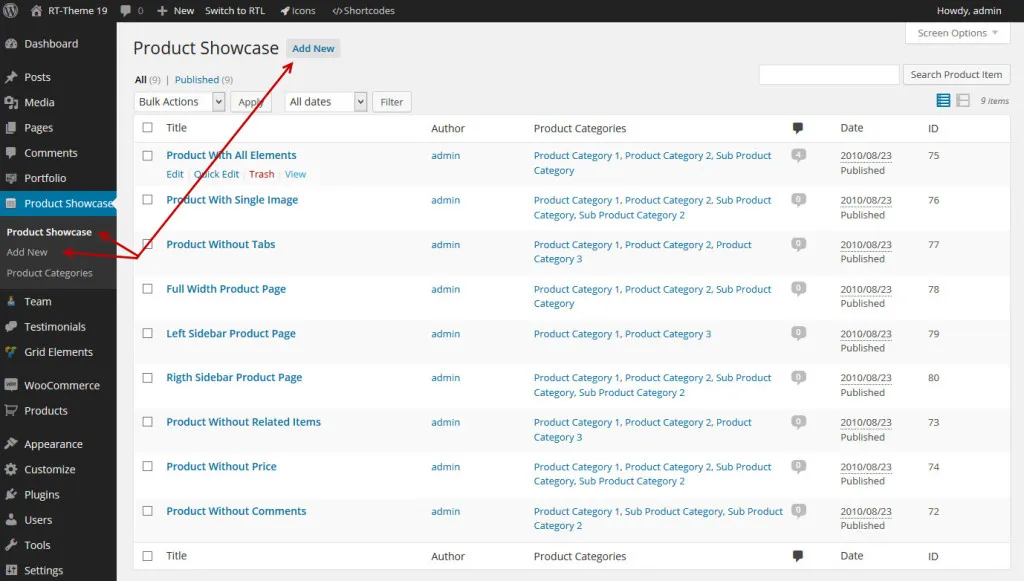
Section titled “Creating a product”In your WordPress admin, go to Product Showcase and click one of its Add New links.
Things you should know
Section titled “Things you should know”- A product can have a featured image and several other images, which show as a product image gallery.
- A product needs at least one category.
- To add a featured image, open the Featured image panel in the sidebar and click Set featured image.
- Attach gallery images in the same way: click Add New Images in the Product Image Gallery box. The gallery is optional.
Product options
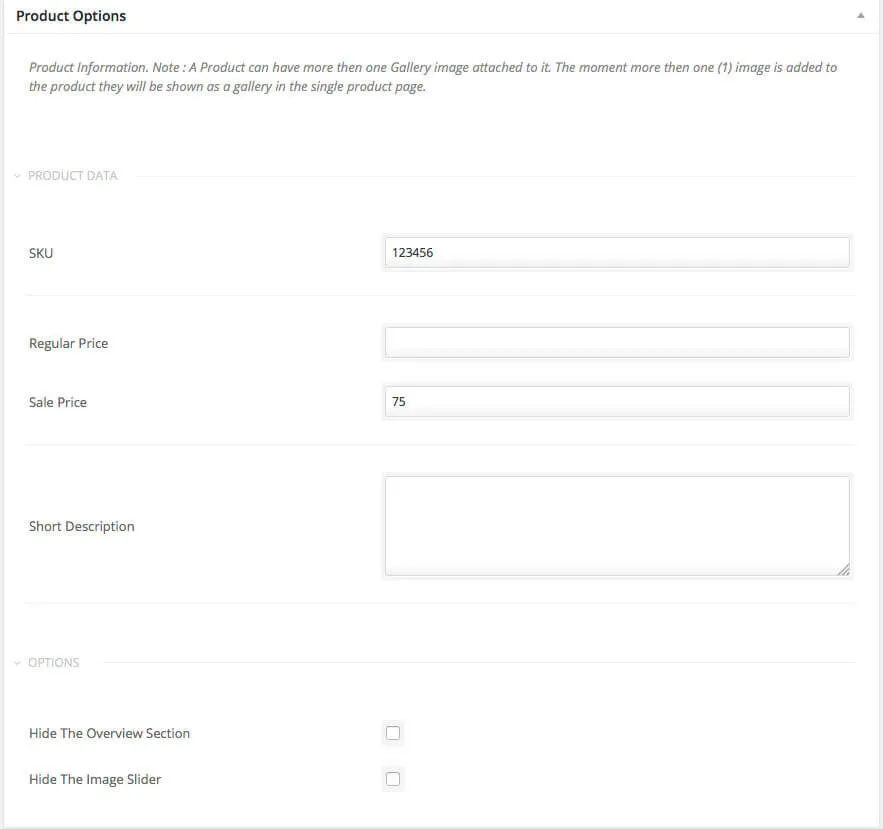
Section titled “Product options”The product add and edit screen has a Product Options section. A regular product page has an automatic Overview section with the short description, prices, SKU and product images, as on this sample product. The Overview section is optional: if you do not want it, check Hide The Overview Section.
Product sections
Section titled “Product sections”A Product Showcase item can have sections. The sections are numbered, and a bar links to each one. Take the same sample product: it has five sections, Overview, Design, Technology, Innovation and Product Videos. We made them for the sample page only, so create your own sections with your own titles. You can add as many as you like, but check that they all fit in the sticky section bar at the top of the product page.
Creating a section
Section titled “Creating a section”There are two ways:
- If you design your product page with WPBakery Page Builder, add the Product Section Break element above the section’s content. That’s it.
- Without WPBakery Page Builder, place the Product Section shortcode above the section’s content. You find the shortcode’s details in the shortcode generator. Read more about the theme’s shortcodes.
The Overview section
Section titled “The Overview section”Unless you checked Hide The Overview Section in the product options, the theme creates a first section called “Overview”. You can change the word “Overview” only with a translation file (.po/.mo), even for English. See Translating theme strings.
Product listing page
Section titled “Product listing page”Setting up a product listing page is straightforward:
- Create your products.
- Create a page.
- Add the Product Posts shortcode, or add a Product Showcase element with WPBakery Page Builder.
Creating a Product Showcase page
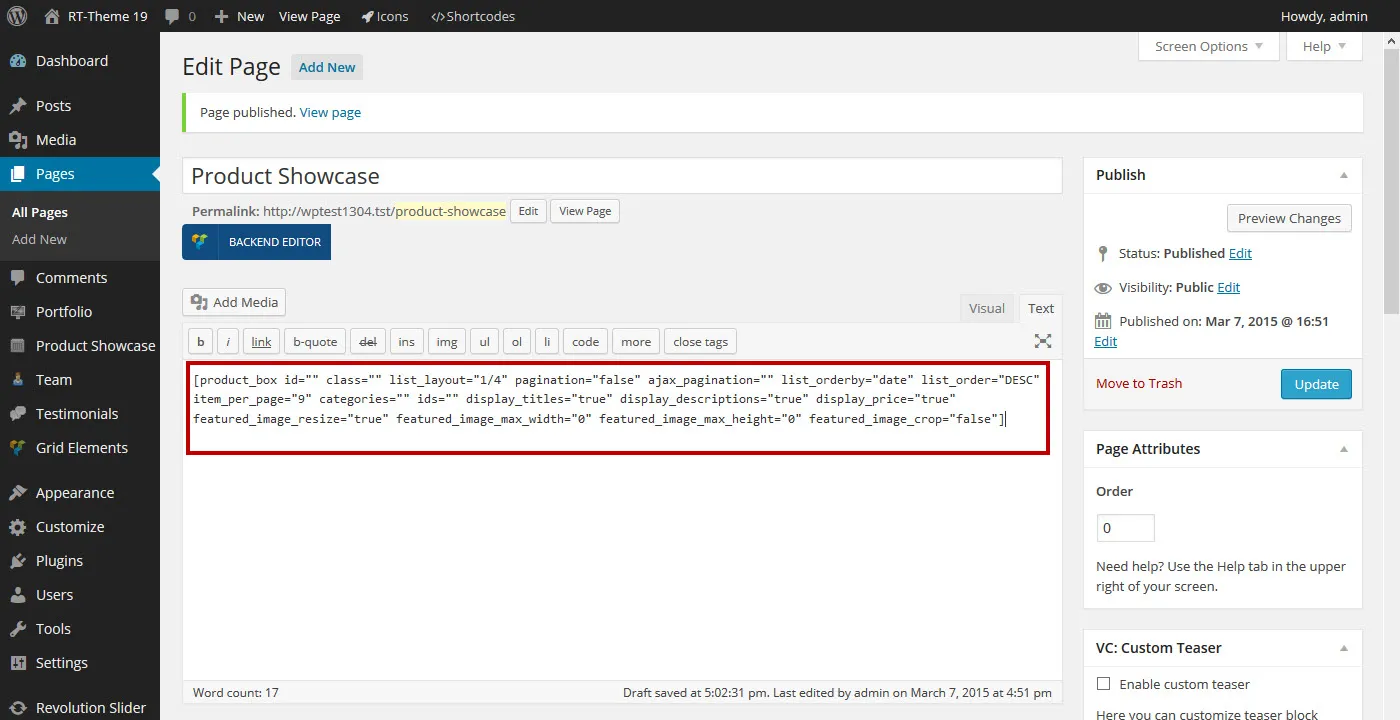
Section titled “Creating a Product Showcase page”A product listing page is a regular page that contains the Product Posts shortcode or a WPBakery Page Builder element. Create a page and add the shortcode or element, plus any other content you want.
Adding a Product Showcase element with WPBakery Page Builder
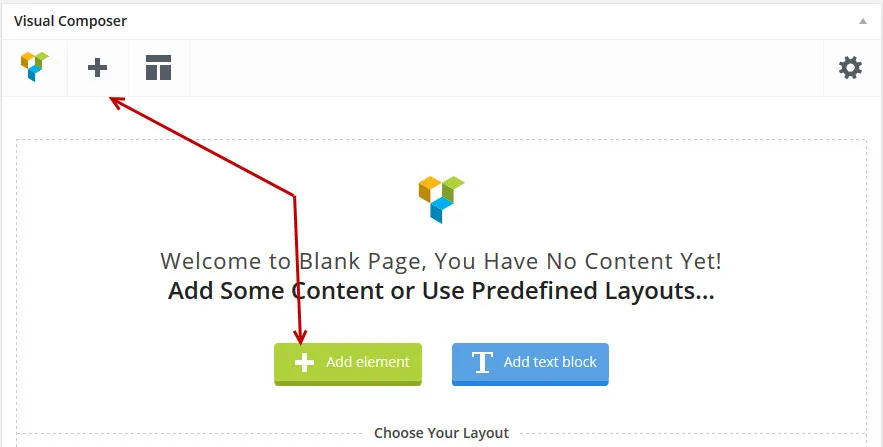
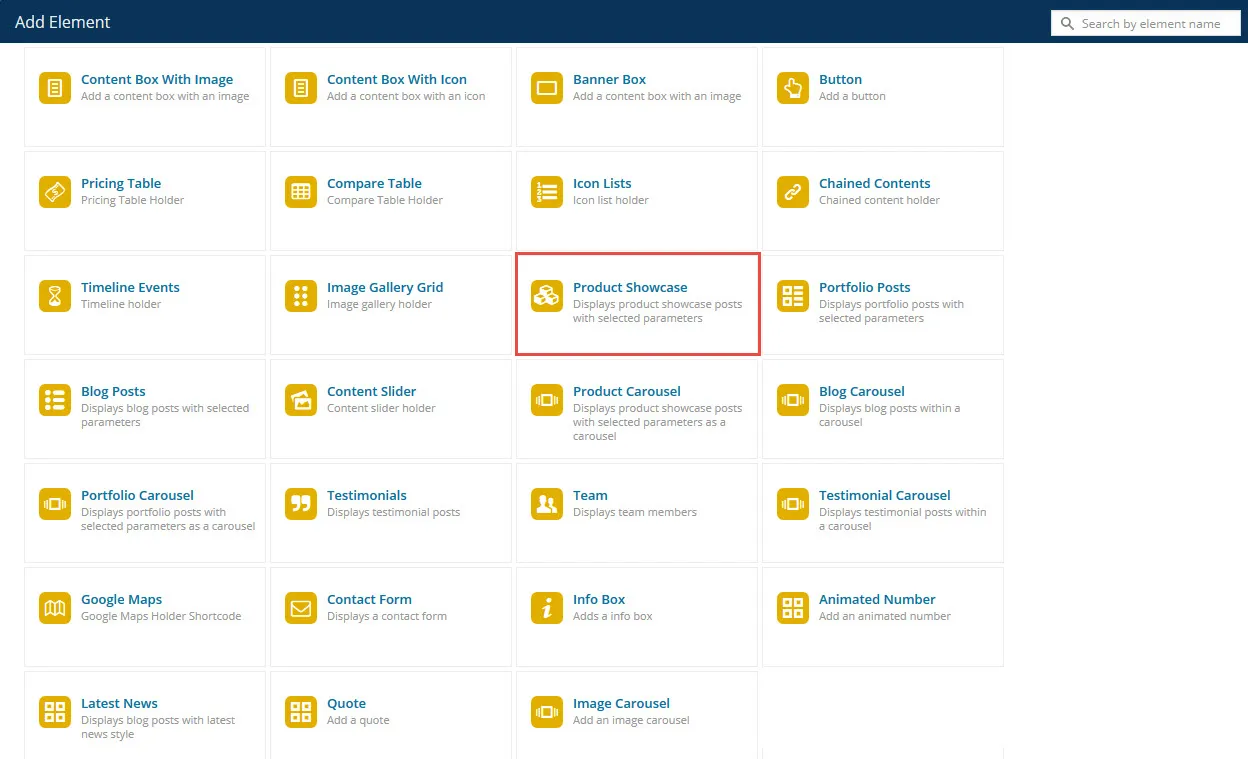
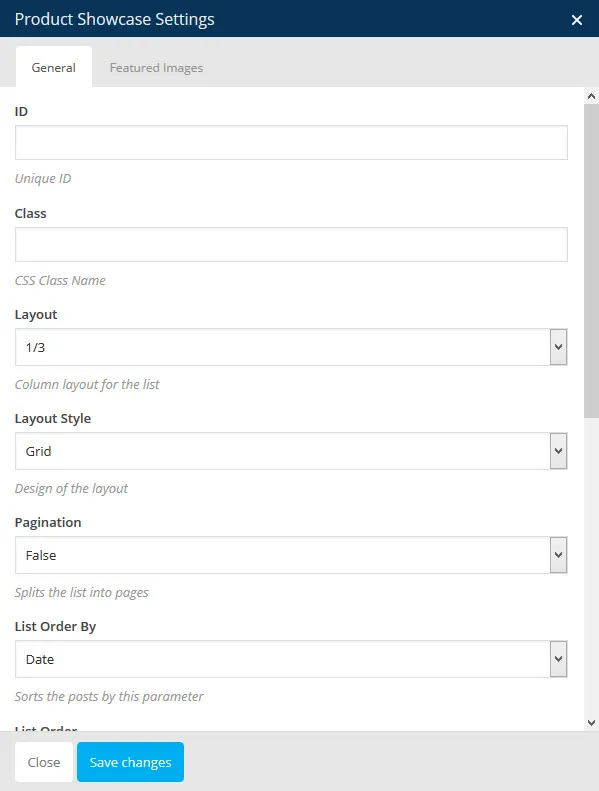
Section titled “Adding a Product Showcase element with WPBakery Page Builder”In WPBakery Page Builder, click Add Element (the + sign) and add a Product Showcase element. Then set up the element in its settings window.
Adding a Product Showcase with a shortcode
Section titled “Adding a Product Showcase with a shortcode”Click the shortcode button in the admin bar. In the pop-up, select the Product Posts shortcode and adjust it to your needs. Then copy the shortcode into your page content where the products should appear.
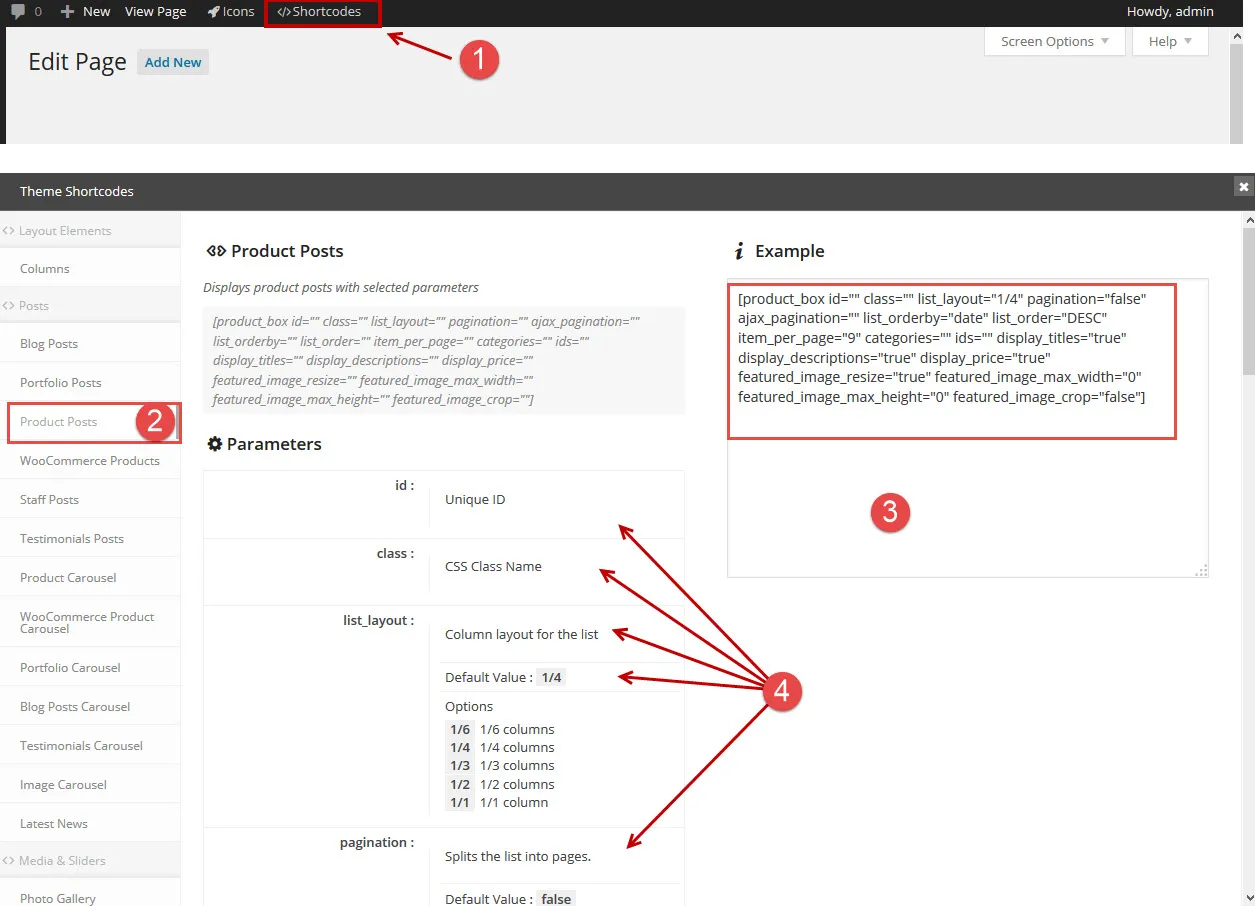
In the screenshot:
- The shortcode button.
- The Product Posts (showcase) shortcode.
- The shortcode example. Adjust its parameters, then copy it into the page content.
- The explanation of the parameter options. Use it to adjust the shortcode in step 3.
In the page, the shortcode can look like this: