
Testimonial List / Post
Creating testimonials
Section titled “Creating testimonials”A testimonials page is made of testimonial items. Create the testimonials first, then show them on an overview page, such as a testimonials list or a “What people say about us” page, with a shortcode or a WPBakery Page Builder element.
Creating a testimonials page
Section titled “Creating a testimonials page”You can add a testimonial list to any page or post. There are two ways to add it.
Inserting a Testimonials element with WPBakery Page Builder
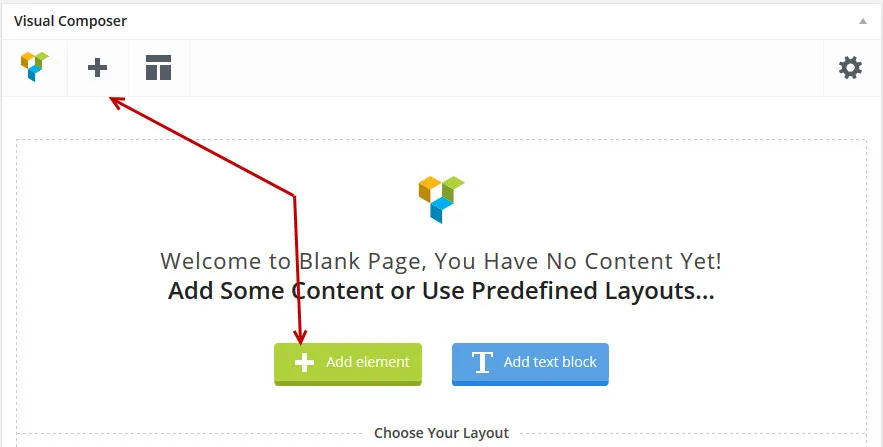
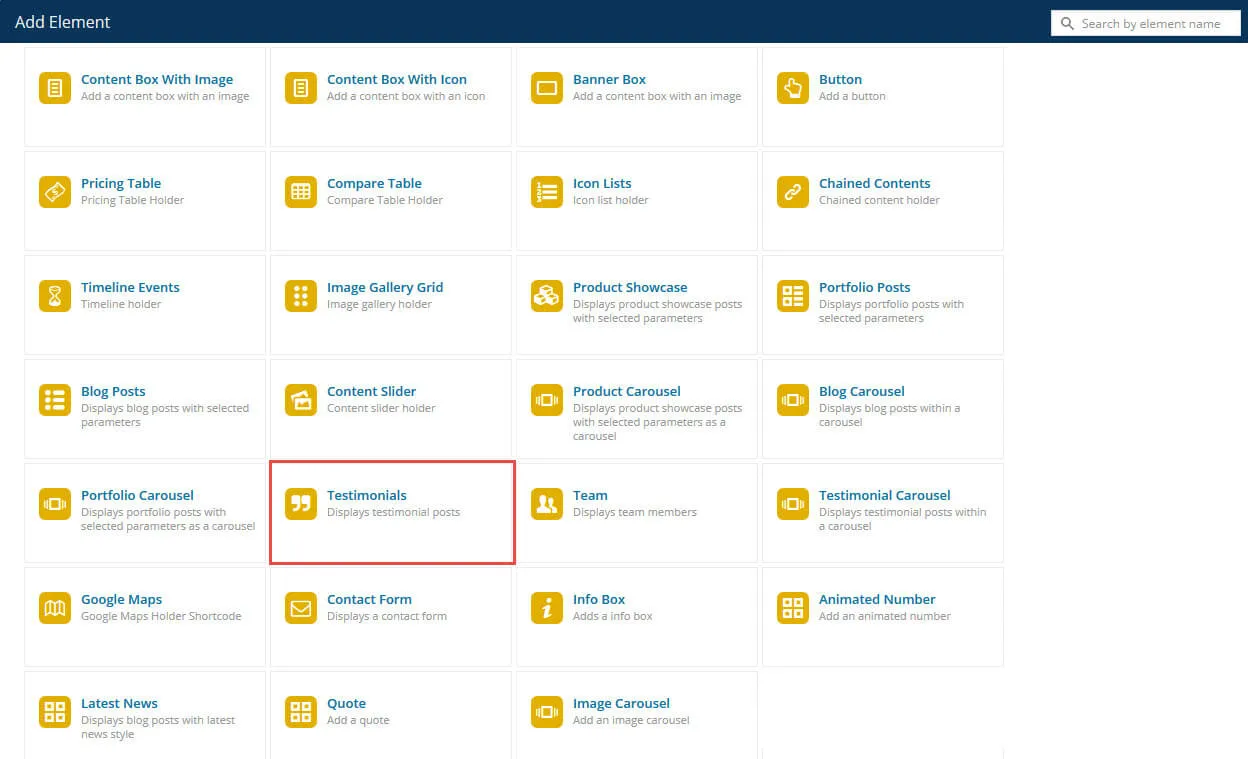
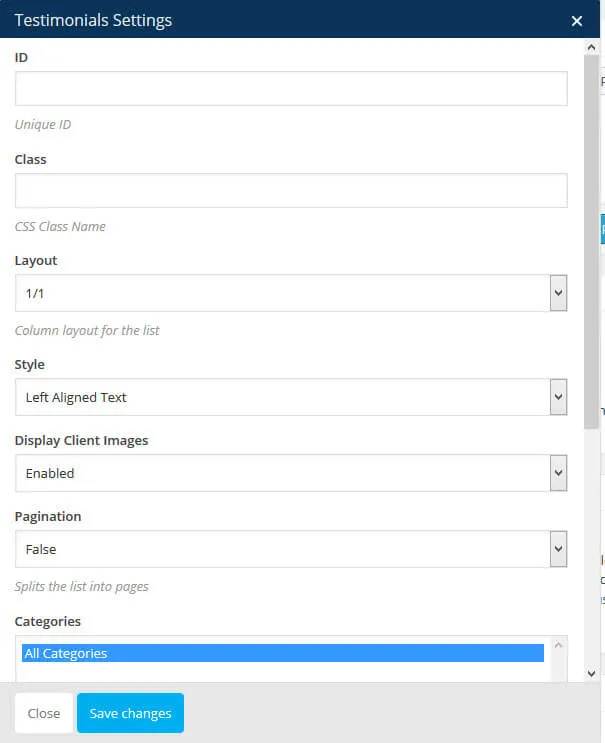
Section titled “Inserting a Testimonials element with WPBakery Page Builder”In WPBakery Page Builder, click Add Element (the + sign) and add a Testimonials element.
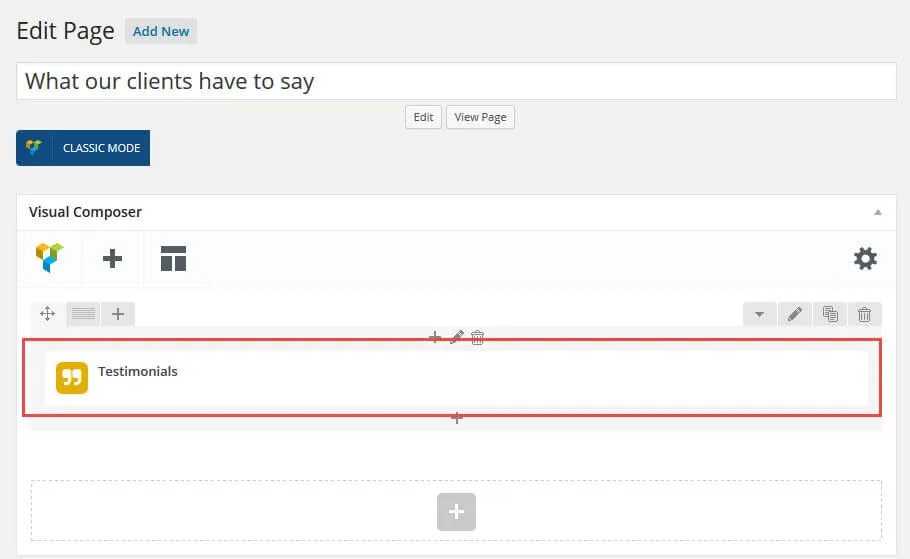
Inserting testimonials with a shortcode
Section titled “Inserting testimonials with a shortcode”Open the Theme Shortcodes menu in the admin bar and select the Testimonials shortcode in the popup. Adjust the code to your needs, then copy it and paste it into your page content where the testimonials should appear.
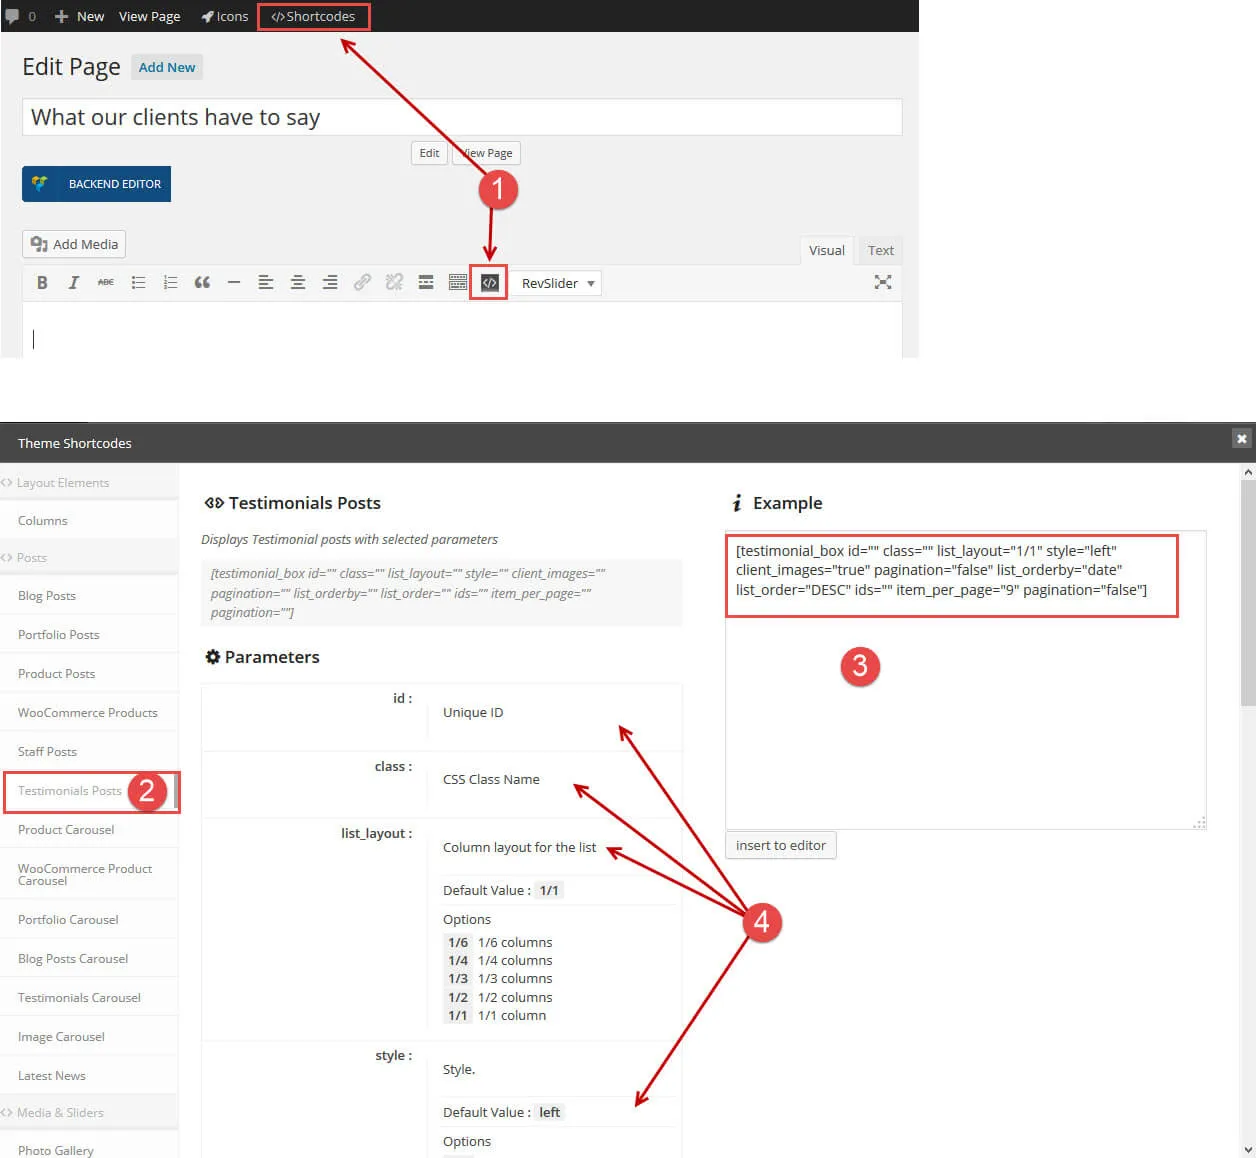
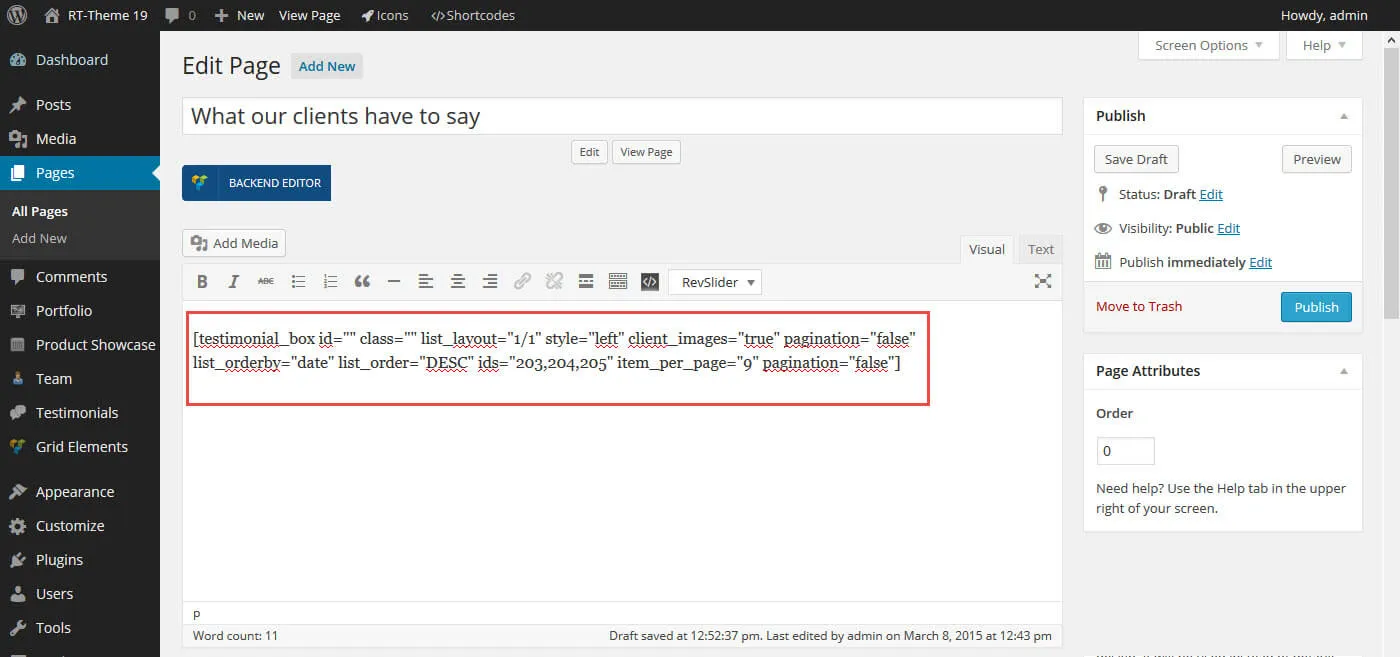
Creating a testimonial
Section titled “Creating a testimonial”Creating a testimonial is straightforward. Use the Testimonials custom post type to add your testimonials.
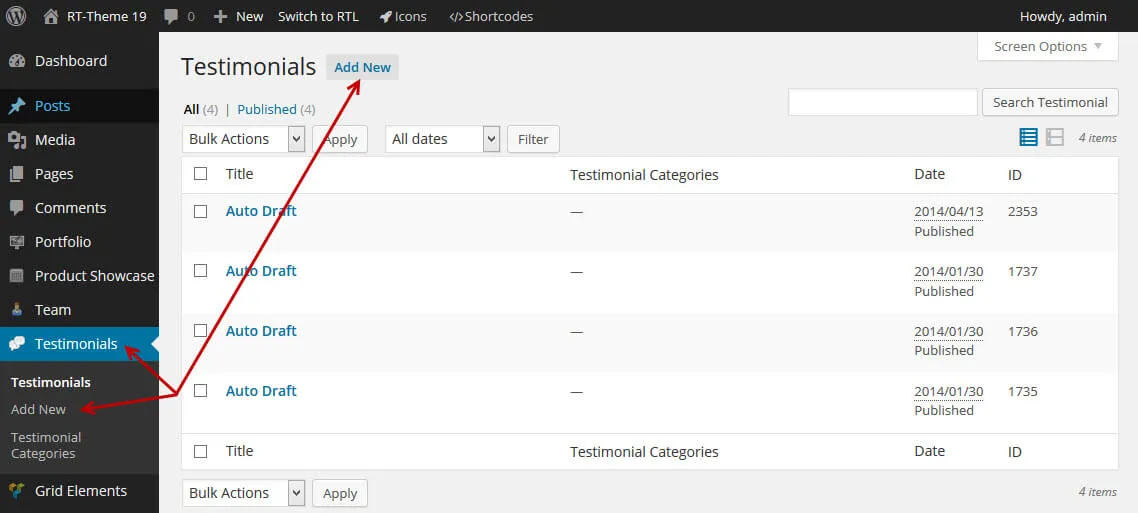
- In the WordPress admin, open the Testimonials menu.
- Click Add New, either in the menu or at the top of the list of testimonials.
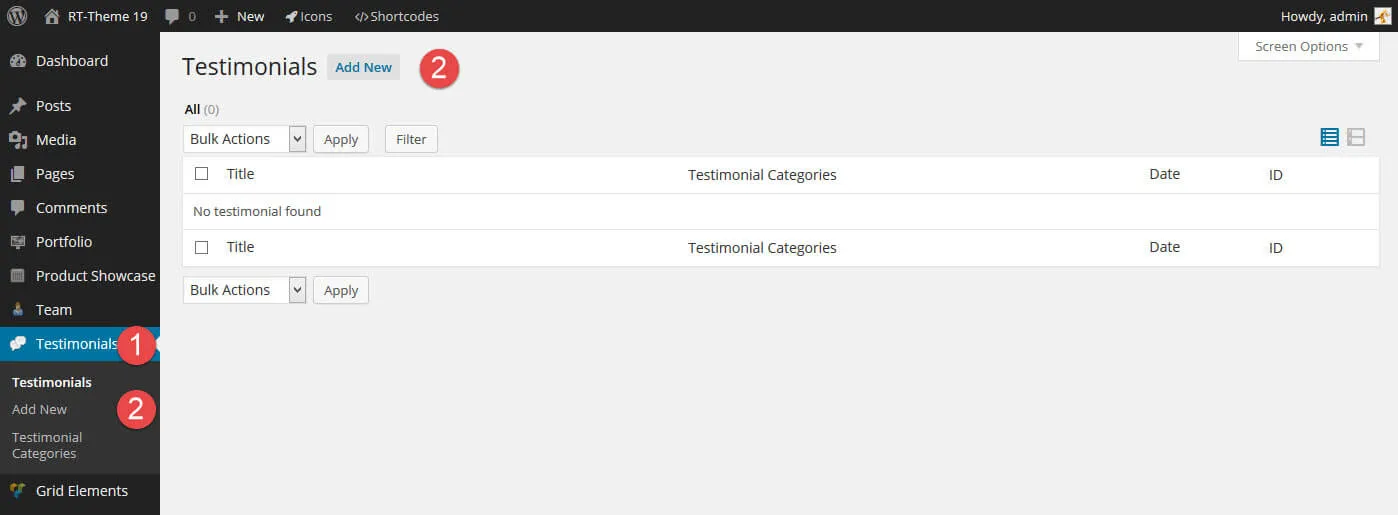
Things you should know
Section titled “Things you should know”-
A single testimonial cannot be previewed or viewed as a single post.
-
You can group testimonials into categories.
-
You select testimonials by their ID or by category.
-
The testimonial text accepts valid HTML, such as heading tags, links and
divelements, but we advise you to keep the formatting as simple as possible. -
For each testimonial you can add:
- The name of the person who wrote it.
- The job title of that person.
- A valid URL to that person’s website or social page.
- The text for that URL.
-
Upload a featured image with the Set featured image link in the Featured Image box.

The single testimonial
Section titled “The single testimonial”A single testimonial has fewer options than the other post types.
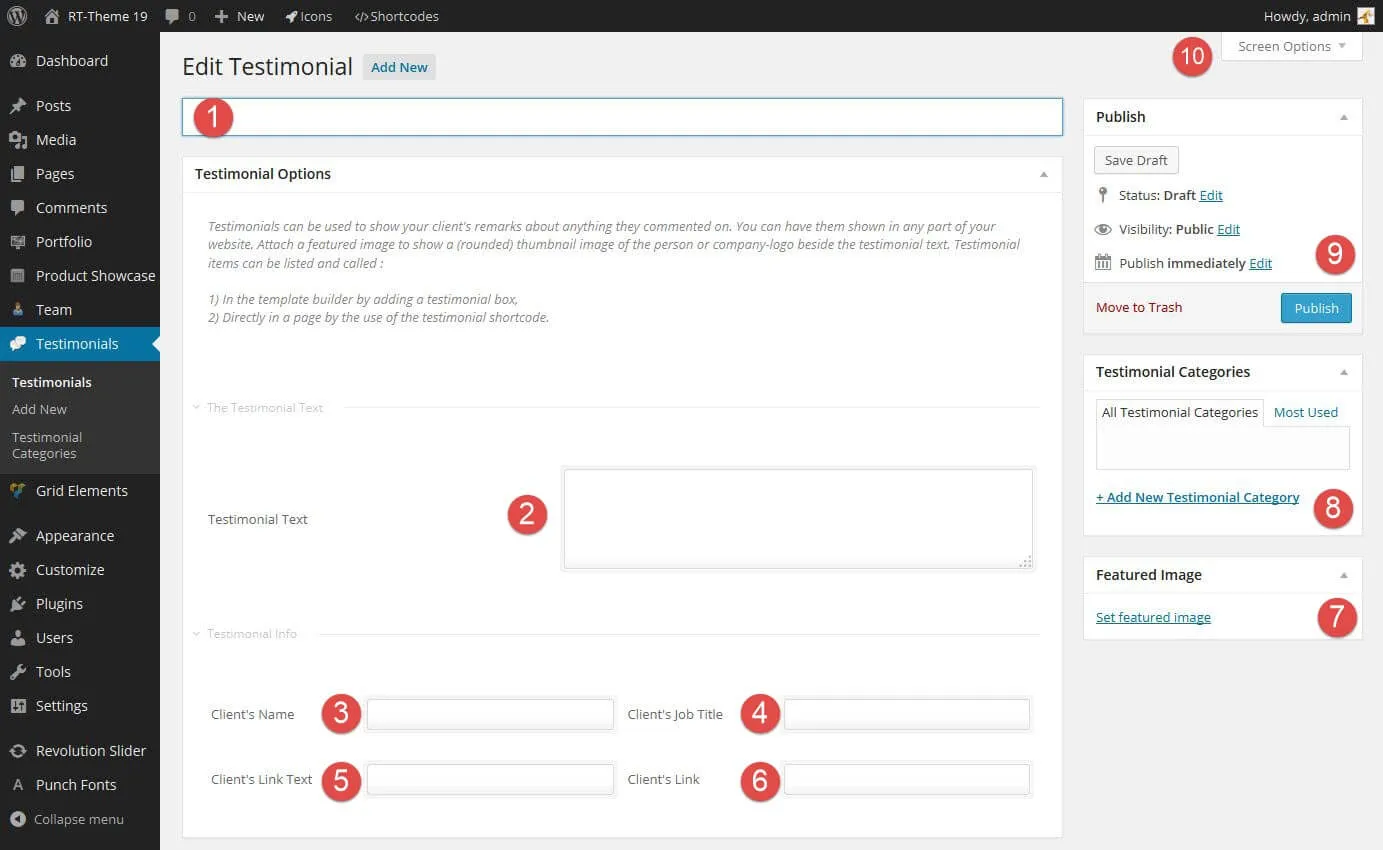
- The title (name) of the testimonial.
- The testimonial text.
- The client’s name.
- The client’s job title.
- The client’s link text (optional).
- The client’s link URL (optional).
- The client’s image or logo.
- The testimonial category, to group testimonials.
- Publish the post to make it visible on your site. You can also change its date or visibility, or save it as a draft.
- Screen Options: show or hide the boxes of this custom post type.
When you have added all settings and content to the testimonial, publish the post. It then shows in every testimonials list you created on a page with the Testimonials shortcode or the WPBakery Page Builder Testimonials element.