
Blog List / Post
Creating a Blog
Section titled “Creating a Blog”A blog starts with single posts. You can group posts by category and show them on an overview page, called a blog list.
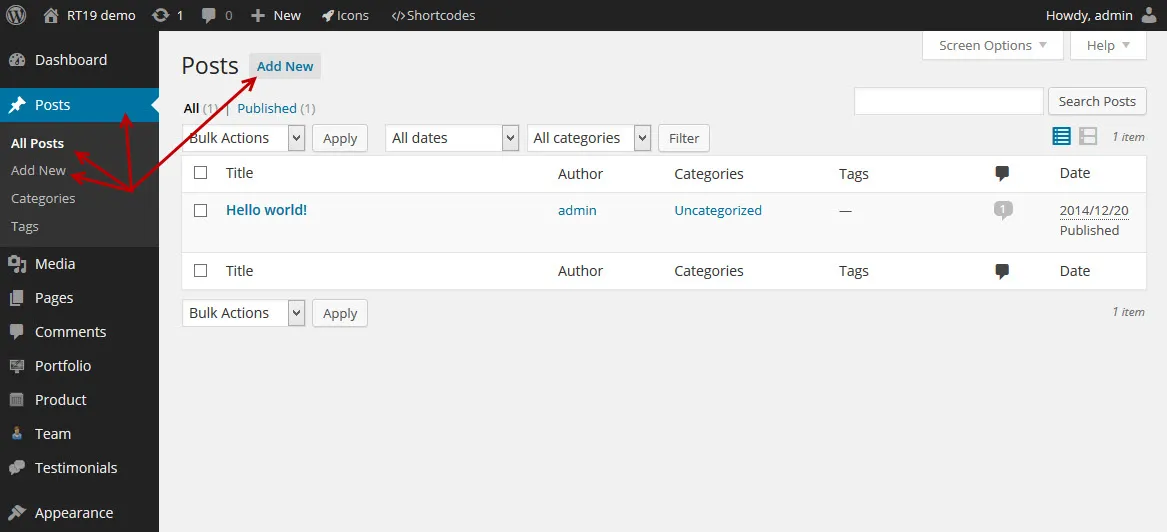
Write your blog posts under Posts in the WordPress admin.
Things you should know
Section titled “Things you should know”-
A post can have a featured image, an image gallery, a video or an audio file. You can design the layout of a post with WPBakery Page Builder: add elements to the page, drag them into place and set the options of each element. A slider element, for example, holds the slider images, the transition and timing, and the titles and subtitles. Every element you add has settings that control how it behaves on the page.
-
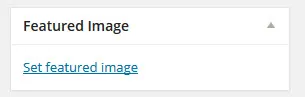
To add a featured image, click Set featured image in the Featured Image box.
-
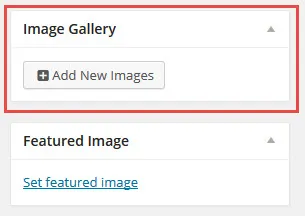
To add gallery images, click Add New Images in the Image Gallery box.
-
Every post has a post format. The format you choose decides how the post behaves on your site, and each format adds its own settings. Each setting has a help text that explains what to enter.

Post formats
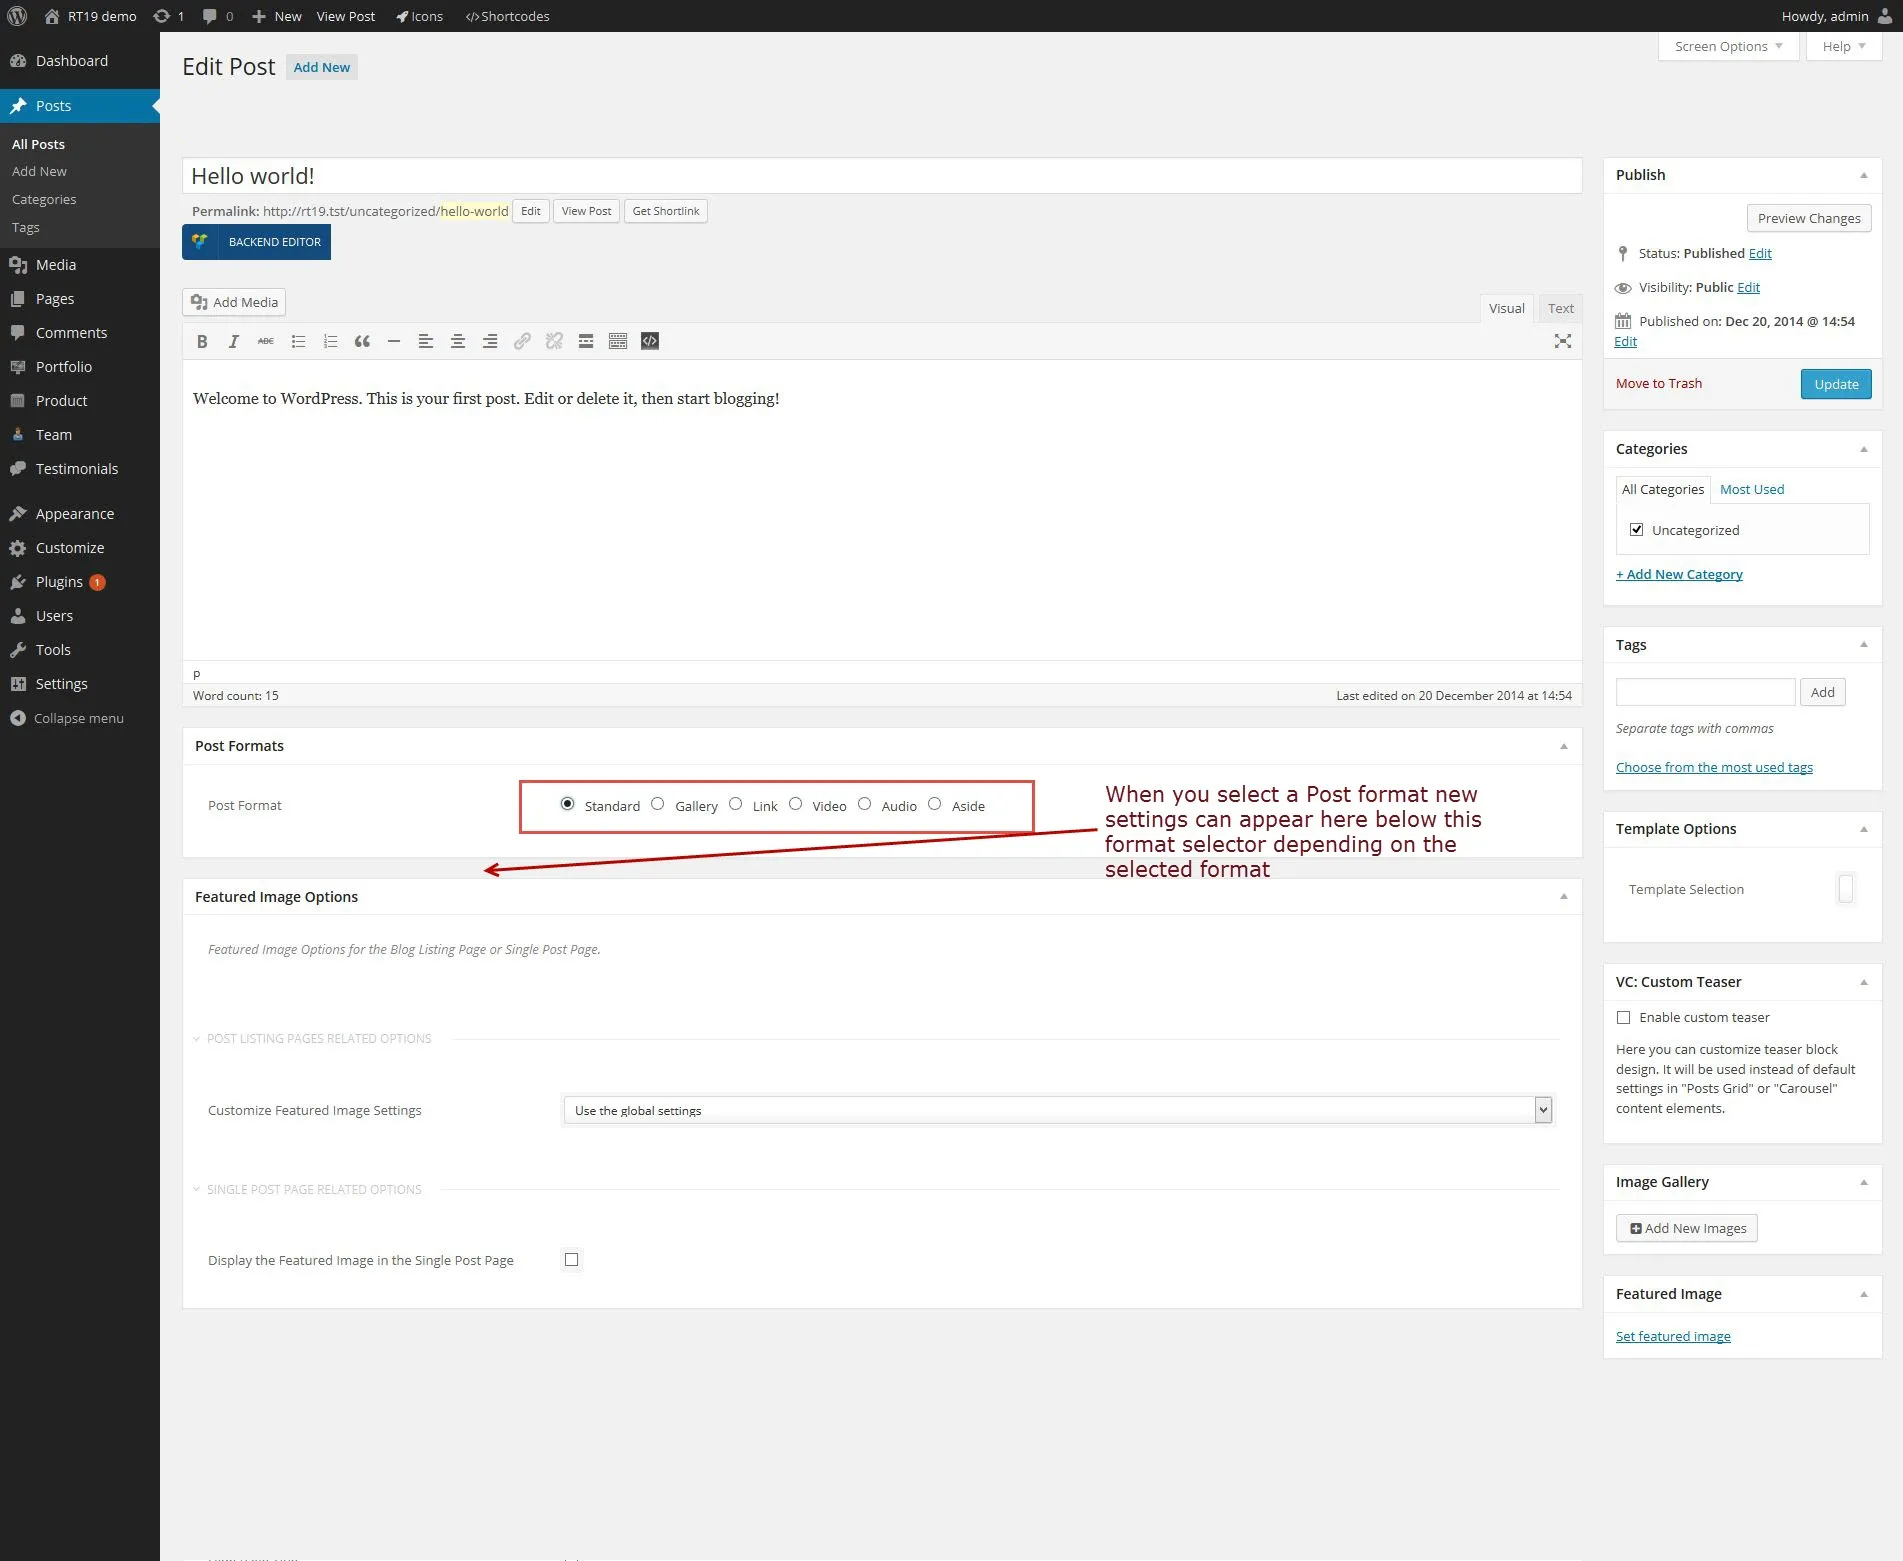
Section titled “Post formats”The Post Format option offers six formats:
- Standard: shows the featured image.
- Gallery: shows the images as a gallery or a slider.
- Link: tells something about a subject and adds a link to another site.
- Video: shows and plays a video.
- Audio: shows and plays an audio file.
- Aside: the post appears in the blog list, but it has no single post page that visitors can open.
When you select a format, the settings for that format appear below the Post Format option.
Creating a Blog Listing page
Section titled “Creating a Blog Listing page”RT-Theme 19 gives you three ways to build a blog page: set a static posts page, add a blog list element to a page with WPBakery Page Builder, or add the blog shortcode to a page. A page built with the element or the shortcode can hold other content as well.
Static posts page
Section titled “Static posts page”This is the quickest way. For the general WordPress steps, see Homepage and blog page.
-
Go to Pages › Add New and create a page, for example “Blog”.
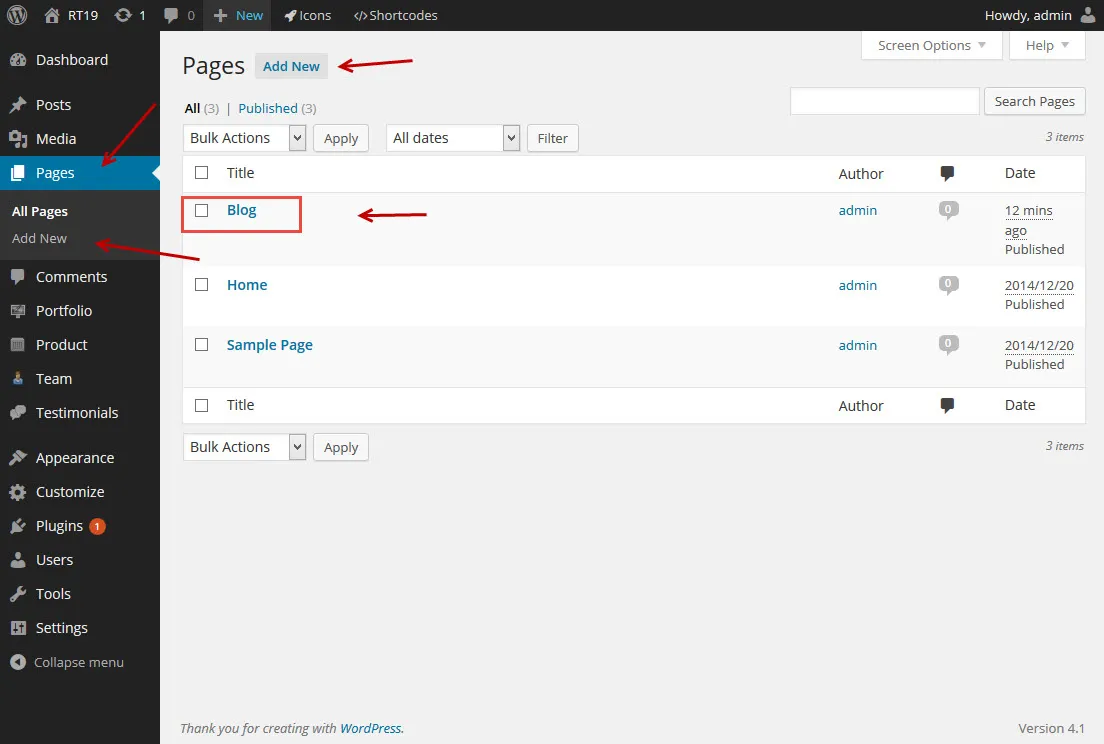
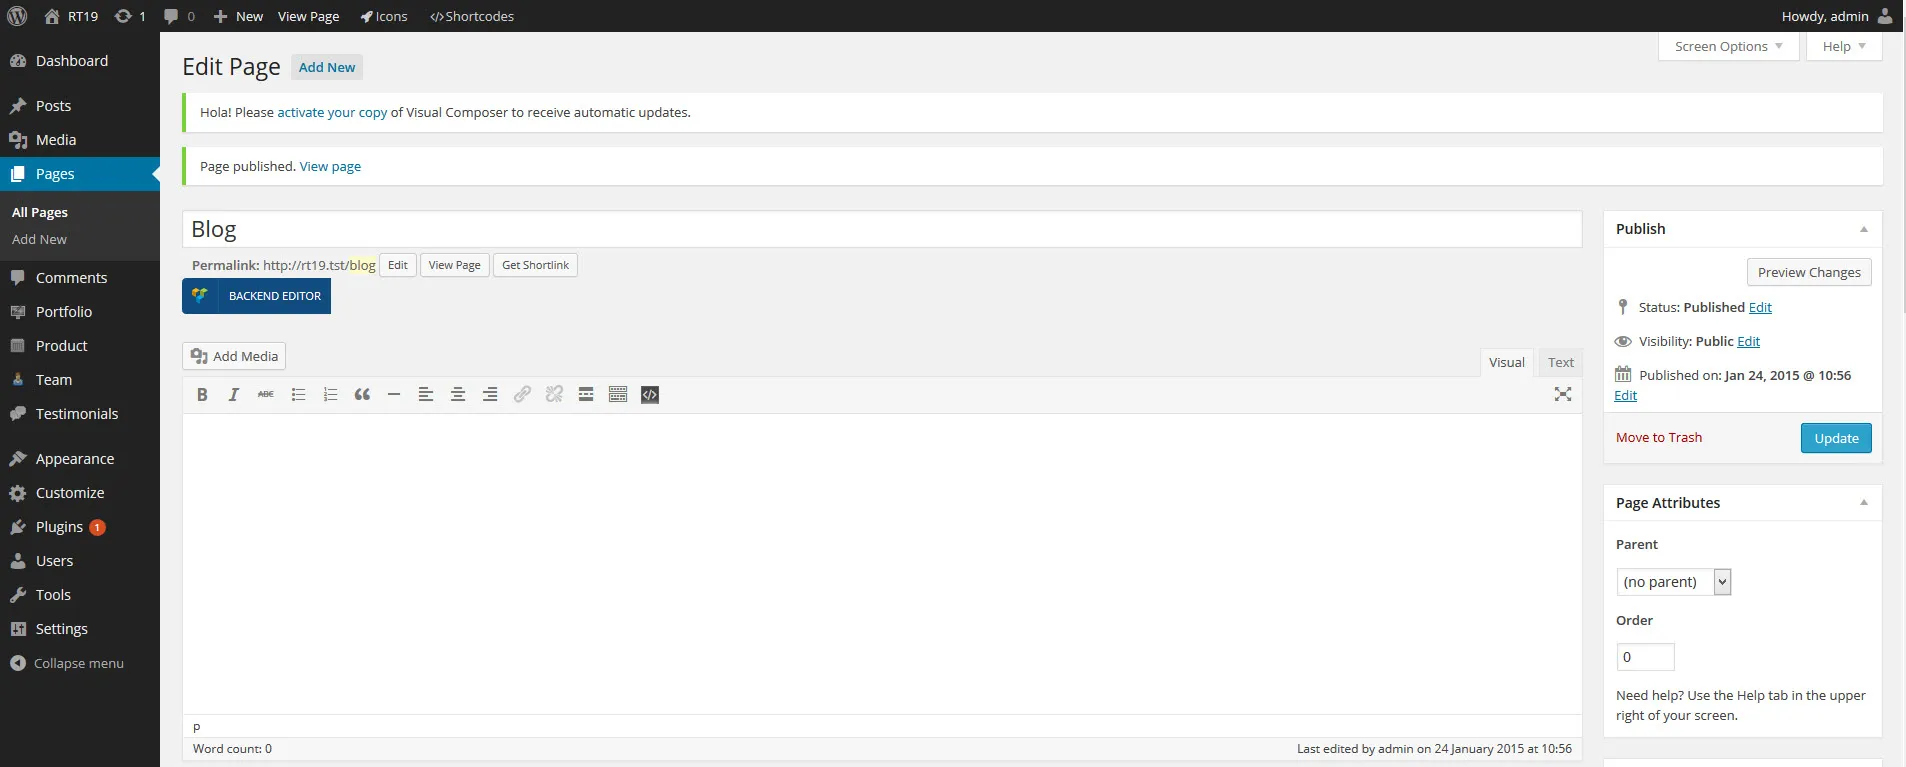
-
Go to Settings › Reading and choose that page under Posts page.
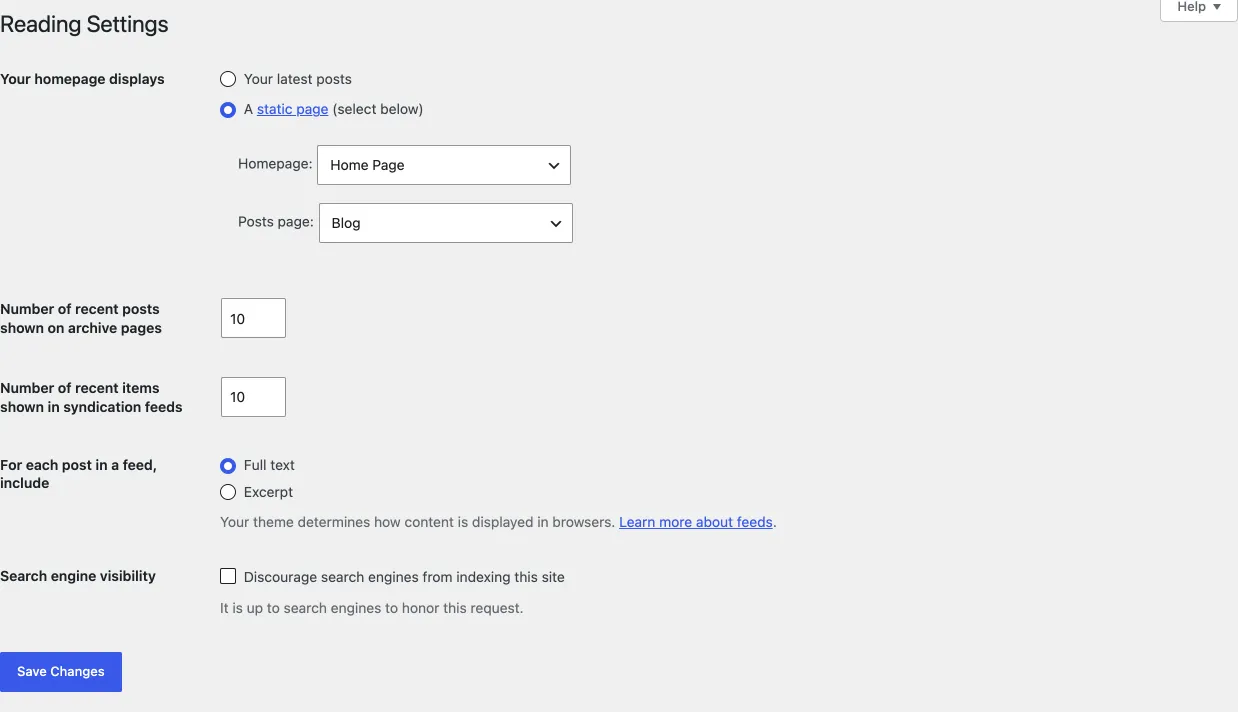
-
View the page on your site. If everything is set correctly, you see your blog list:
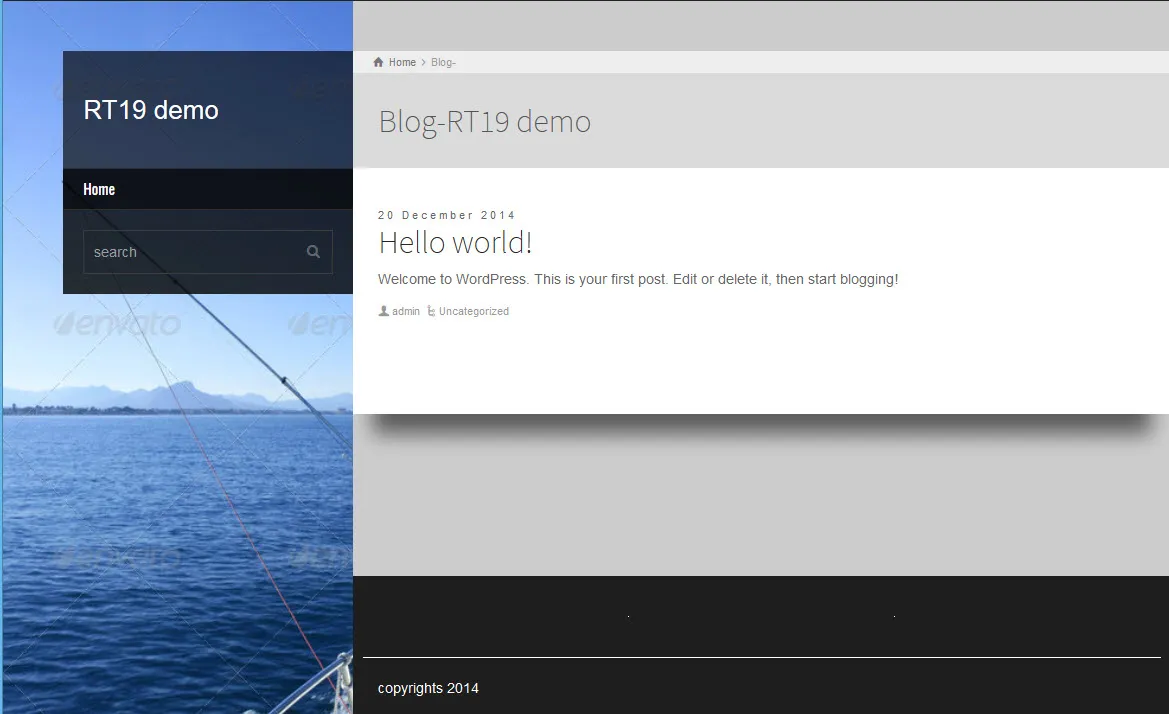
Blog listing page with WPBakery Page Builder
Section titled “Blog listing page with WPBakery Page Builder”Any page can be a blog listing page. With WPBakery Page Builder and the Blog Posts element, you can create several blog listing pages, each showing posts from different categories. This takes more steps than the static posts page.
-
Create a page called “Blog”.
-
Open the page and click Backend Editor to switch to WPBakery Page Builder.
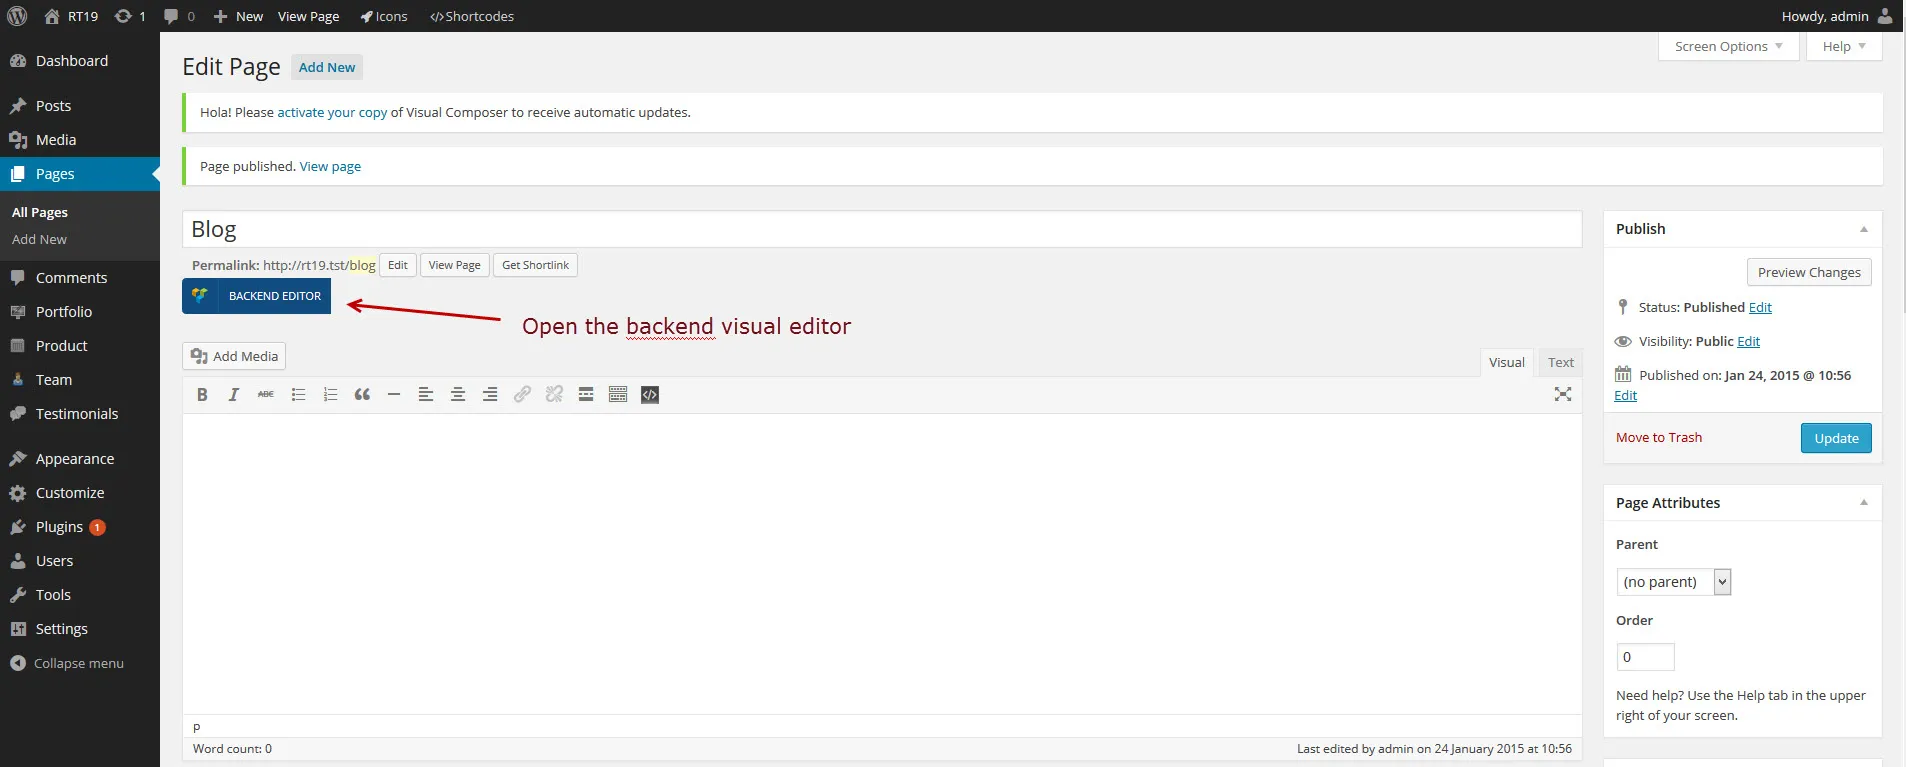
The editor now looks like this:
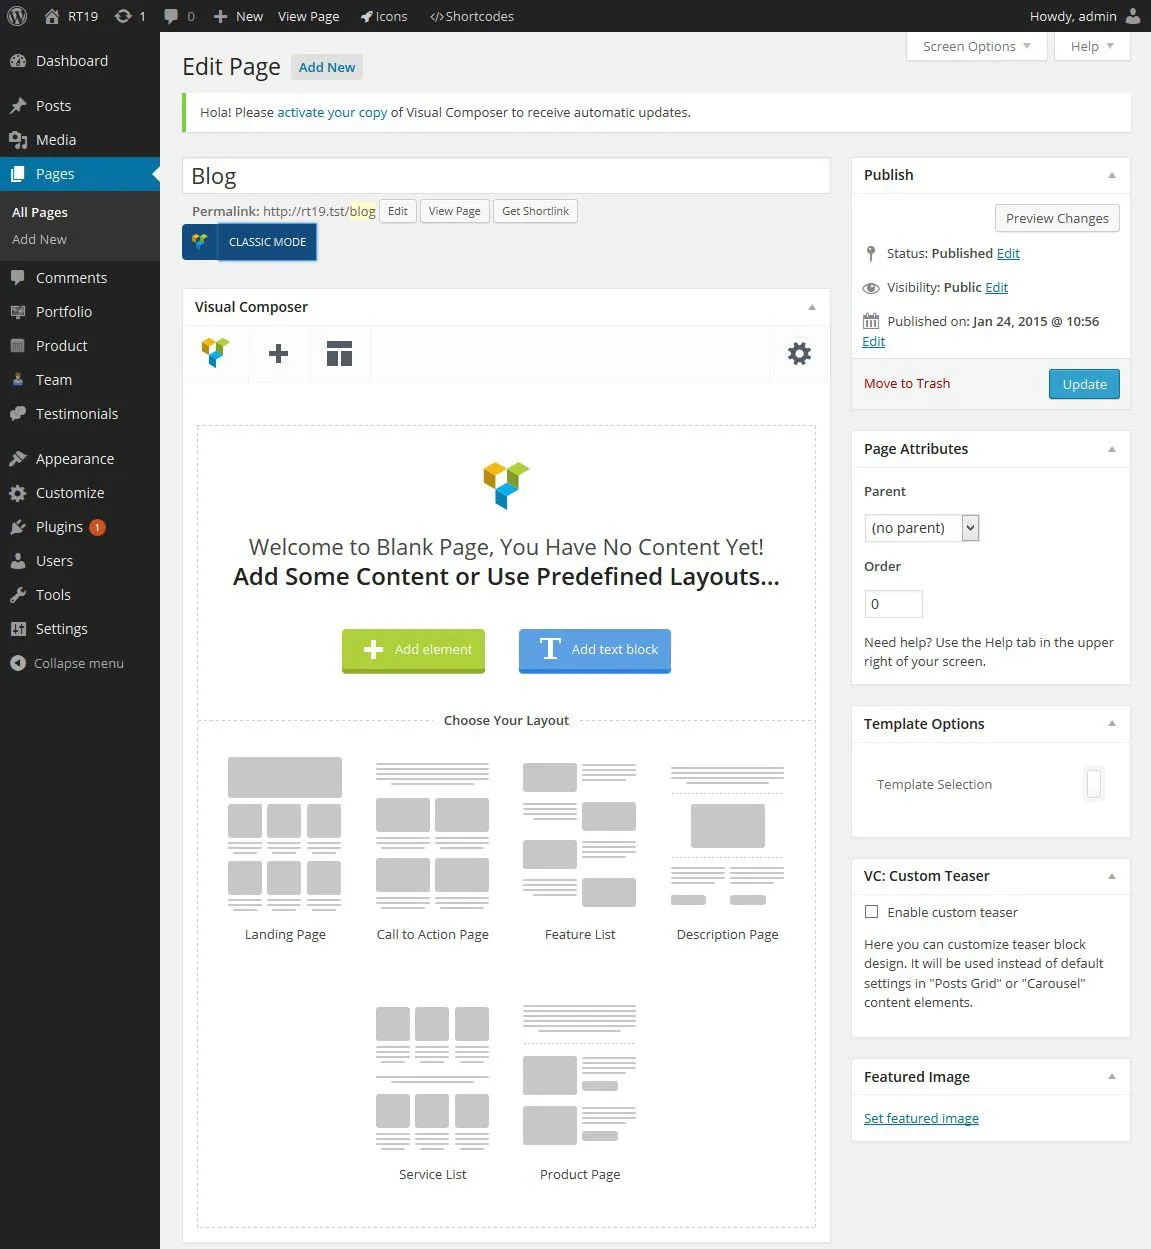
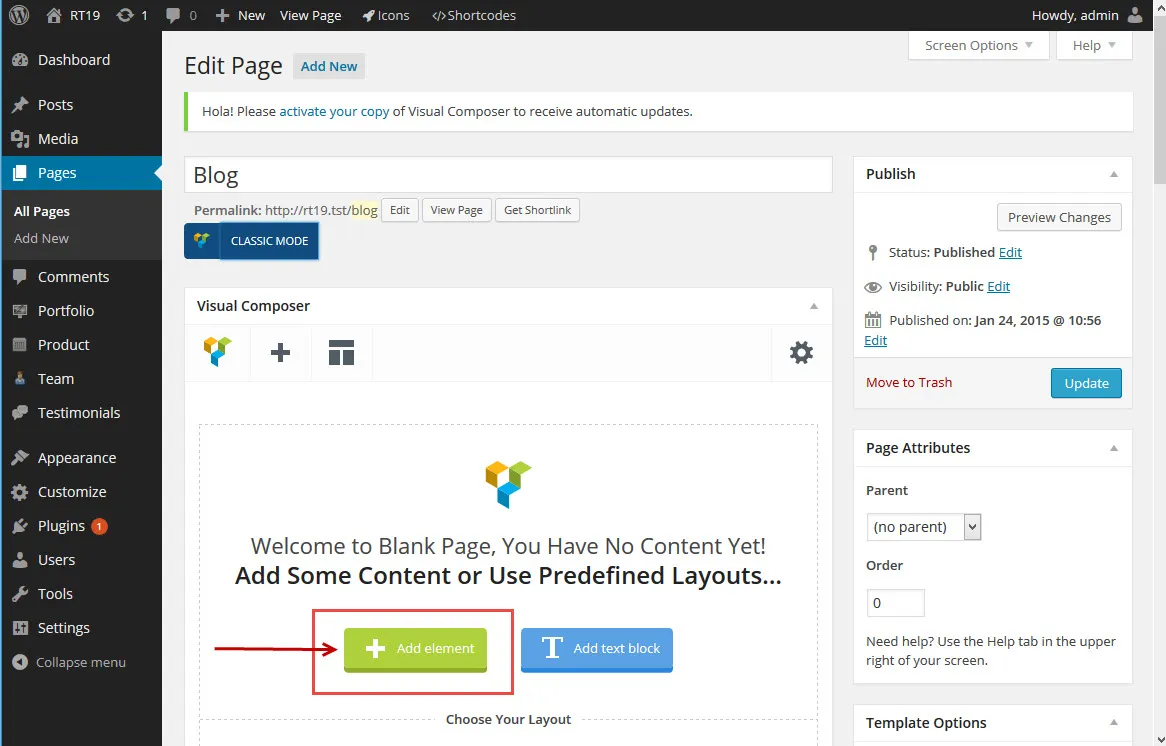
-
Click Add element.
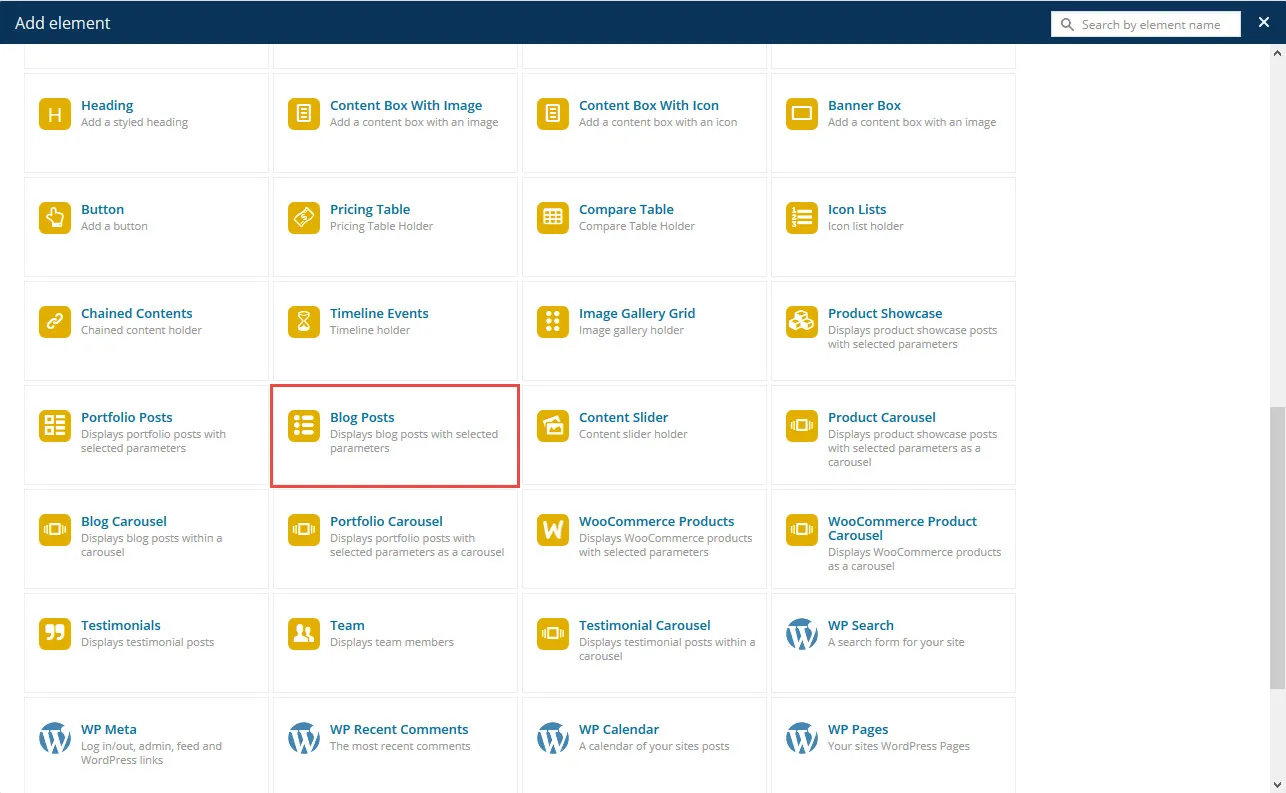
-
In the Add element window, choose Blog Posts.
-
A window opens with the settings of the element.
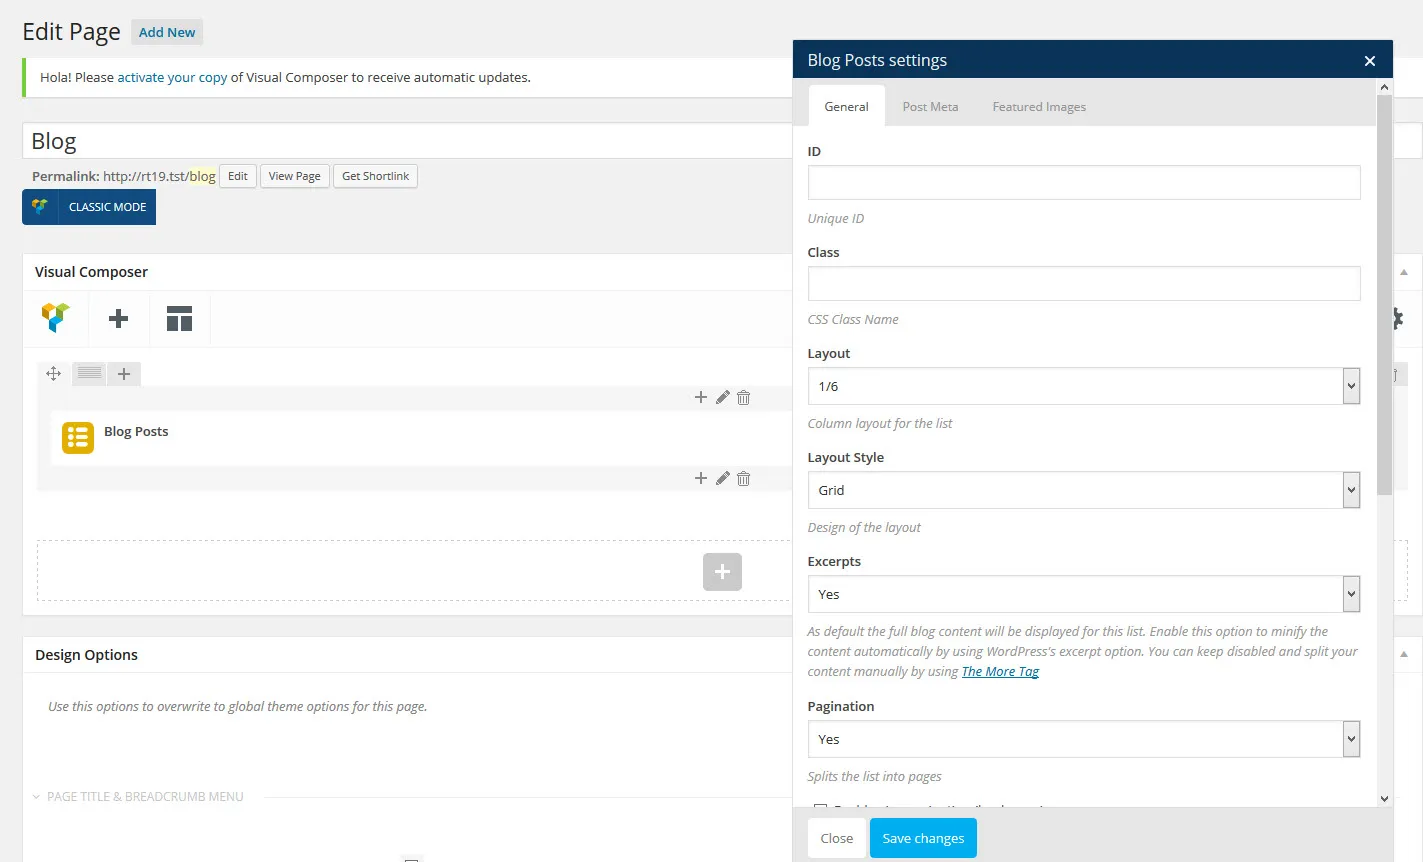
Set up the blog list the way you want it and save the settings.
-
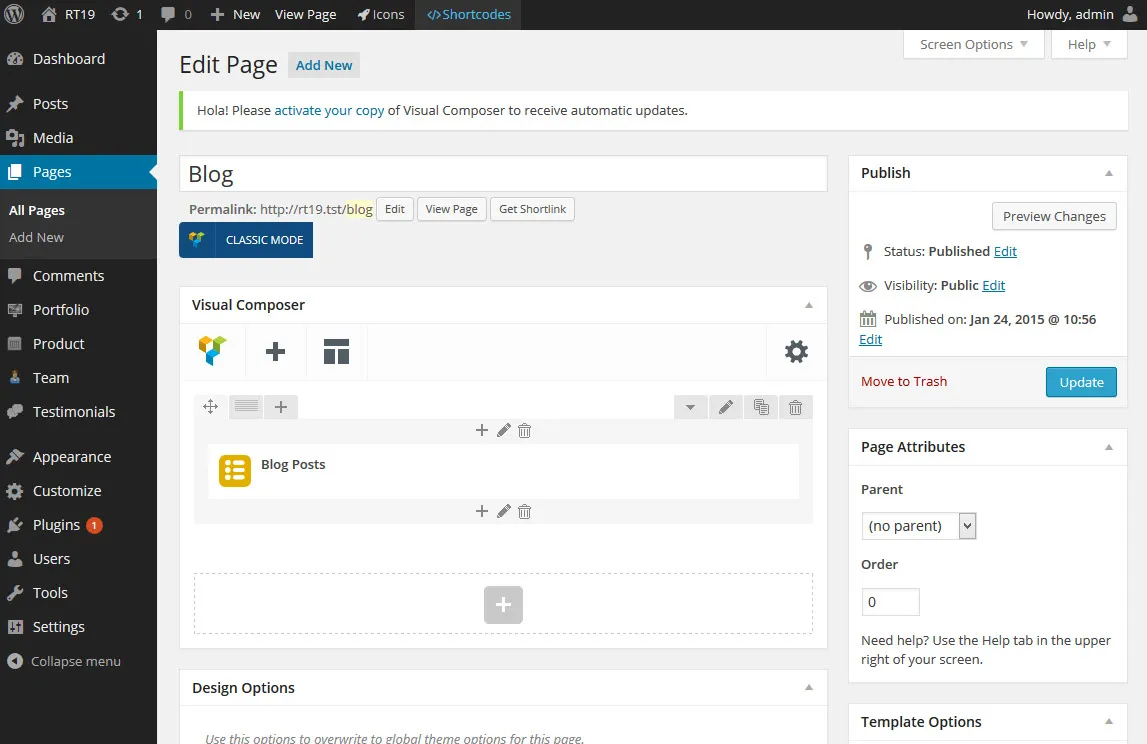
You return to the page editor, which now shows the element:
-
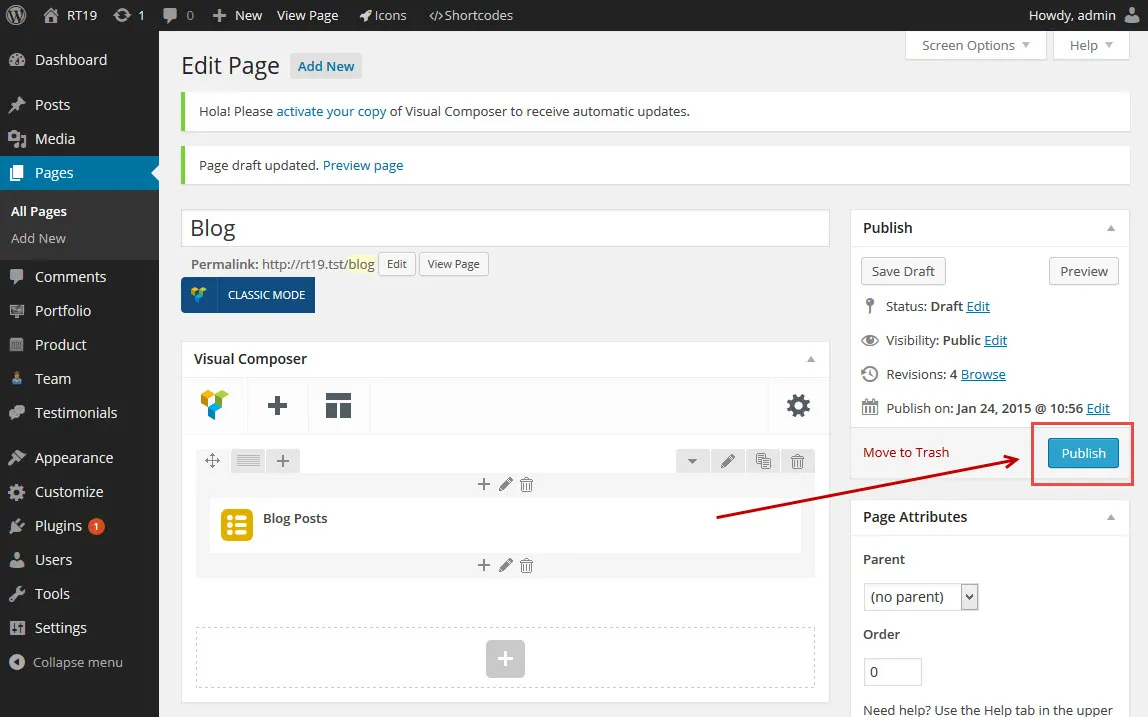
Click Publish, add the page to your menu and view it on your site. It looks the way you designed it.
-
The result looks like this:
Blog listing page with the blog shortcode
Section titled “Blog listing page with the blog shortcode”You can also turn any page into a blog listing page with the RT-Theme 19 blog shortcode. As with the element, you can create several blog listing pages, each showing posts from different categories. This also takes more steps than the static posts page.
-
Create a page called “Blog”.
-
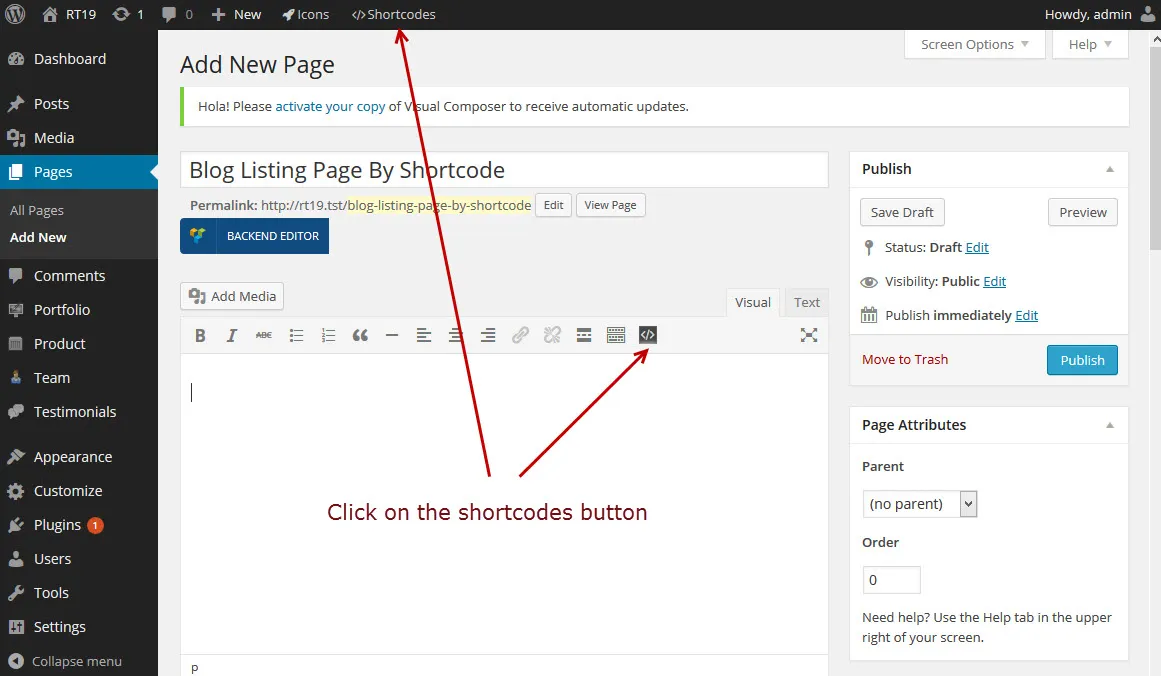
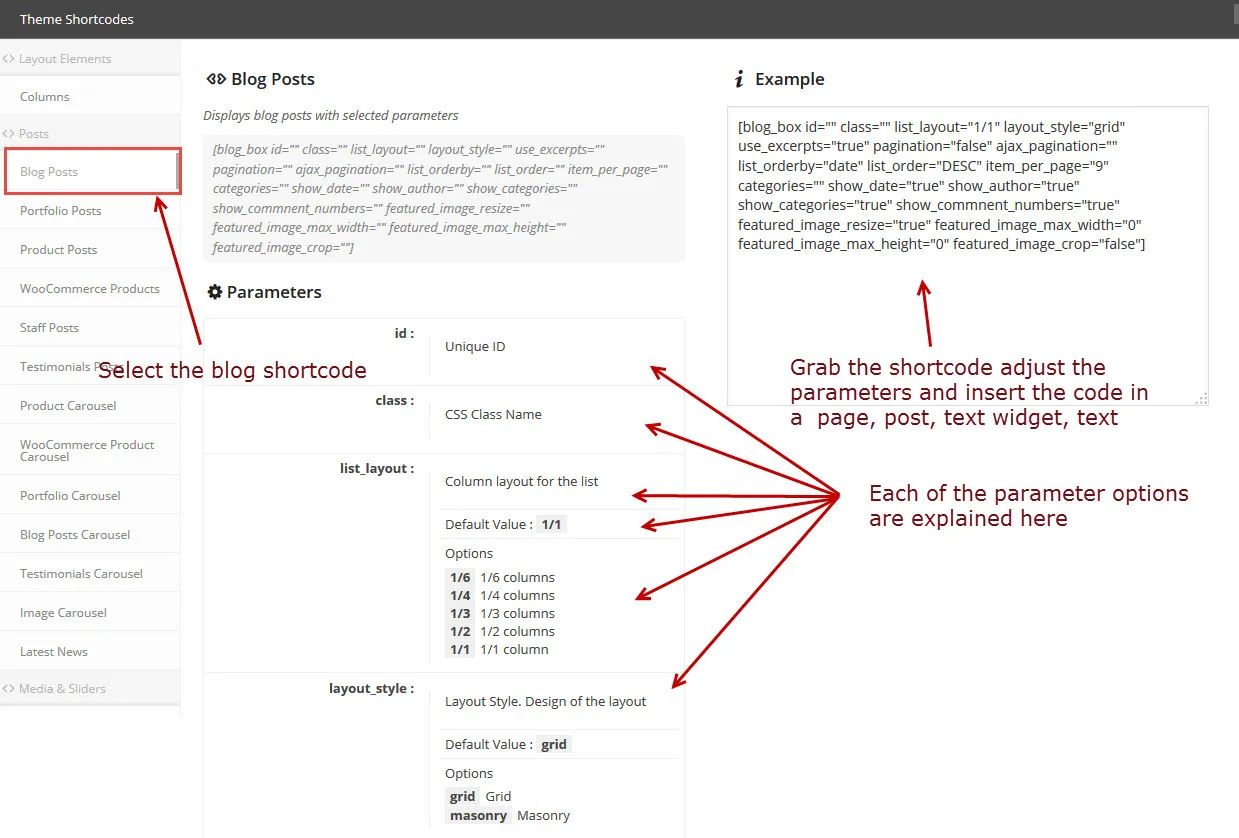
Instead of switching to WPBakery Page Builder, click the Shortcodes button. In the Classic Editor it sits in the editor toolbar; it is also in the admin bar at the top of the screen.
-
The Theme Shortcodes window lists the available shortcodes. Select Blog Posts.
-
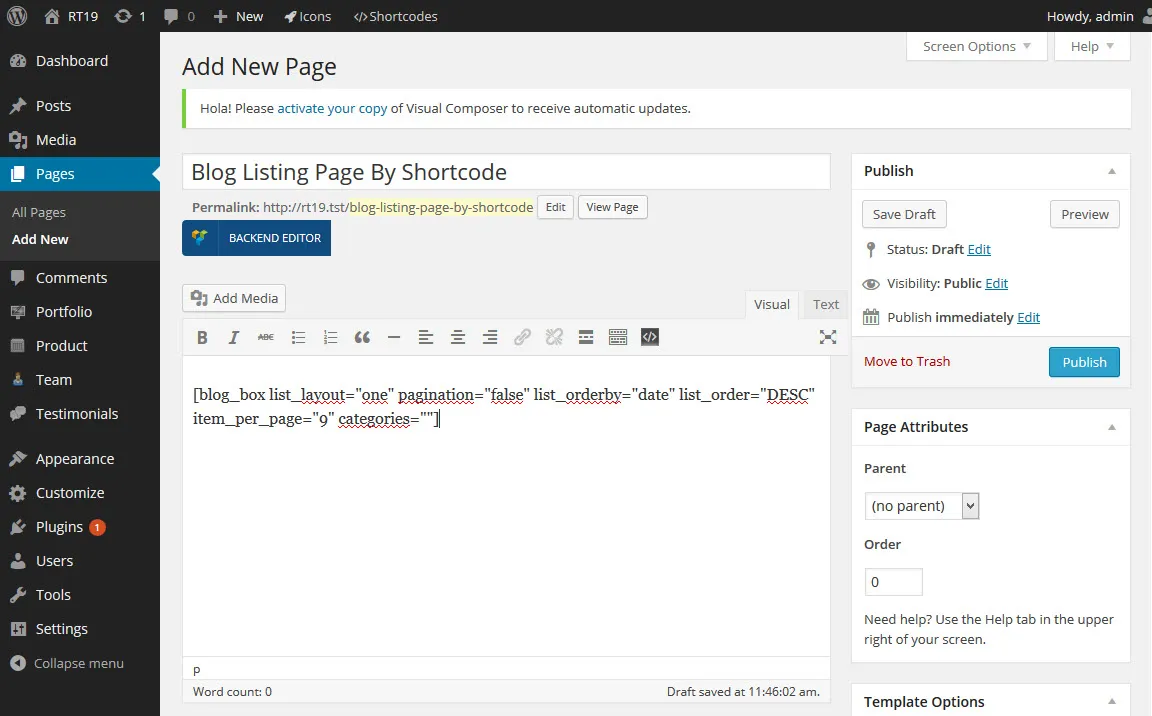
Adjust the example shortcode to your needs, following the explanation of each parameter in the window, then copy it and paste it into the page. After you insert it, the page looks more or less like this:
-
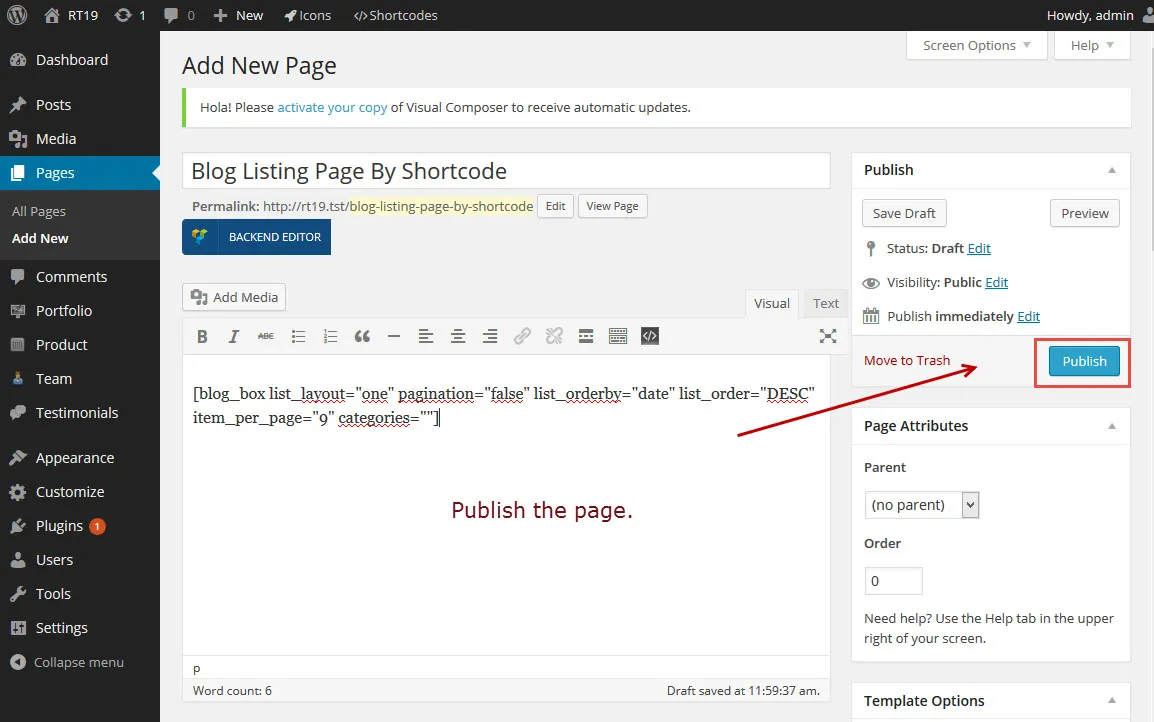
Click Publish, add the page to your menu and view it on your site. It looks the way you designed it.
-
The result looks like this:
Creating a Single Blog Post
Section titled “Creating a Single Blog Post”To add a post:
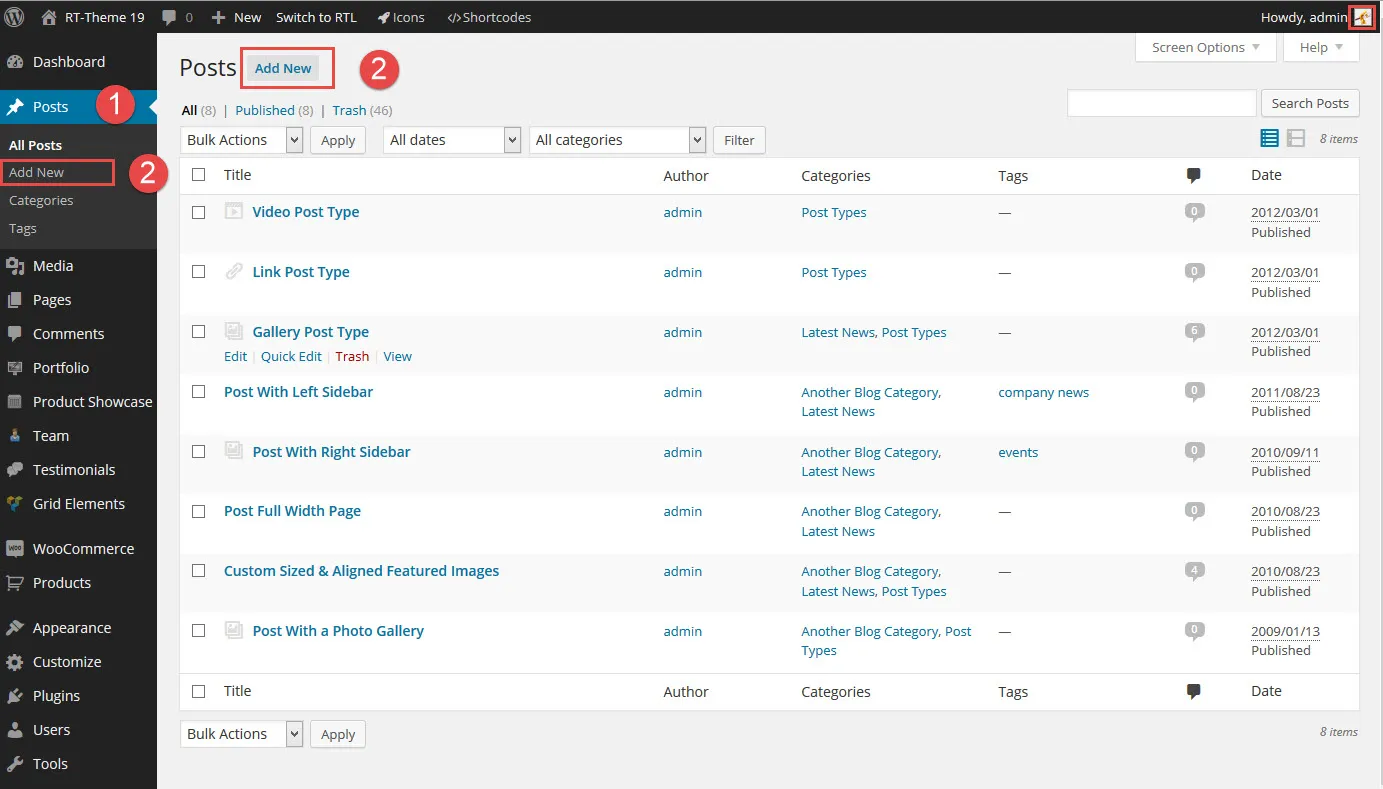
- In the WordPress admin, go to Posts.
- Click Add New in the menu, or the Add New button at the top of the post list.
The single post screen
Section titled “The single post screen”The post editor has many options. The numbers below match the screenshot.
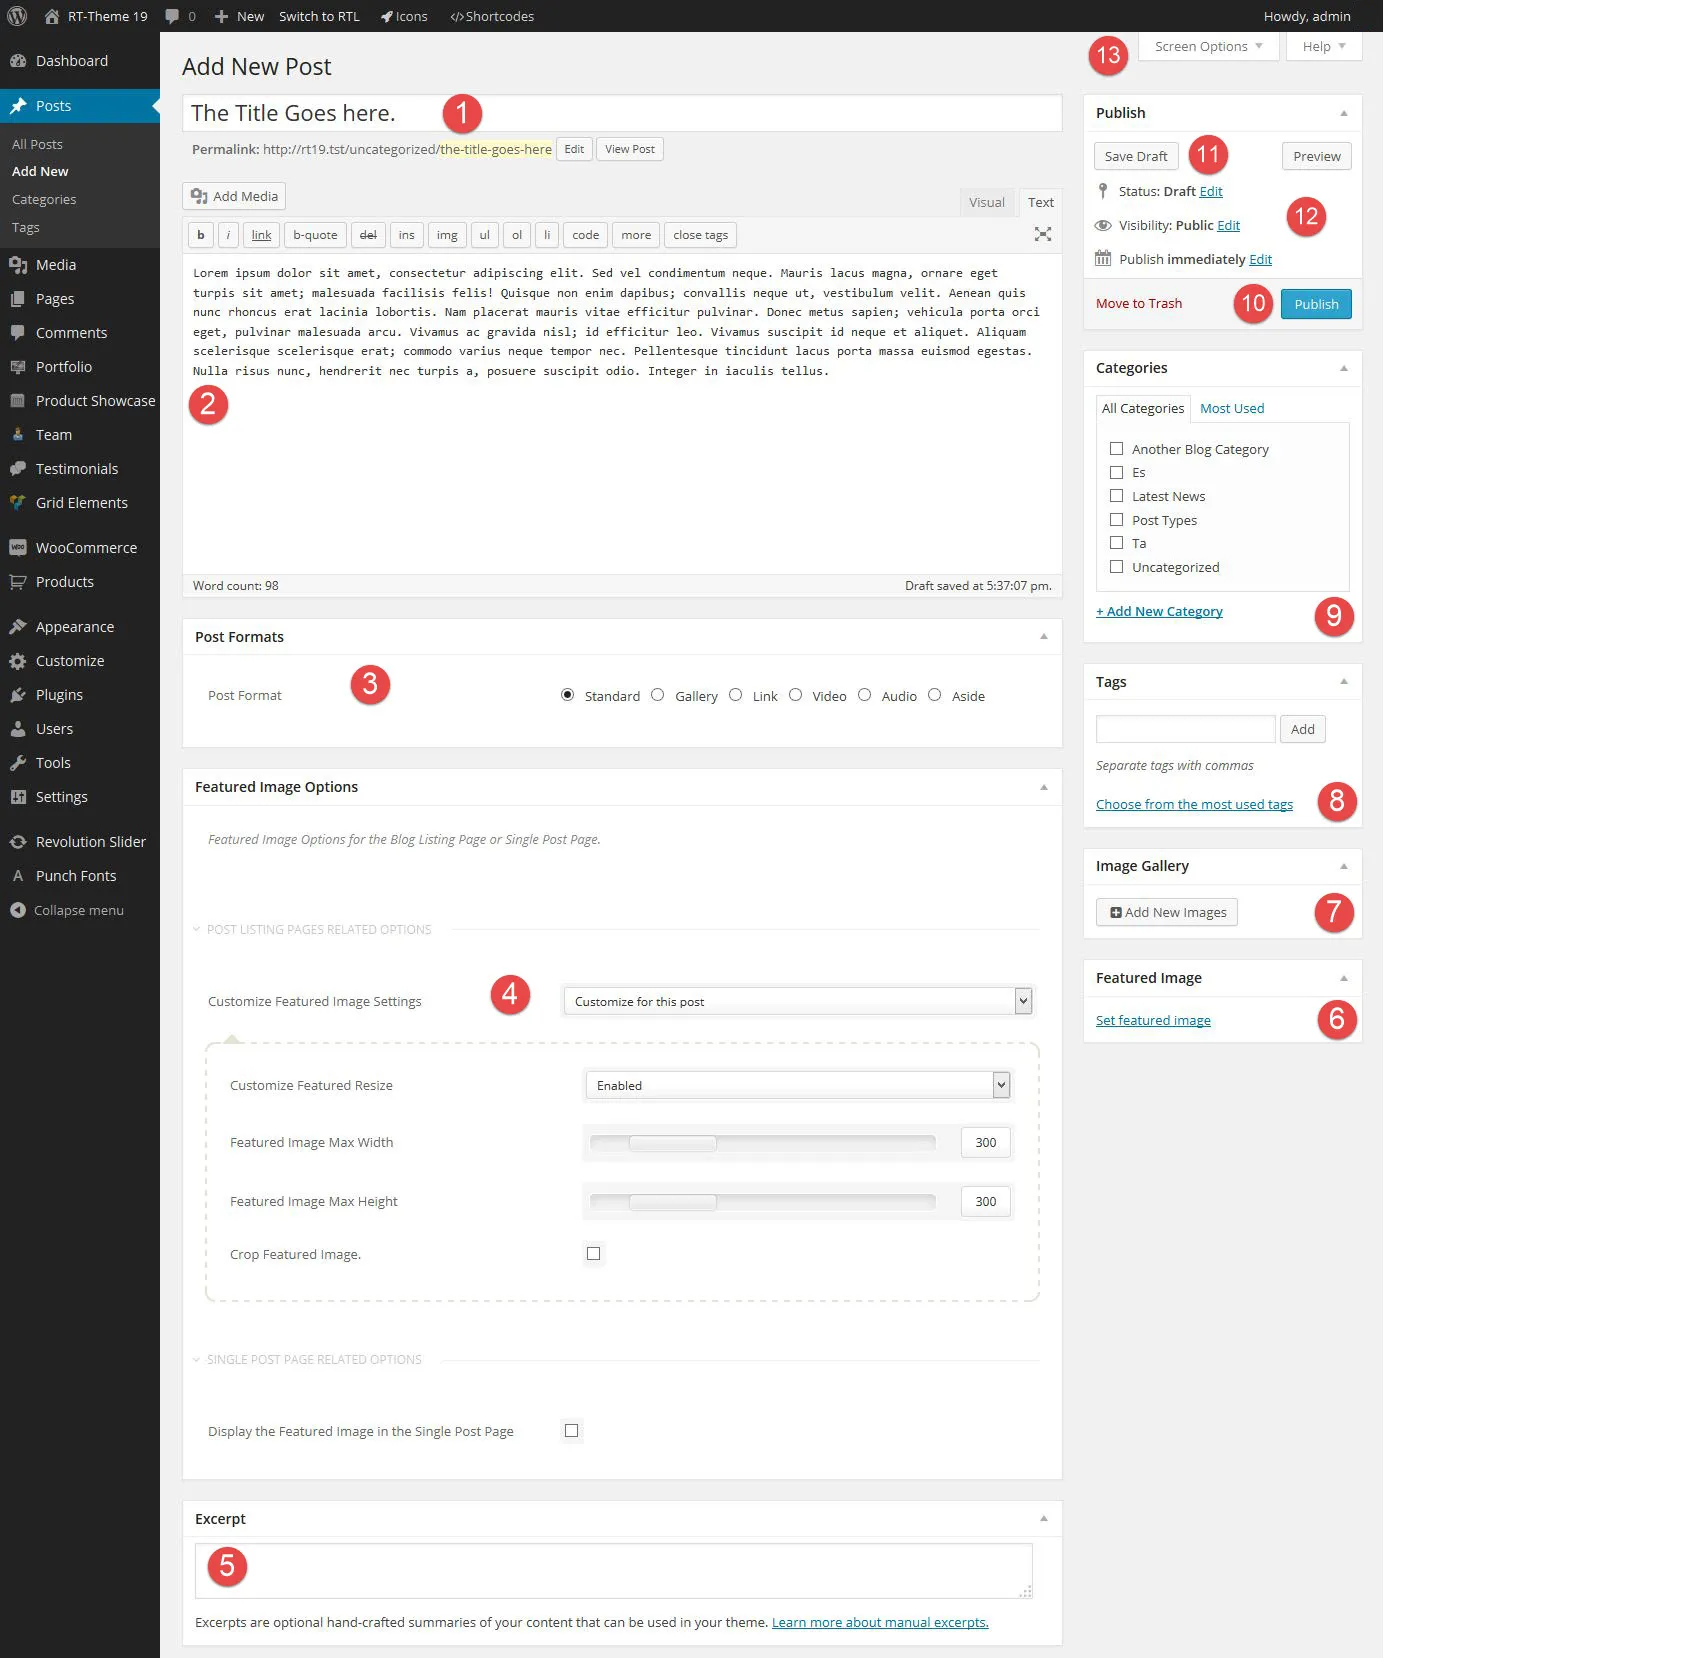
- The title of the post.
- The content of the post.
- The post format: Standard, Gallery, Link, Video, Audio or Aside. See Post formats above for what each one does.
- Featured Image Options: change the default size and cropping of the featured image for this post.
- The excerpt, a short teaser for listing pages. Use it when you have enabled excerpts in the Customizer. If you don’t see the Excerpt box, turn it on under the Screen Options tab at the top right of the screen.
- Featured Image: add a featured image to the post.
- Image Gallery: add more images to show as a gallery.
- Tags: add tags to the post. An SEO plugin such as Yoast SEO or Rank Math can add SEO settings to tags.
- Categories: put the post in one or more categories. An SEO plugin can add SEO settings to categories too.
- Publish: make the post visible on your site.
- Save Draft or Preview the post.
- Change the status, visibility and publish date of the post.
- Screen Options: show or hide boxes on the post editing screen.
Design Options
Section titled “Design Options”Every post and page has a Design Options section that overrides the global Customizer styling, such as backgrounds and colours, for that post or page only. View the abilities of the Design Options