
Team List / Post
Creating a Team
Section titled “Creating a Team”A team page is made of team member posts. You show them on an overview page, such as a team list or an “About us” page, with a shortcode or a WPBakery Page Builder element. You manage the members under Team in the WordPress admin.
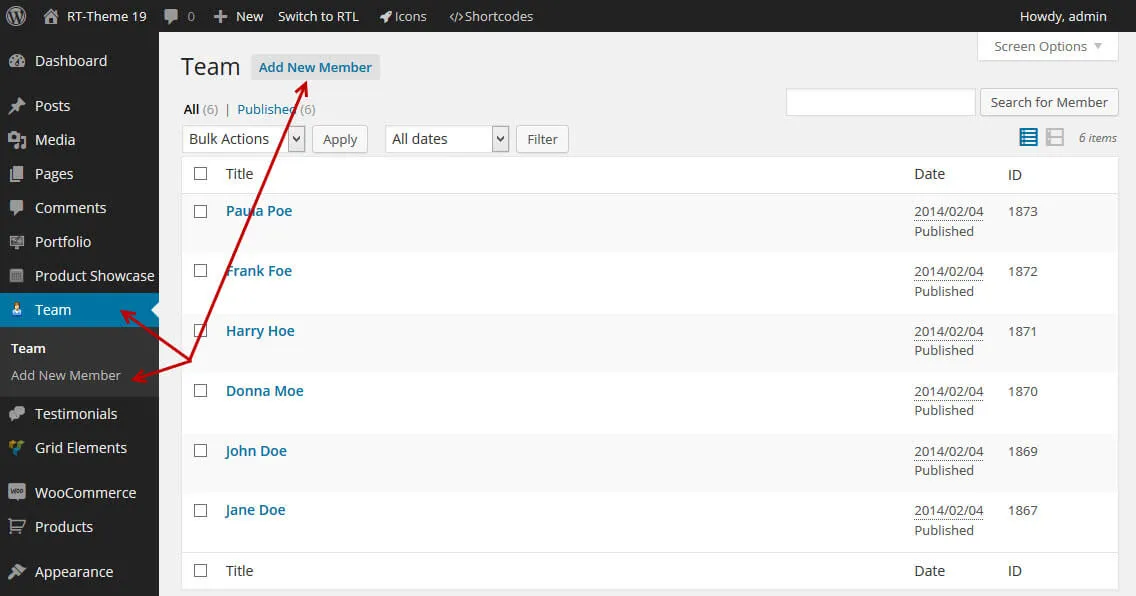
The Team post type comes with the RT-Theme 19 Extensions plugin, so keep that plugin active.
Things you should know
Section titled “Things you should know”-
Team members have no categories.
-
To show members on a page, add them by ID in the shortcode, or select them one by one in the settings of the WPBakery Page Builder element. The IDs are in the ID column of the Team list.
-
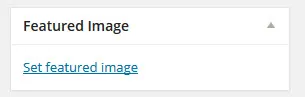
To add a photo of the member, click Set featured image in the Featured Image box.
-
The short info of a member accepts HTML, such as headings, links and
divtags. Keep it as simple as possible. -
For each team member you can add:
- A position (job title).
- A short info text for listing pages, like a small excerpt.
- Links to more than 40 social networks, each with its own icon.
- A full story about the person in the body content of the post. HTML and shortcodes are allowed, and you can design the whole post with WPBakery Page Builder elements.
Creating a Team Listing Page
Section titled “Creating a Team Listing Page”To set up a team listing page:
- Create your team members.
- Create a page.
- Add the team shortcode to the page, or add the Team element with WPBakery Page Builder.
Creating the team page
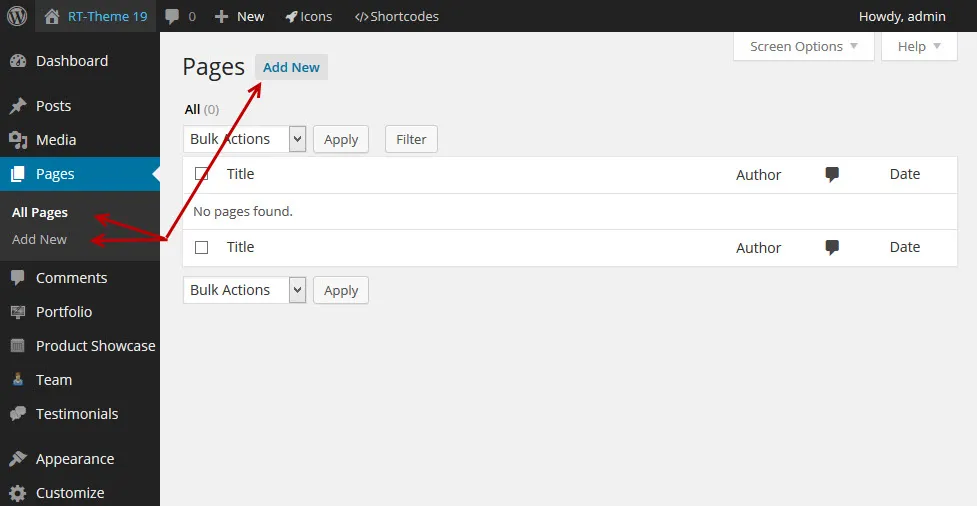
Section titled “Creating the team page”Go to Pages › Add New and create the page that will hold the team.
Adding the Team element (WPBakery Page Builder)
Section titled “Adding the Team element (WPBakery Page Builder)”-
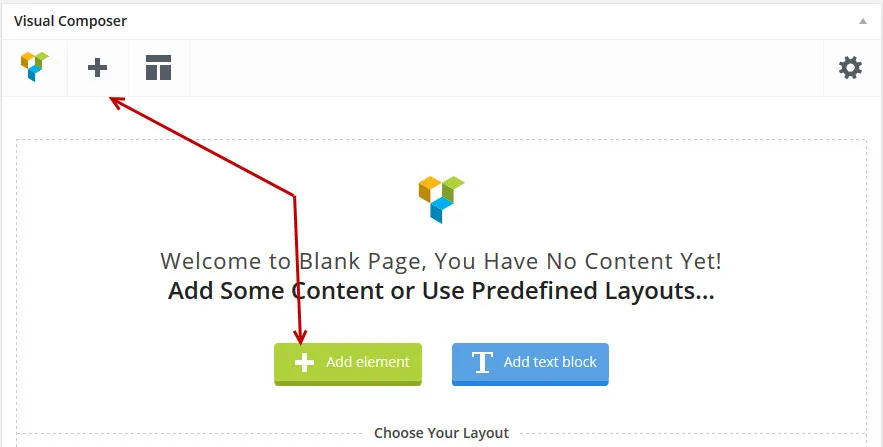
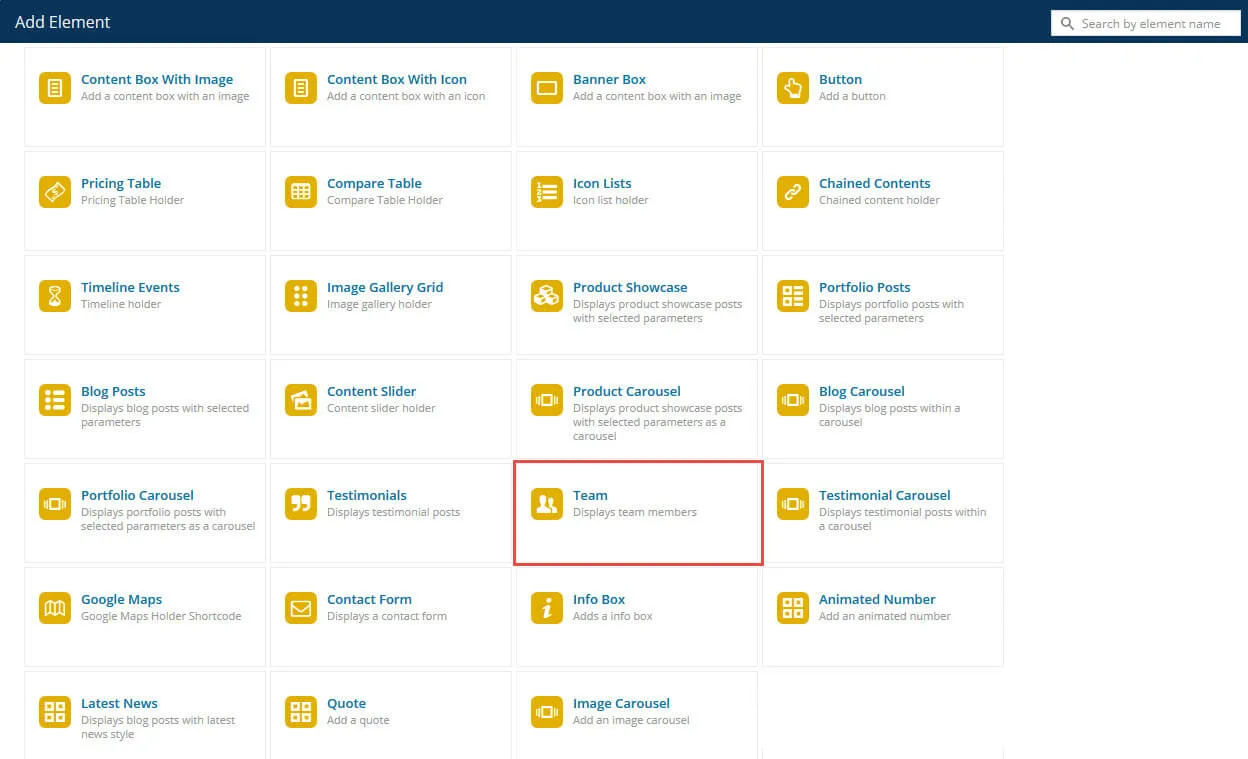
In WPBakery Page Builder, click Add element (the + sign).
-
Choose Team.
-
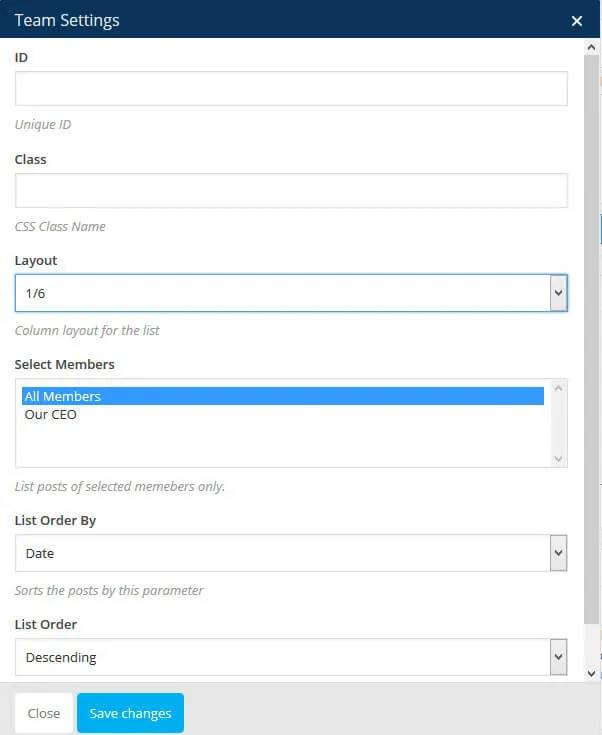
A window opens with all the settings of the element.
-
Adjust the settings. You can always edit them later if you don’t like the result.
-
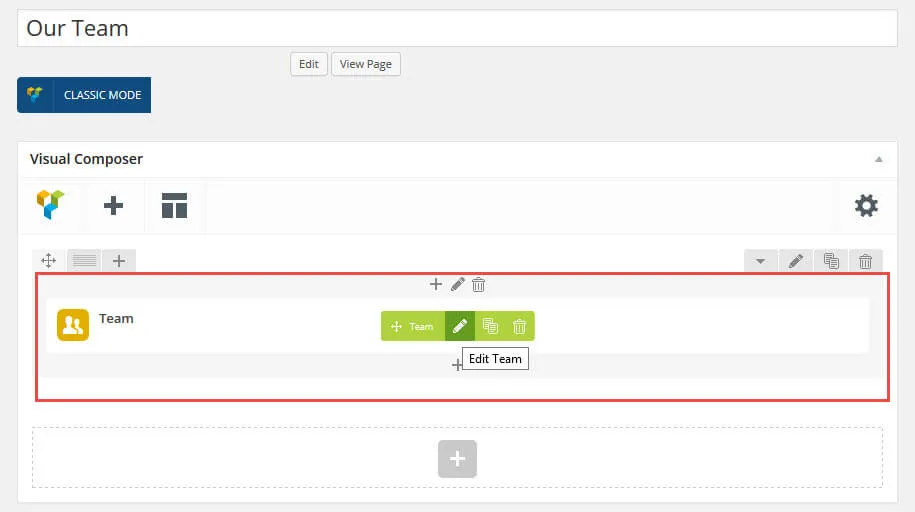
Click Save changes in the window. The page editor now shows the element:
Adding team members with a shortcode
Section titled “Adding team members with a shortcode”Click Shortcodes in the admin bar, or the shortcode icon in the Classic Editor toolbar. In the Theme Shortcodes window, select Staff Posts, adjust the example to your needs, and copy and paste the shortcode into the page where you want the team to appear. The numbers below match the screenshot.
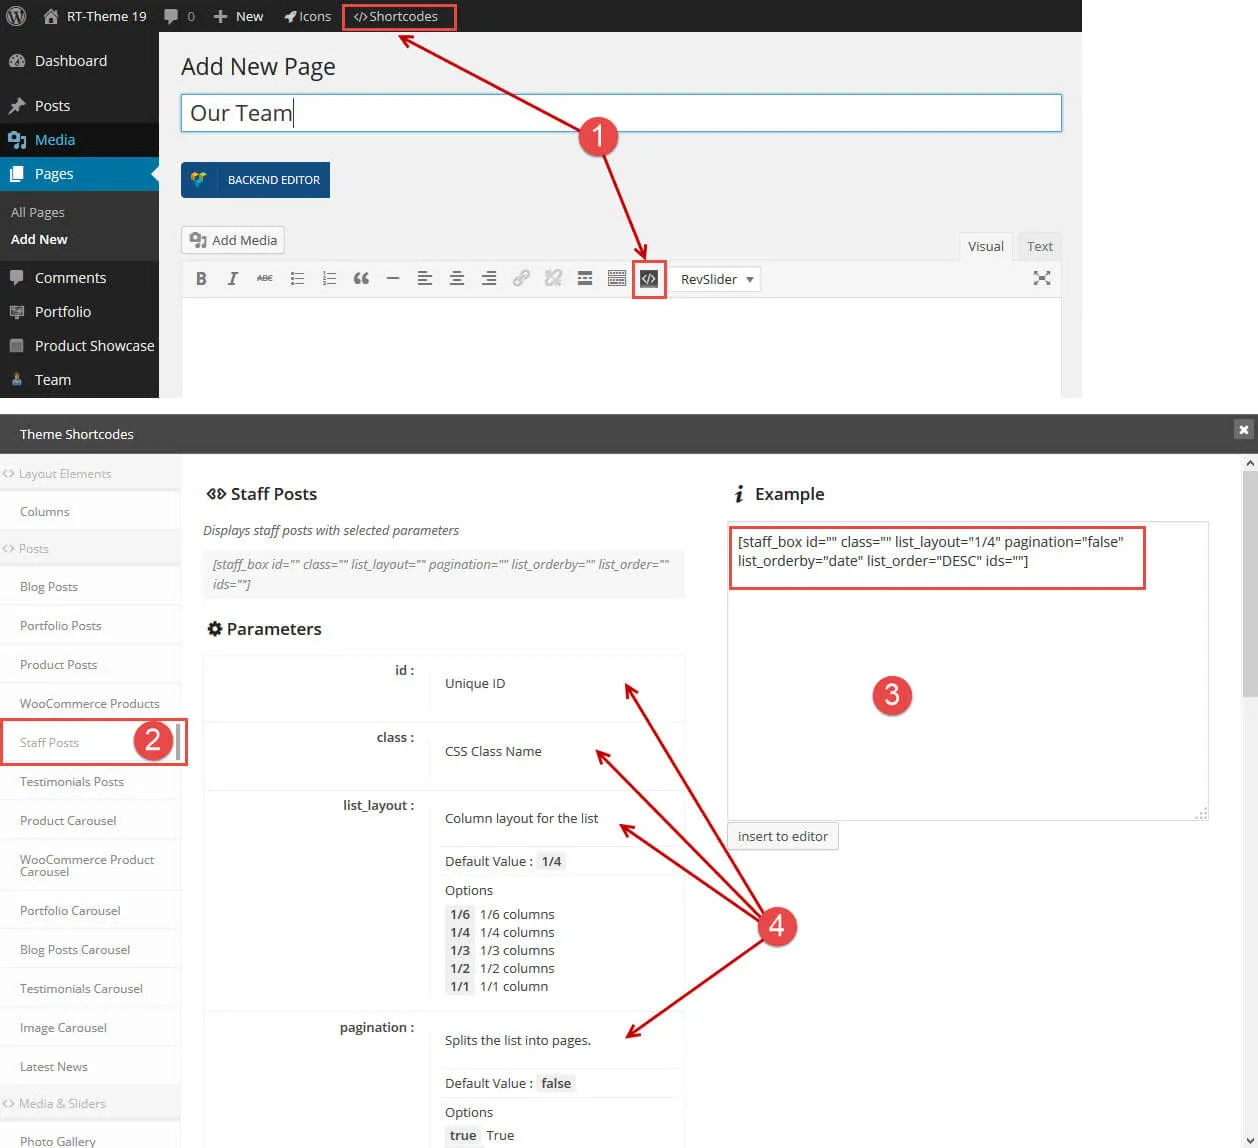
- The Shortcodes button.
- The team (Staff Posts) shortcode.
- The example shortcode. Adjust it, then copy and paste it into the page content.
- The explanation of each parameter. Use it to adjust the parameters in the example from step 3.
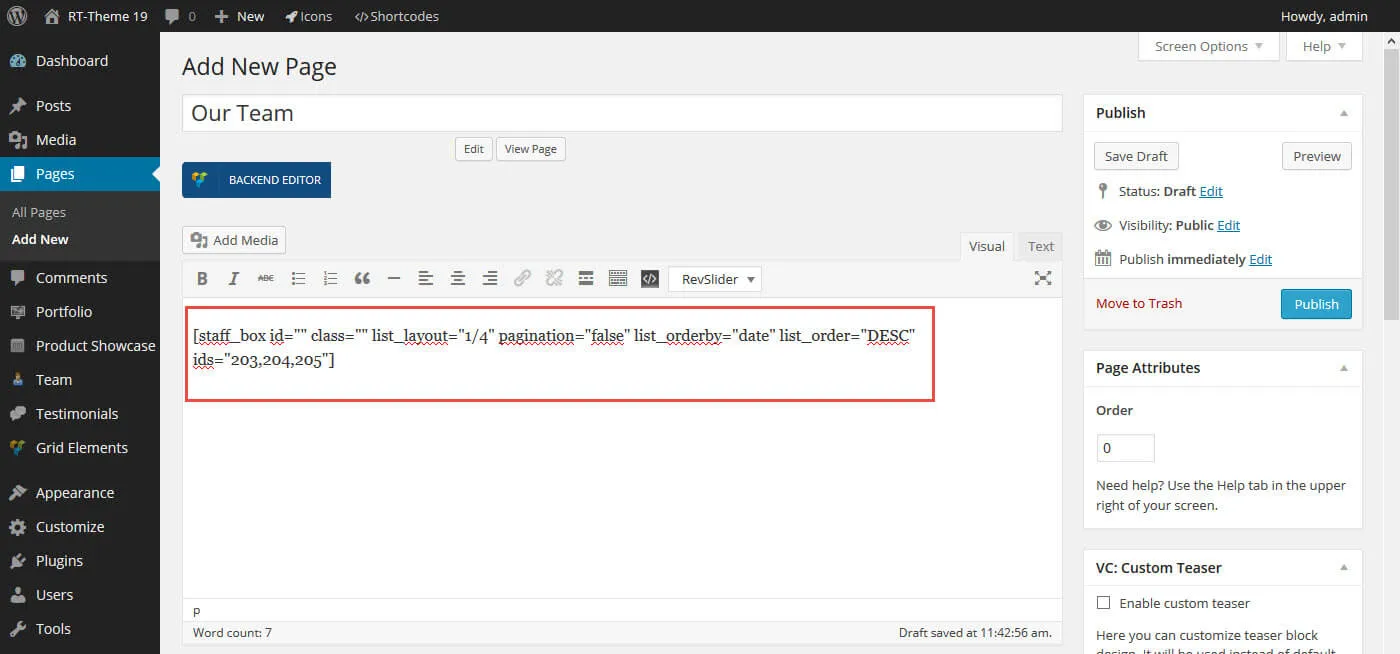
In the page, the shortcode can look like this:
Page design options
Section titled “Page design options”If the page needs a look that differs from your Customizer settings, change its Design Options. View the abilities of the Design Options
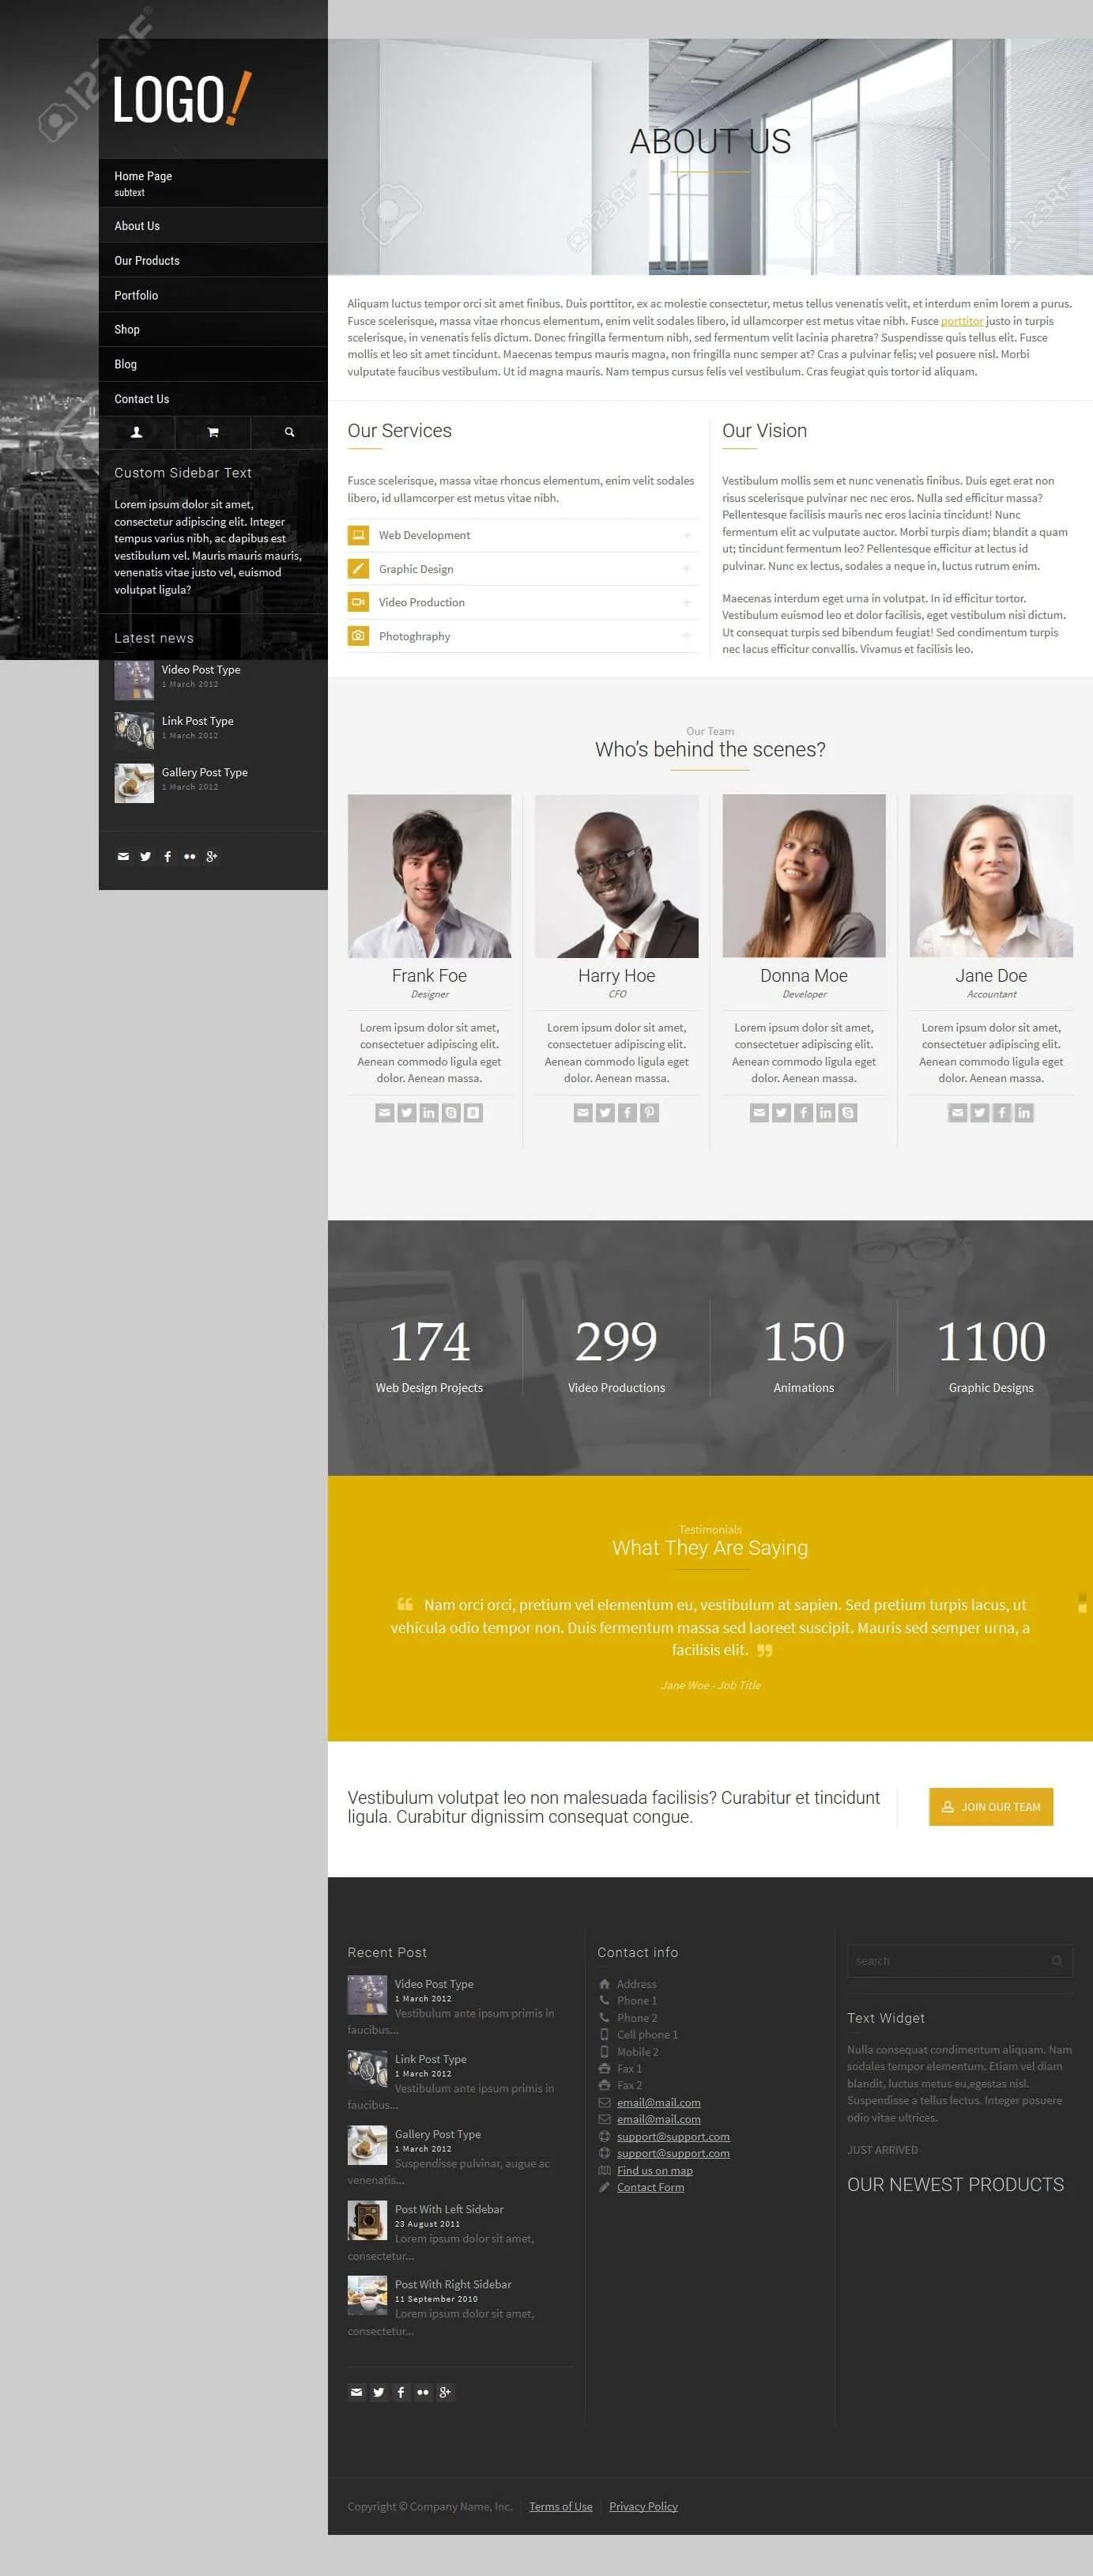
When you are done, click Publish and view the page on your site. It might look like this:
Creating a Team Member
Section titled “Creating a Team Member”Add your members with the Team post type:
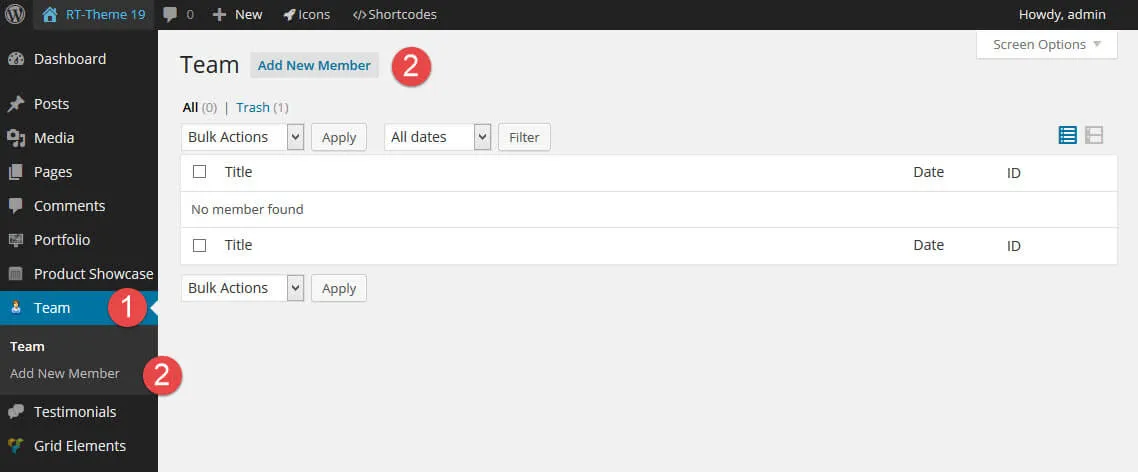
- In the WordPress admin, go to Team.
- Click Add New Member in the menu, or the Add New Member button at the top of the list.
Things you should know
Section titled “Things you should know”- Team members have no categories.
- You show members on a page by their ID in the shortcode, or by selecting them in the WPBakery Page Builder element.
- To add a photo of the member, click Set featured image in the Featured Image box.
- The short info accepts HTML, such as headings, links and
divtags. Keep it as simple as possible. - Each member has a position, a short info text, social links and a full story in the body content, which you can design with WPBakery Page Builder.
The single team member item
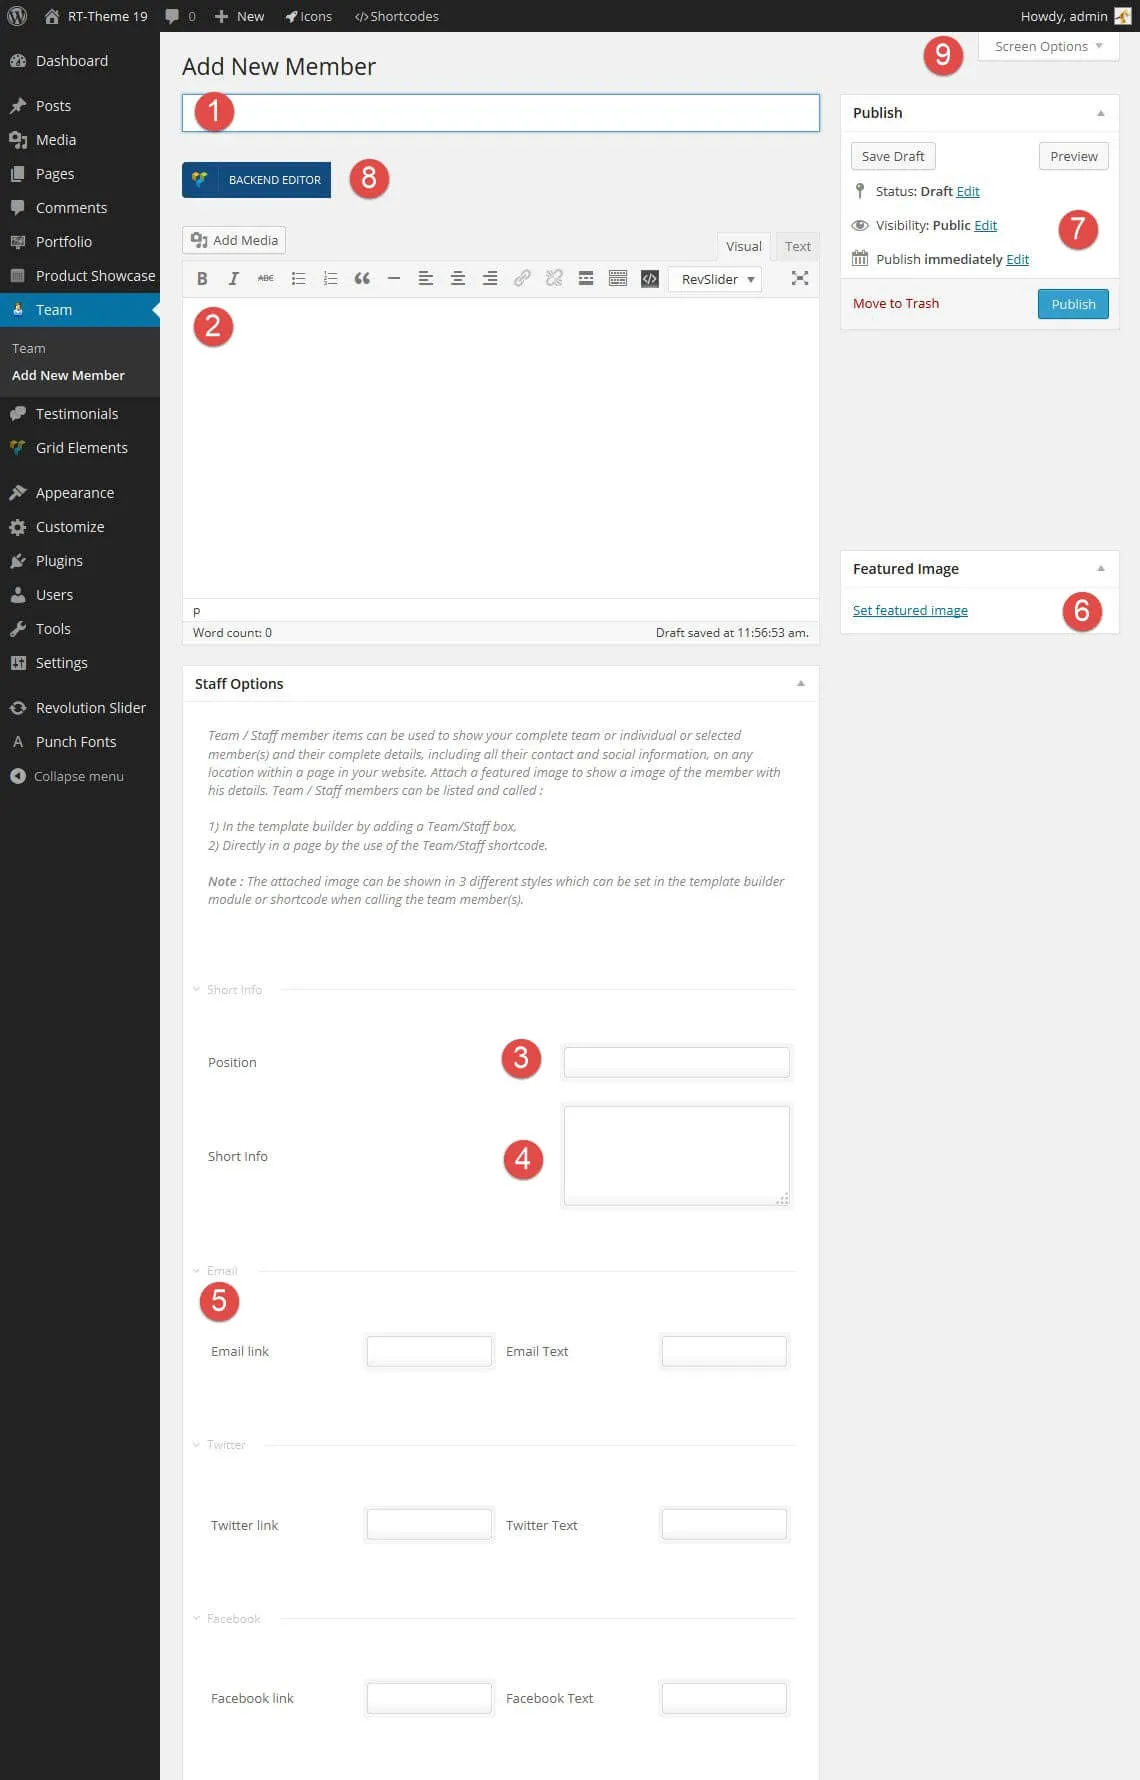
Section titled “The single team member item”The member editor has these options. The numbers below match the screenshot.
-
The title: the name of the team member.
-
The content: the story you want to tell. It appears on the single team member page.
-
Position: the member’s job title.
-
Short Info: the short text for listing pages.
-
The social links you want to show for this member.
-
Featured Image: add a photo of the team member.
-
Publish: make the member visible on your site, or change the date or visibility, save it as a draft or preview it.
-
Backend Editor: switch to WPBakery Page Builder to add its elements, or stay in the Classic Editor and add shortcodes or text the usual WordPress way.
-
Screen Options: choose which boxes appear on the editing screen of this post type.
When the content and settings are complete, publish the member. They then appear in every team list whose page has the team shortcode or the Team element in the place where you want the list.
Design Options
Section titled “Design Options”Every team member post has a Design Options section that overrides the global Customizer styling, such as backgrounds and colours, for that post only. View the abilities of the Design Options