
Installation and Licence
Installing Furnica takes three steps: upload the theme, activate your RT-Themes licence key, and run the setup wizard. This page covers the first two, the bundled plugins, updates, and the RT-Themes › Furnica page where you manage all of them later.
Requirements
Section titled “Requirements”- WordPress 7.1 or later. 7.1.4 or later is recommended: earlier 7.1 releases drop the Width setting of buttons.
- PHP 8.1 or later.
- WooCommerce for the shop pages. It is optional: the setup wizard installs it when you turn the Shop feature on.
Install the theme
Section titled “Install the theme”- Download
furnica.zipfrom your RT-Themes dashboard. Don’t unzip it. - In your admin, go to Appearance › Themes › Add New Theme › Upload Theme, choose
furnica.zipand click Install Now. - Click Activate.
WordPress opens the setup wizard (RT-Themes › Setup) once after activation. Continue with Setup Wizard, or come back to it later: the theme works as a simple blog theme until you run it.
The theme zip carries no photos. Furnica’s patterns show light grey placeholders until the setup wizard downloads the demo images.
Activate your licence
Section titled “Activate your licence”Your licence key starts with RTL-. You find it in your RT-Themes dashboard, next to your Furnica purchase.
- Go to RT-Themes › Furnica and open the License tab (or use the wizard’s License step).
- Paste the key into License key and click Activate.
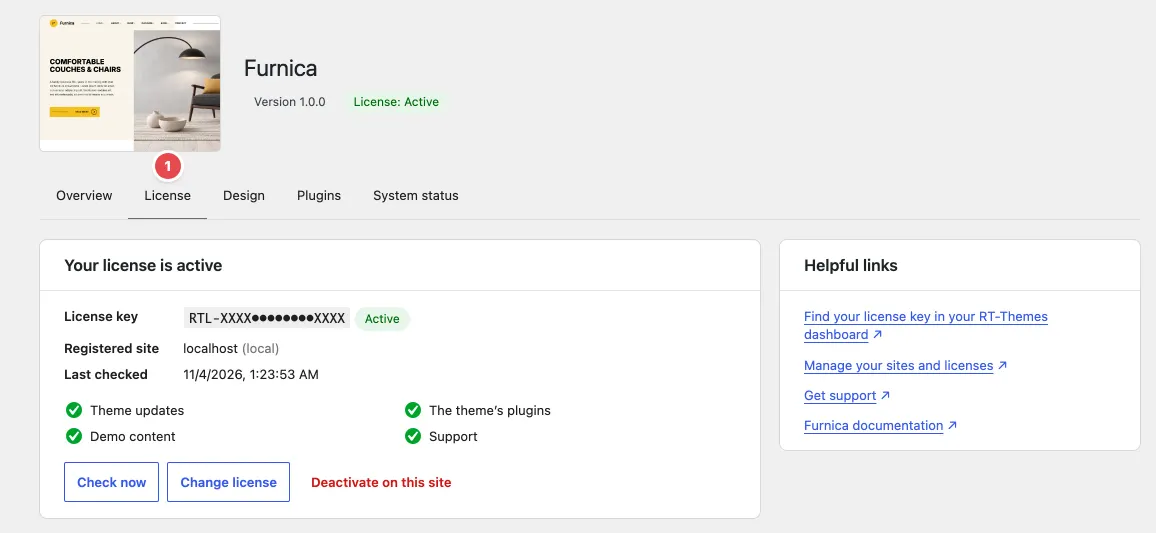
The tab then shows Your license is active, the registered site and what the licence unlocks:
- Theme updates, offered in Dashboard › Updates like any theme update;
- The theme’s plugins, RT-Themes Blocks and RT-Themes Toolkit;
- Demo content, the sample products, catalog items, posts and images the wizard installs;
- Support in your RT-Themes dashboard.
Without a licence, Furnica stays a simple blog theme: the plugins and the demo content need it.
Move the licence to another site
Section titled “Move the licence to another site”On the old site, open RT-Themes › Furnica › License and click Deactivate on this site. Then activate the key on the new site. Change license replaces the key with another one; Check now asks the licence server again, for example after you renewed.
When you activate or check your key, Furnica sends the key, the site address, a random install id and, on activation, the environment type and the theme, WordPress and PHP versions to the RT-Themes licence server. Nothing is sent before you enter a key.
The RT-Themes › Furnica page
Section titled “The RT-Themes › Furnica page”Furnica adds an RT-Themes menu to your admin. Its first item is the theme page, with five tabs:
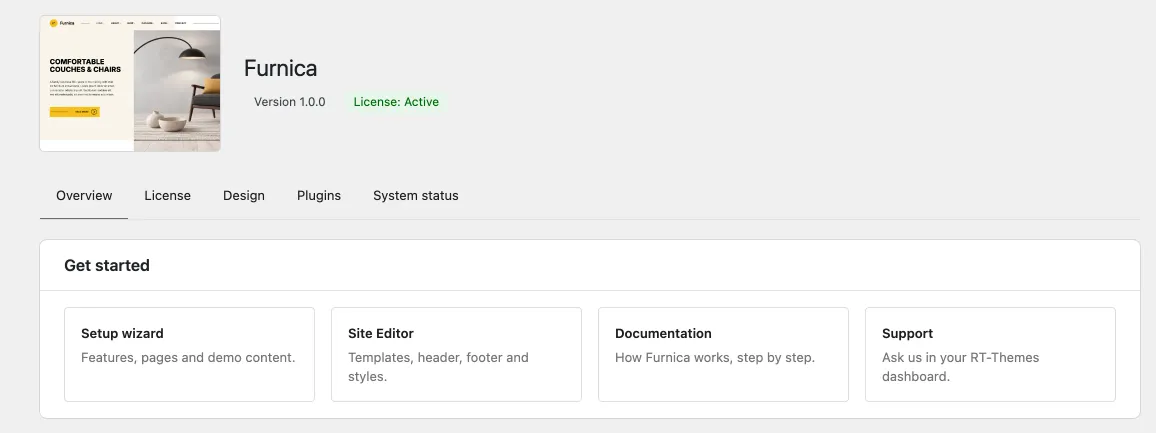
| Tab | What you find there |
|---|---|
| Overview | Version, licence and update status, and links to the setup wizard, the Site Editor, this documentation and support |
| License | Your key, its status and the registered site; Check now, Change license, Deactivate on this site |
| Design | Site-wide choices for the header, the footer and the page title band, see Header and Footer |
| Plugins | The bundled plugins and the plugins your features need: installed and available versions, Install, Activate, Update |
| System status | WordPress, server and connection checks, and Copy the report for support |
The other items of the menu are Setup (the setup wizard), and from the RT-Themes Toolkit plugin Content Types, Import / Export and Site Mode (see Catalog and Custom Fields).
The bundled plugins
Section titled “The bundled plugins”| Plugin | What it adds |
|---|---|
| RT-Themes Blocks | The custom blocks (sliders, cards, maps, forms, timeline …), block styles for core blocks and the Motion panel. See Custom Blocks and Motion. |
| RT-Themes Toolkit | The Catalog post type and its fields, the setup steps behind the wizard, the Design tab’s choices, and Site Mode. It keeps your content structure when you switch themes. |
The setup wizard installs and activates both. Plugins that come with the theme update with it: a theme update brings their new versions to the Plugins tab.
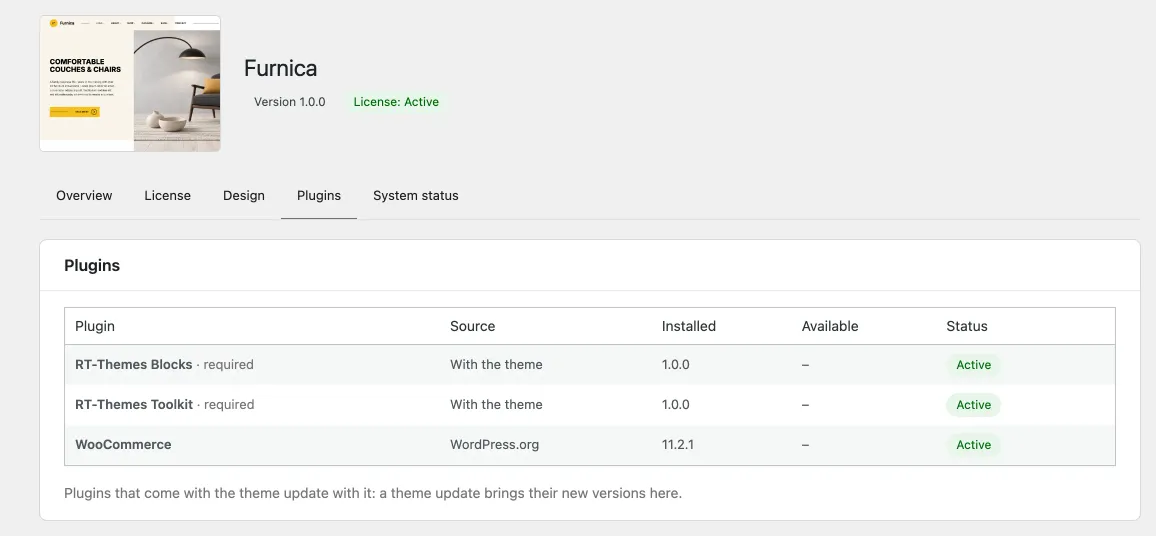
To install one by hand, upload its zip (rtthemes-blocks.zip or rtthemes-toolkit.zip, in the theme package) in Plugins › Add New Plugin › Upload Plugin.
Update Furnica
Section titled “Update Furnica”When a new version is out, Dashboard › Updates and the theme page’s Overview tab show it. Update as you update any theme. Templates and template parts you saved in the Site Editor keep your edits; the rest follows the new version (this is how WordPress block themes work).
Use a child theme only if you change theme files. Changes made in the Site Editor are kept in the database and don’t need one.