
Navigations
WordPress menus
Section titled “WordPress menus”WordPress lets you build your own navigation menus. You create a menu, add your pages, posts, categories and links to it, and assign the menu to one of the theme’s locations. For example, you create a menu called “My main navigation” and assign it to the main navigation location. The theme then shows your menu where the main navigation sits.
The shared guide Creating menus explains how to create a menu, add and nest items and assign a location. This page covers what is specific to RT-Theme 18.
Menu locations
Section titled “Menu locations”RT-Theme 18 has three menu locations:
| Location | Where it shows | Dropdown menus |
|---|---|---|
| RT Theme Main Navigation | The navigation area of the header | Yes, with sub-level items and multi-column menus |
| RT Theme Top Navigation | The top bar above the header | No, top-level items only |
| RT Theme Footer Navigation | The footer bottom area, next to the copyright text | No, top-level items only |
The theme comes with a Main Navigation Menu for the main navigation location and a Footer Navigation Menu for the footer location. You can use those, or create menus with your own names and assign them to the locations. You can also assign the same menu to more than one location. Keep in mind that the top and footer locations show no dropdown (sub-level) items.
Menu subtitles
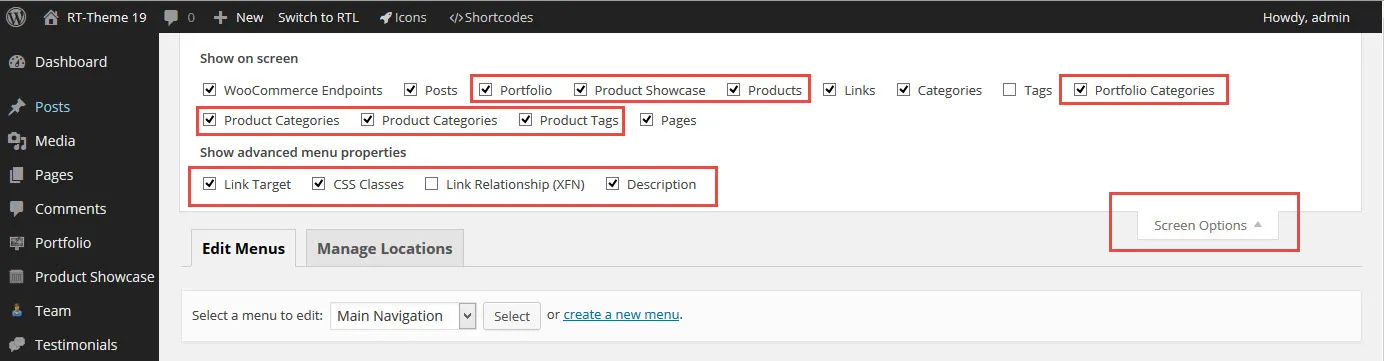
Section titled “Menu subtitles”RT-Theme 18 supports subtitles in the main menu. You add a subtitle in the Description field of the menu item. If you do not see the Description field, open Screen Options at the top right of the menus screen and turn on Description.
Mobile navigation
Section titled “Mobile navigation”Finding the menus
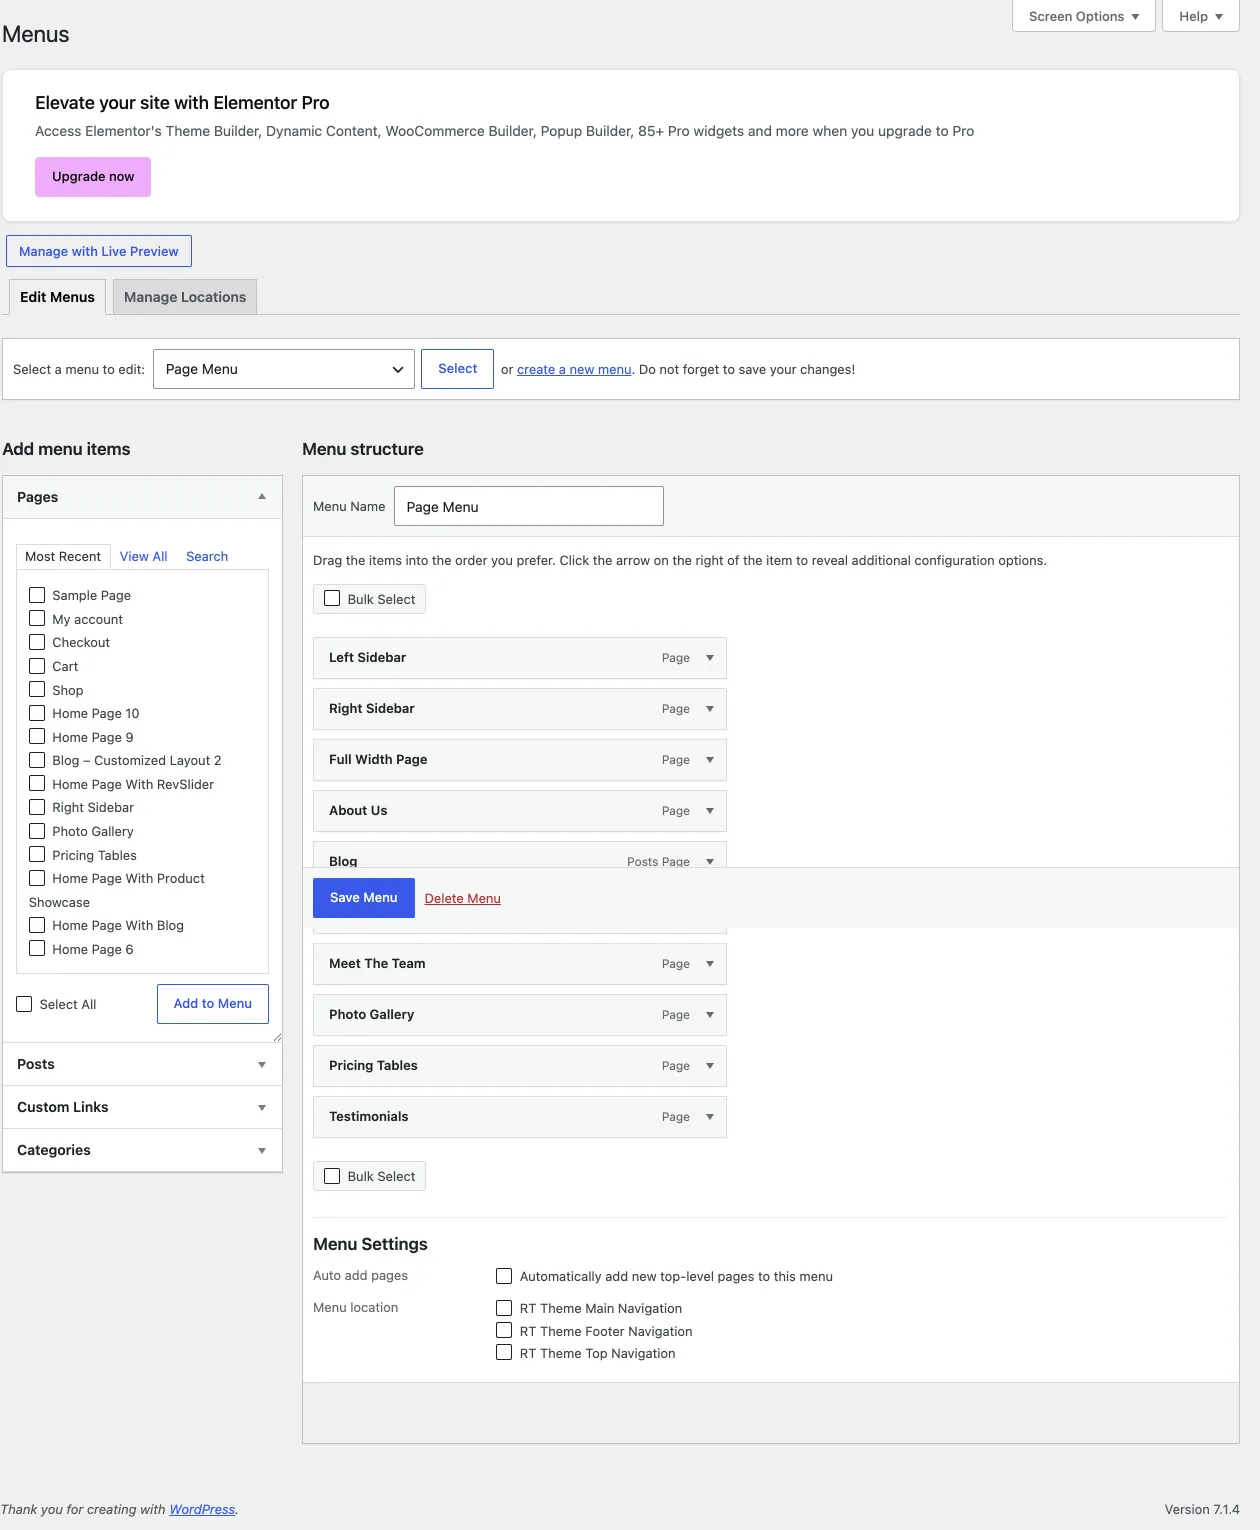
Section titled “Finding the menus”Go to Appearance › Menus. The screen has two tabs, Edit Menus and Manage Locations.
Building a navigation menu
Section titled “Building a navigation menu”In short:
- On the Edit Menus tab, select the Main Navigation Menu and click Select, or click create a new menu.
- On the left you see your pages, posts, products, categories and portfolio items. Select the items you want and click Add to Menu. They appear in the menu on the right.
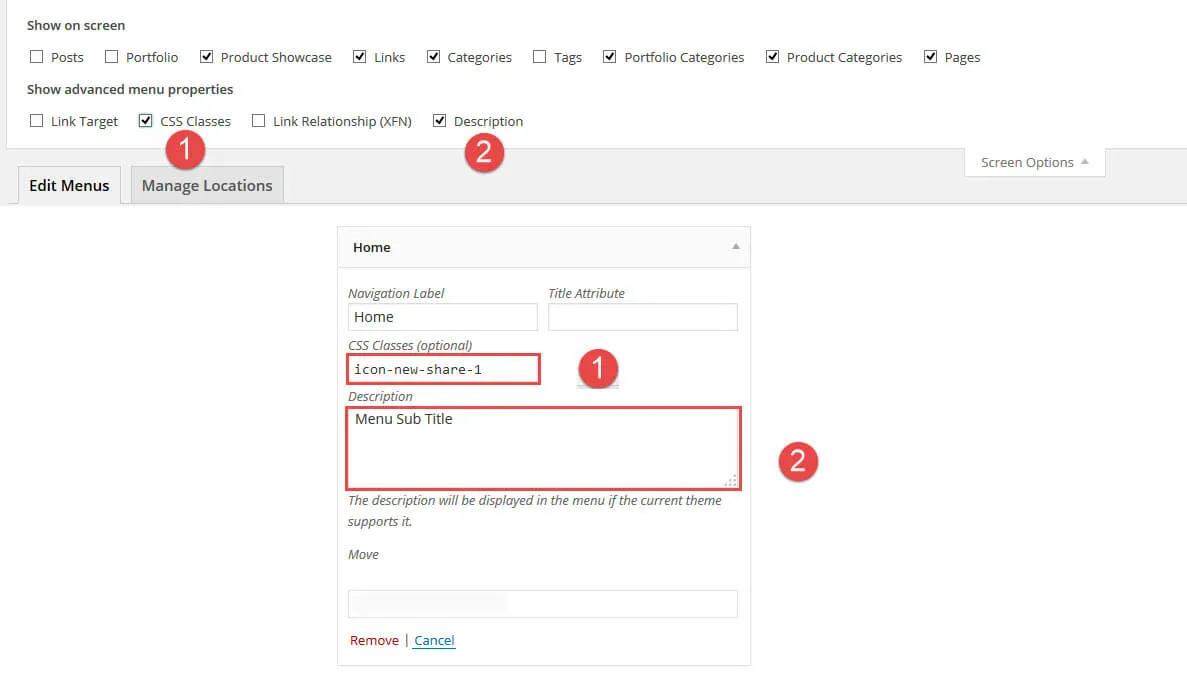
- Open an item to change its settings: the navigation label, the title attribute (the text that appears when a visitor hovers over the item), the description and the CSS classes. If you do not see all of these fields, turn them on in Screen Options.
- Drag the items into the order you want. Drag an item to the right, under another item, to make it a sub-level item.
- Under Menu Settings, select the theme location for the menu. You must assign a location, or the menu will not appear.
- Click Save Menu and visit your site to see the result.
Menu icons and subtitles
Section titled “Menu icons and subtitles”- Icon: click in the CSS Classes field of the menu item. A popup with the available icons appears. Select the icon you want.
- Subtitle: type the text in the Description field.
Showing categories in the menus screen
Section titled “Showing categories in the menus screen”If you do not see your portfolio, product or post categories on the left of the menus screen, open Screen Options at the top right of the screen.
Turn on the post, product and portfolio categories. They then appear on the left, and you can add them to your menu.
Adding a home page or a custom link
Section titled “Adding a home page or a custom link”- Open the Custom Links box on the left.
- Enter your home page address in URL.
- Enter a label, such as “Home”, in Link Text.
- Click Add to Menu.
- Drag the new item to its place in the menu and adjust its settings if you want.
- Click Save Menu.
Multi-column navigation (mega menu)
Section titled “Multi-column navigation (mega menu)”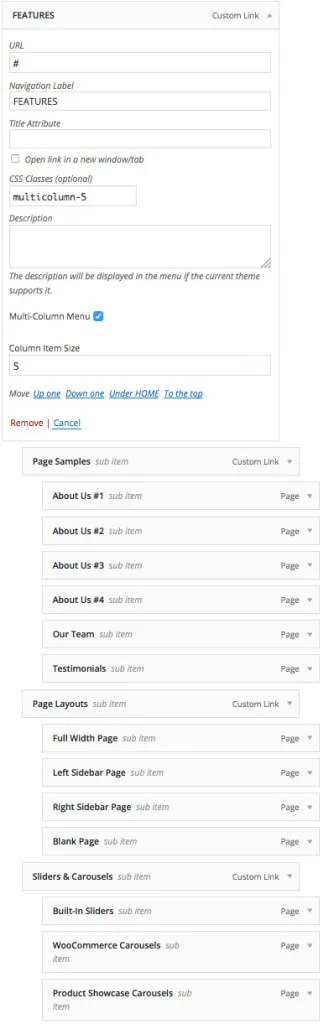
You can turn a dropdown into a multi-column menu. Each menu item has a Multi-Column checkbox, but it only works on top-level items. When you check the box, the theme splits the sub-menu items of that item into columns.
The screenshot shows an example from a demo site. The “Features” menu collects its third-level items under five second-level items. A second-level item becomes a column title when it has a submenu.
On mobile devices, multi-column menus display as regular menus.