Miscellaneous
Special class names
Section titled “Special class names”BusinessLounge has CSS classes that you can enter in the CSS class field of a page builder element, or use in your own HTML.
Lightbox
Section titled “Lightbox”| Class | Effect |
|---|---|
rt_lightbox | Add it to a link to an image or a video (YouTube and Vimeo only) to open the linked media in a lightbox. |
Boxed design and shadows
Section titled “Boxed design and shadows”| Class | Effect |
|---|---|
boxed | Boxed design |
shadow | Shadow 1 |
shadow-2 | Shadow 2 |
shadow-3 | Shadow 3 |
Hover styles
Section titled “Hover styles”| Class | Effect |
|---|---|
hover-shadow | Adds a shadow on mouse over |
hover-opacity | Lowers the opacity on mouse over |
Alignments
Section titled “Alignments”Use aligncenter, alignleft or alignright to align an element.
Text alignments
Section titled “Text alignments”| Class | Effect |
|---|---|
text-left | Left-aligned text |
text-center | Centred text |
text-right | Right-aligned text |
text-justify | Justified text |
text-nowrap | Text does not wrap |
Text alignments for small screens
Section titled “Text alignments for small screens”| Class | Effect |
|---|---|
mobile-text-left | Left-aligned text on small screens |
mobile-text-center | Centred text on small screens |
mobile-text-right | Right-aligned text on small screens |
Bootstrap class names
Section titled “Bootstrap class names”You can use the Bootstrap responsive utility classes. For example, to hide an element only on small devices such as smartphones, use the hidden-xs class.
Typography class names
Section titled “Typography class names”Each font you choose in Typography Options has a class. For example, to use the heading font in an element such as tabs, enter heading-font in the element’s CSS class field.
| Class | Font |
|---|---|
heading-font | Heading font |
body-font | Body font |
secondary-font | Secondary font |
menu-font | Menu font |
sub-menu-font | Sub-menu font |
Colours
Section titled “Colours”| Class | Colour |
|---|---|
body-font-color | Body font colour |
primary-font-color | Primary font colour |
light-font-color | Light font colour |
heading-color | Heading font colour |
Creating a one-page design
Section titled “Creating a one-page design”A one-page design needs two things:
- A page whose rows or sections have unique IDs.
- A navigation menu whose items point to those IDs.
Creating the page
Section titled “Creating the page”Create a new page or edit an existing one, and define the sections that the menu items will point to.
Define sections in Elementor
Section titled “Define sections in Elementor”Elementor gives you two ways:
-
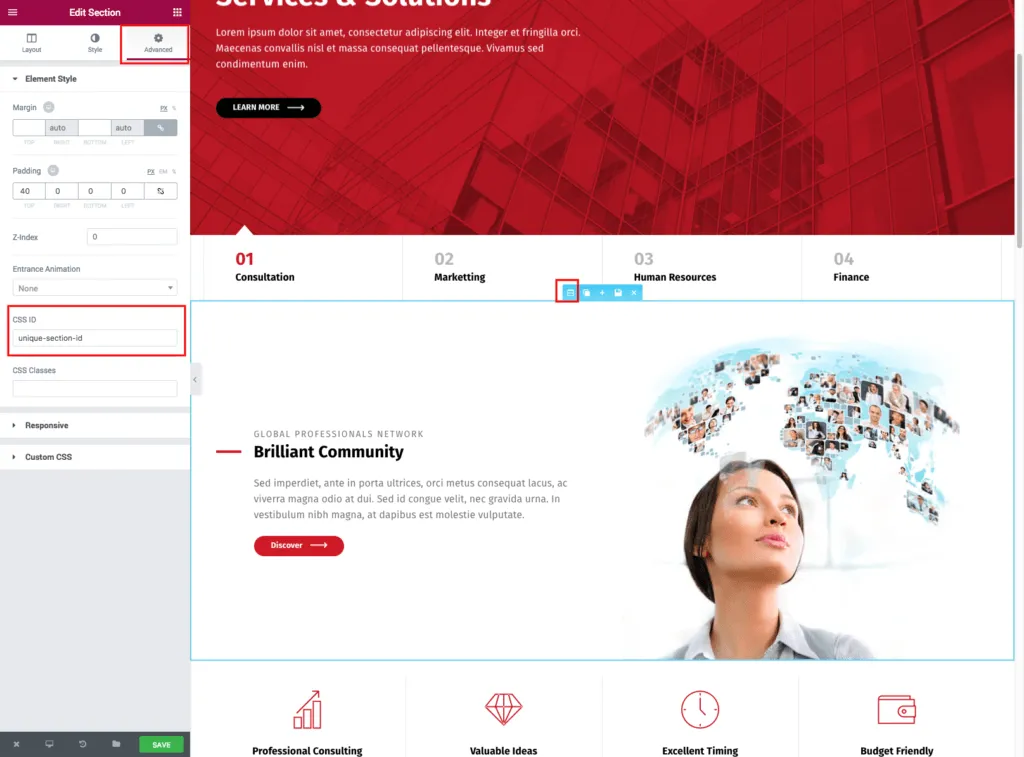
Enter the ID in the CSS ID field on the Advanced tab of a section or column.
-
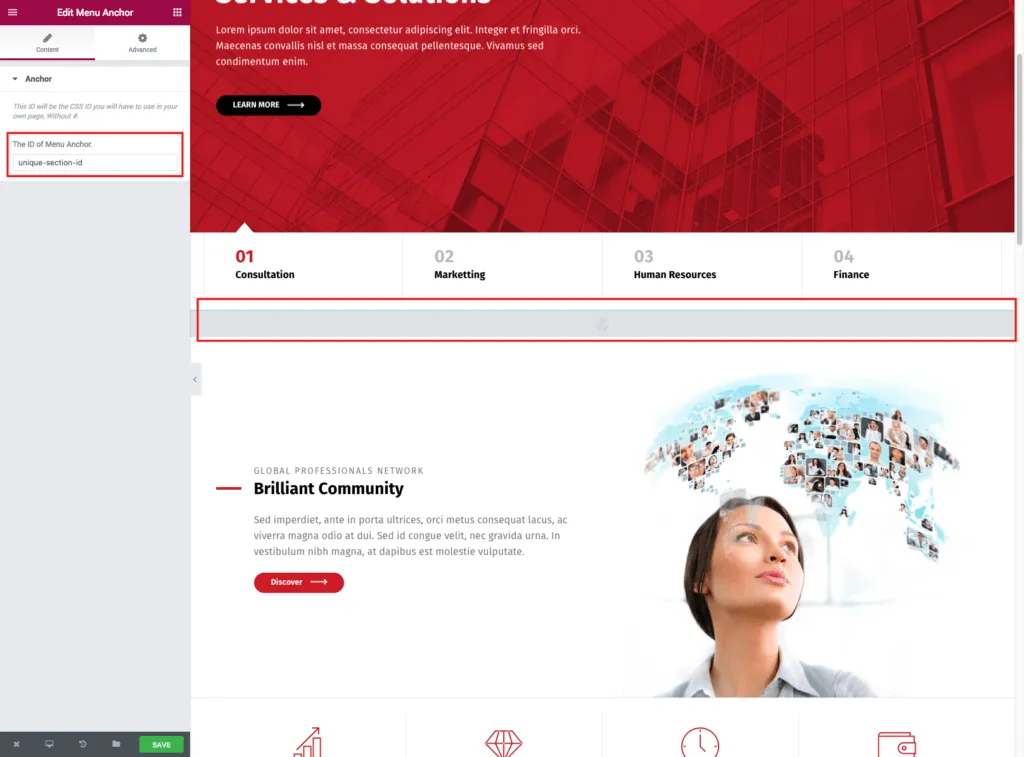
Or add Elementor’s Menu Anchor element above the section.
Define sections in WPBakery Page Builder
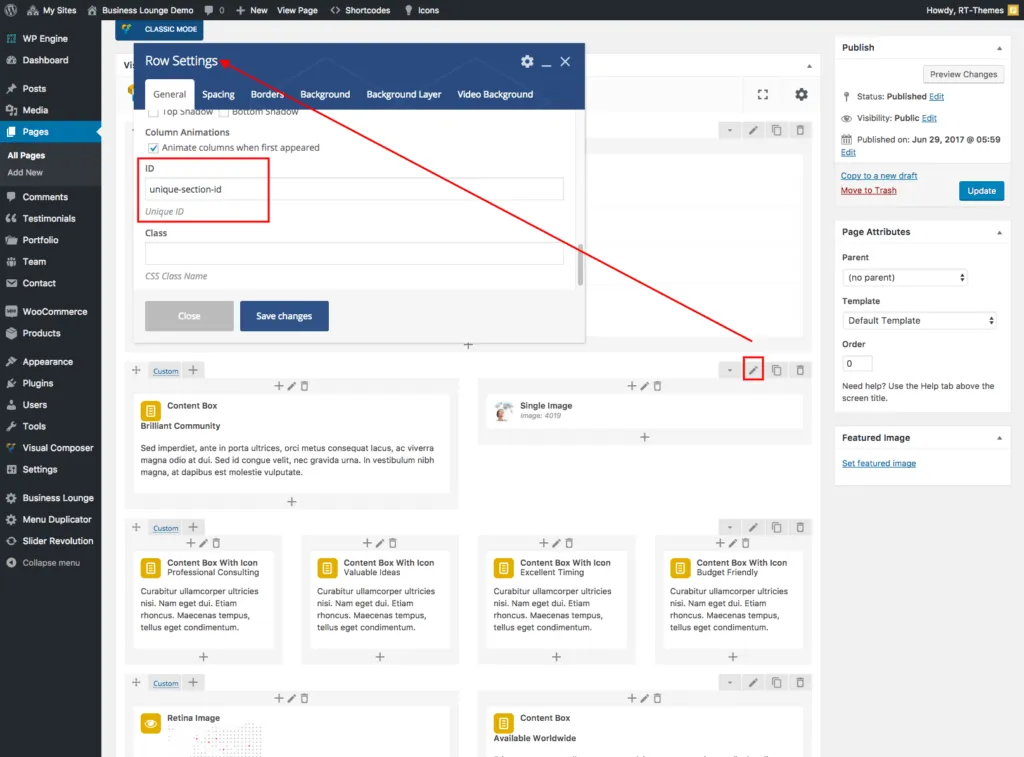
Section titled “Define sections in WPBakery Page Builder”Open the settings of a row and enter the same ID that the menu item uses, as shown below.
Creating the menu
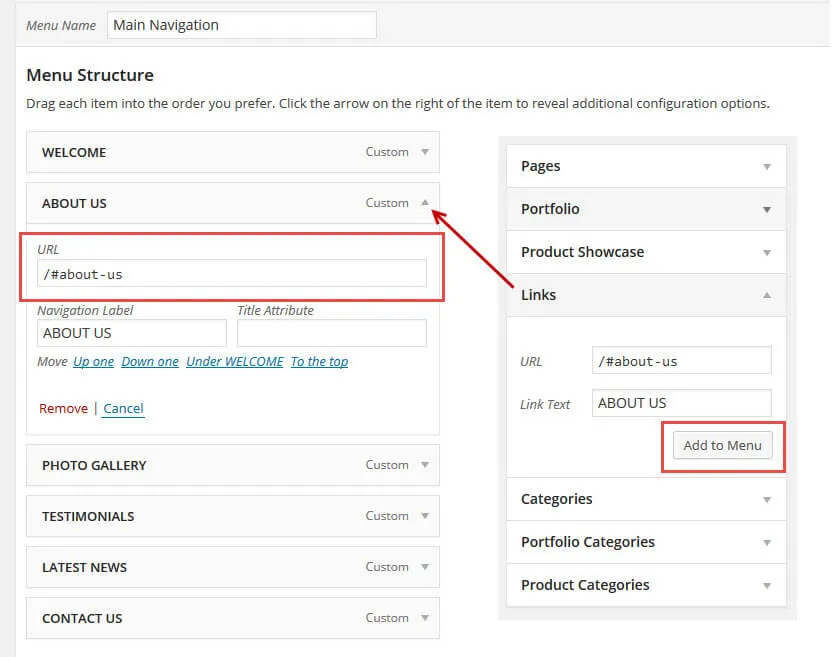
Section titled “Creating the menu”Create a new menu in Appearance › Menus (see Navigations). Add a Custom Link for each section, with a URL such as /#unique-section-id that matches the ID of a section on the page.