
WPBakery Page Builder
Editor modes
Section titled “Editor modes”WPBakery Page Builder (formerly Visual Composer) is the alternative page builder of BusinessLounge; Elementor is the main one. It works in two modes:
- Classic mode: the normal WordPress editor. In the Classic Editor it has two tabs of its own, Visual and Text. We call the Text tab HTML mode.
- Backend Editor mode: the visual mode of WPBakery Page Builder. You add elements to the page and drag and drop them where you want them. Change the settings of an element with its edit button.
Adding elements
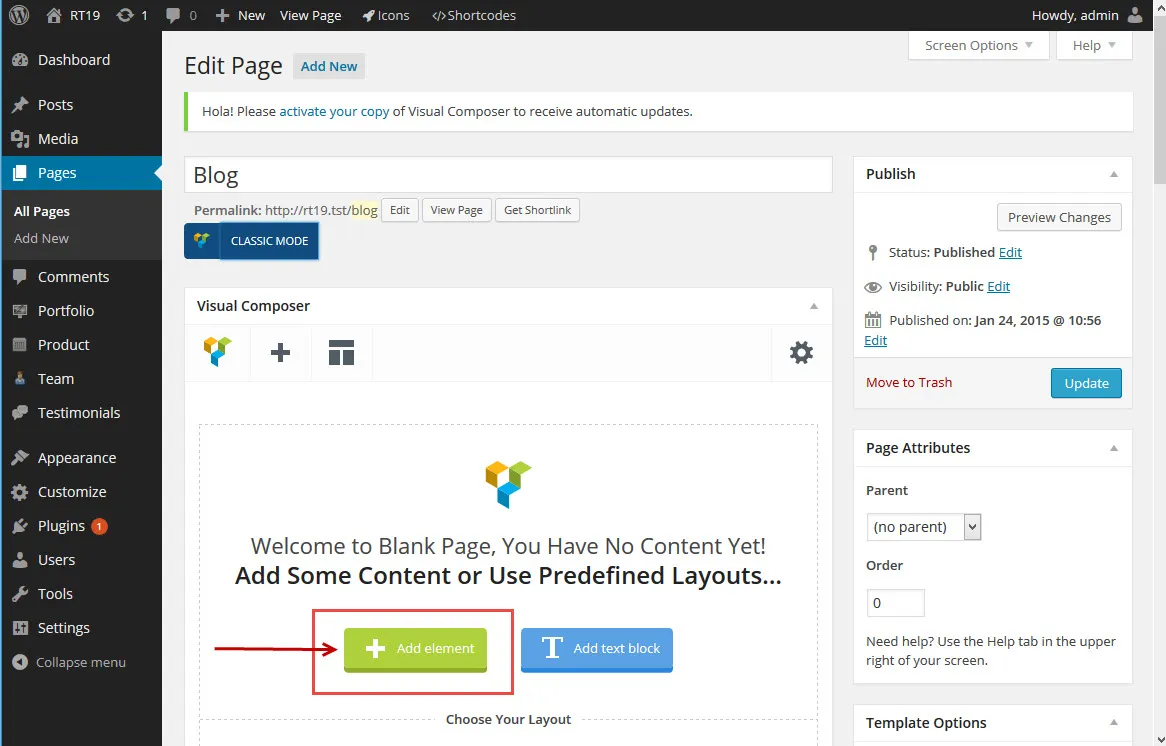
Section titled “Adding elements”On an empty page, start by adding an element:
-
Click Add element.
-
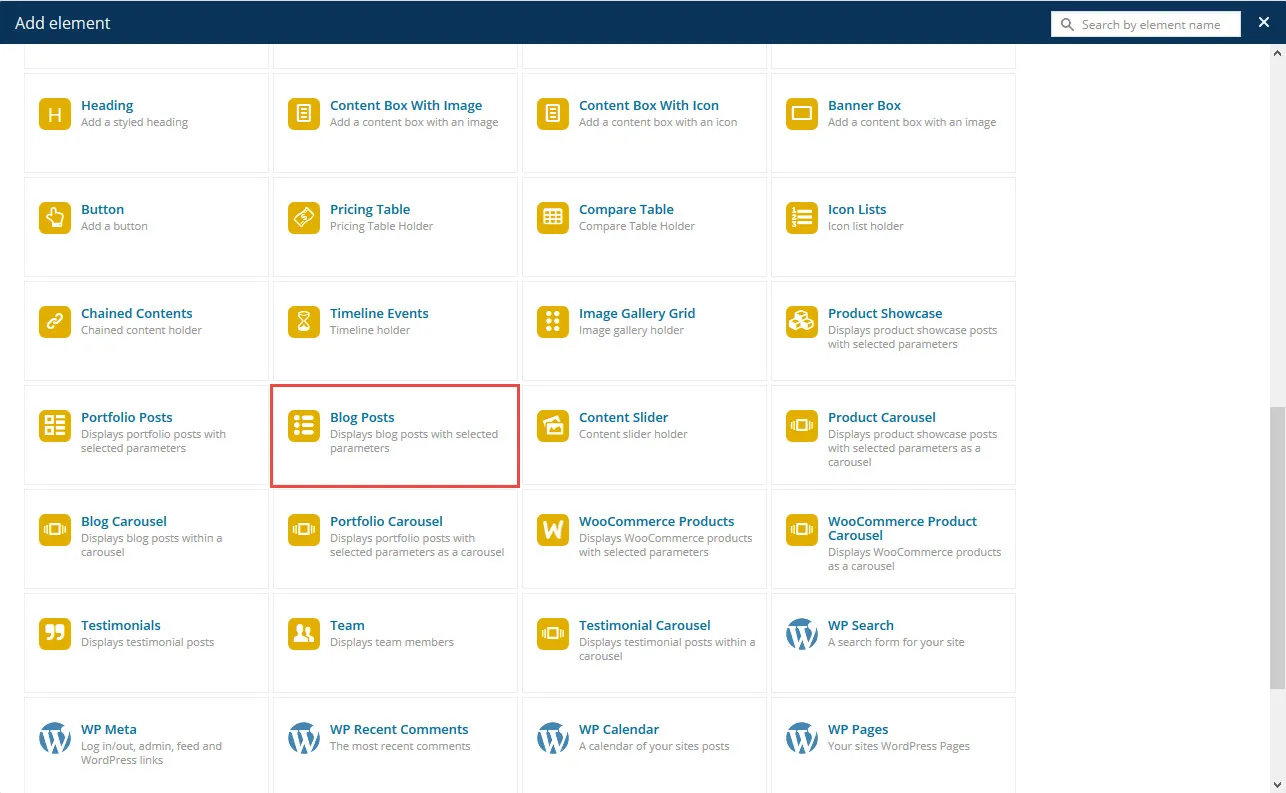
In the popup, choose an element, for example the theme’s blog element (Blog Posts in the screenshot).
-
A window opens with the settings of the element you chose.
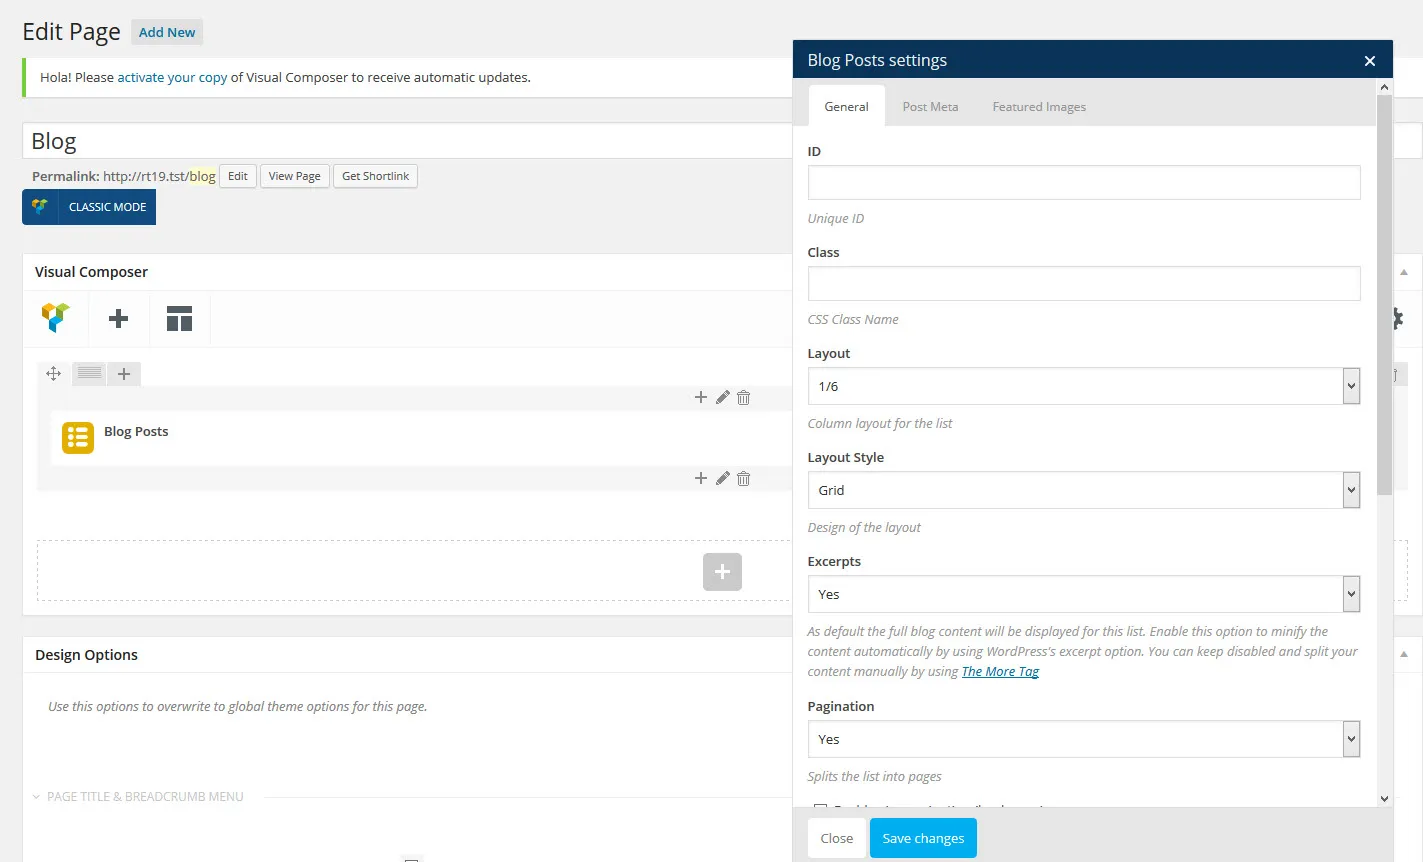
Adjust the settings for your blog list and save them.
-
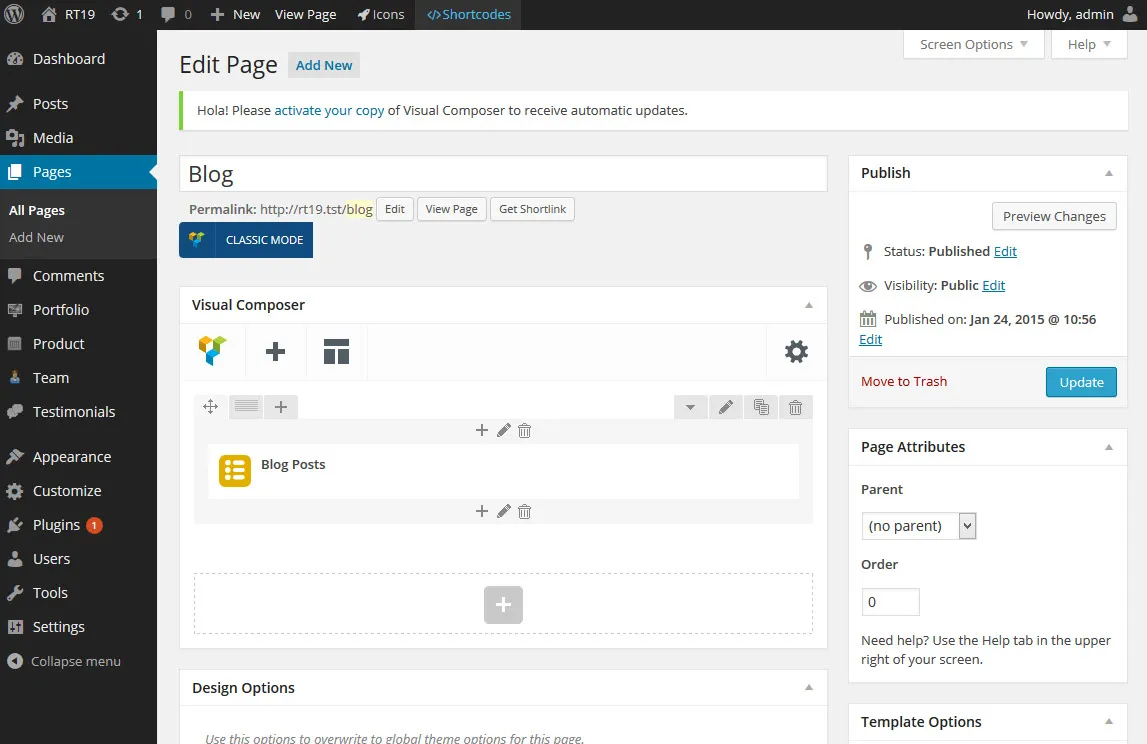
You return to the backend editor, which now looks like this:
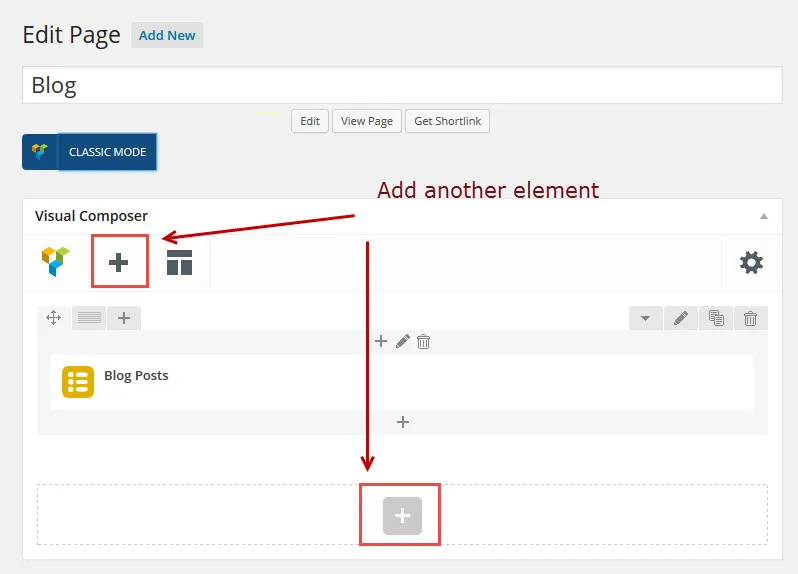
The editor screen
Section titled “The editor screen”When you open a page in the backend editor, you see many buttons and settings:
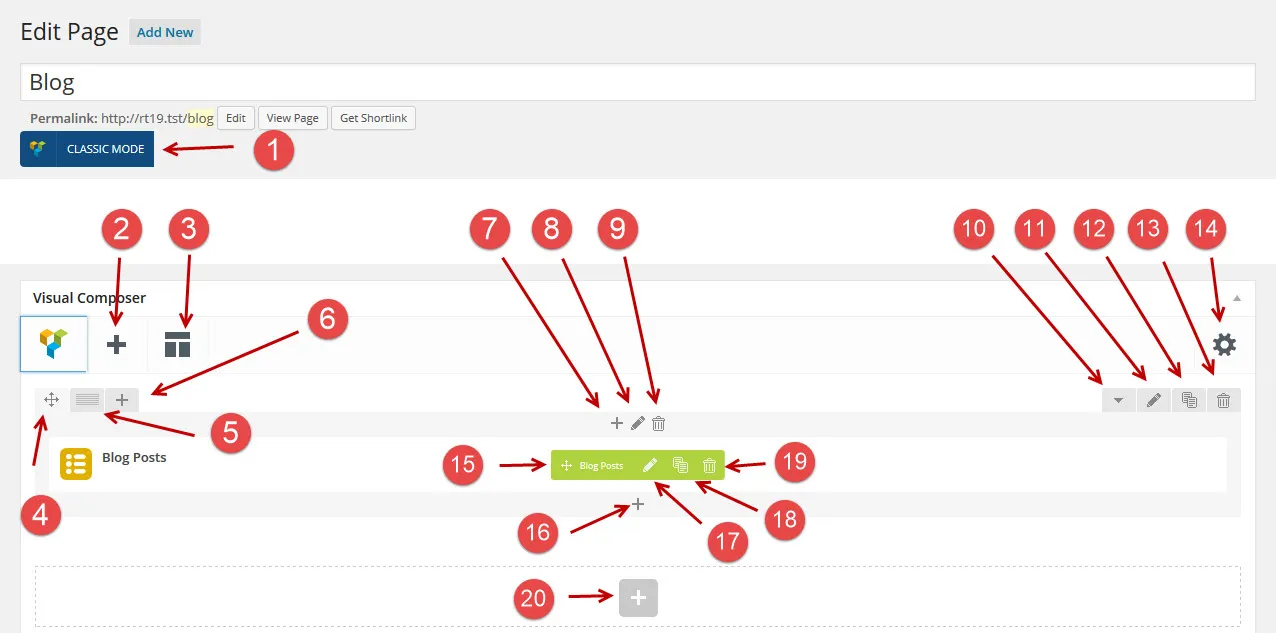
- The toggle that switches between the normal WordPress editor and the WPBakery Page Builder editor.
- Add a new element. A window opens where you choose an element. Another window then shows its settings.
- The template button. Save the page design as a template, or load one. You can then reuse a design with one click instead of building all its elements again.
- Drag the row to another place.
- Change the columns of the row.
- Add a new column. A window opens with the settings of the new column.
- Add a new element before the selected one. A window opens where you choose an element. Another window then shows its settings.
- Edit this column. A window opens with all its settings.
- Delete this column and all its elements.
- Open or close (collapse) this row.
- Edit the settings of this row. A window opens with all its settings.
- Clone this row.
- Delete this row and all its content.
- The custom CSS box, for CSS that applies to this page.
- Move the element within the column or row.
- Add a new element after the selected one. A window opens where you choose an element. Another window then shows its settings.
- Edit the settings of the selected element. A window opens with all its settings.
- Clone the element within the row or column.
- Delete the selected element.
- Add a new element to the page. A window opens where you choose an element. Another window then shows its settings.
WPBakery Page Builder documentation
Section titled “WPBakery Page Builder documentation”Read the WPBakery Page Builder knowledge base and watch the WPBakery Page Builder video tutorials to learn more.
White screen after activating WPBakery Page Builder
Section titled “White screen after activating WPBakery Page Builder”A white screen, or a Customizer that does not load, is usually caused by the PHP memory limit of your server. Raise the PHP memory limit explains how to raise it in wp-config.php or ask your host to do it.