Team List / Post
Creating team members
Section titled “Creating team members”A team page needs team member items. You show them on an overview page, such as a team list or an about us page, with a shortcode or a page builder element.
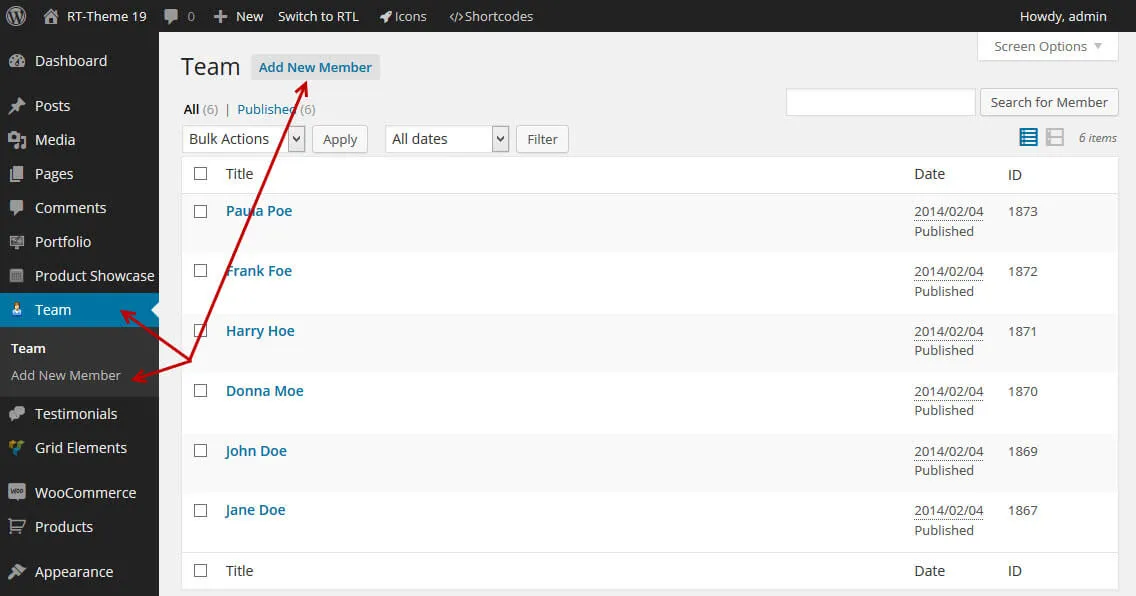
Things you should know
Section titled “Things you should know”- Team members have no categories.
- To show team members, use their IDs in the shortcode, or select them one by one in the page builder element settings.
- The short info of a team member (its excerpt) accepts HTML (headings, links, divs). Keep it as simple as possible.
Creating a team listing page
Section titled “Creating a team listing page”Any page can hold a team list, and you can create as many lists as you want, each with its own settings.
Create with Elementor
Section titled “Create with Elementor”-
Create a new page or edit an existing one.
-
Click Edit with Elementor.

-
Find the Team element and add it to the page.
-
Adjust the element settings and save the page.
Create with WPBakery Page Builder
Section titled “Create with WPBakery Page Builder”-
Create a new page or edit an existing one.
-
Click BACKEND EDITOR to switch to WPBakery Page Builder.

-
Click the Add New Element (+) button and find the Team element that the theme adds.
-
Adjust the element settings and save them.
Create with a shortcode
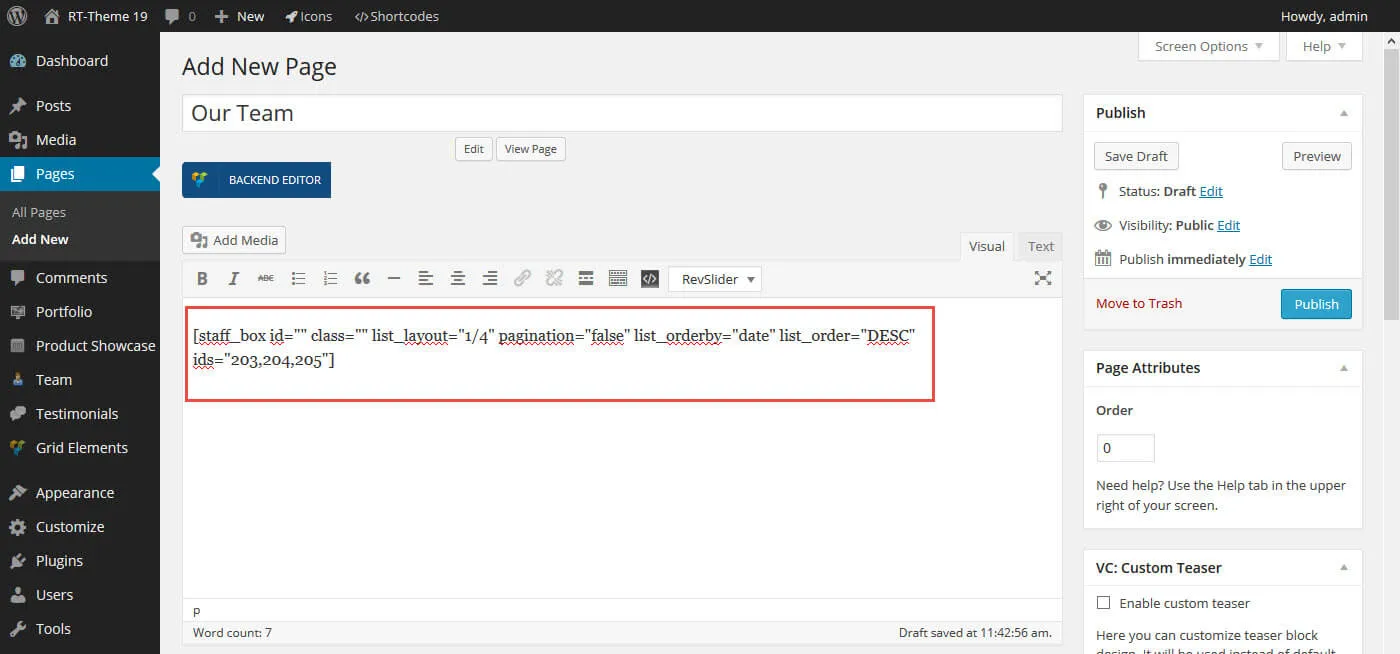
Section titled “Create with a shortcode”You can do the same without a page builder. Create a page and add the theme’s Staff Posts shortcode. See Shortcodes to learn more.
Creating a team member
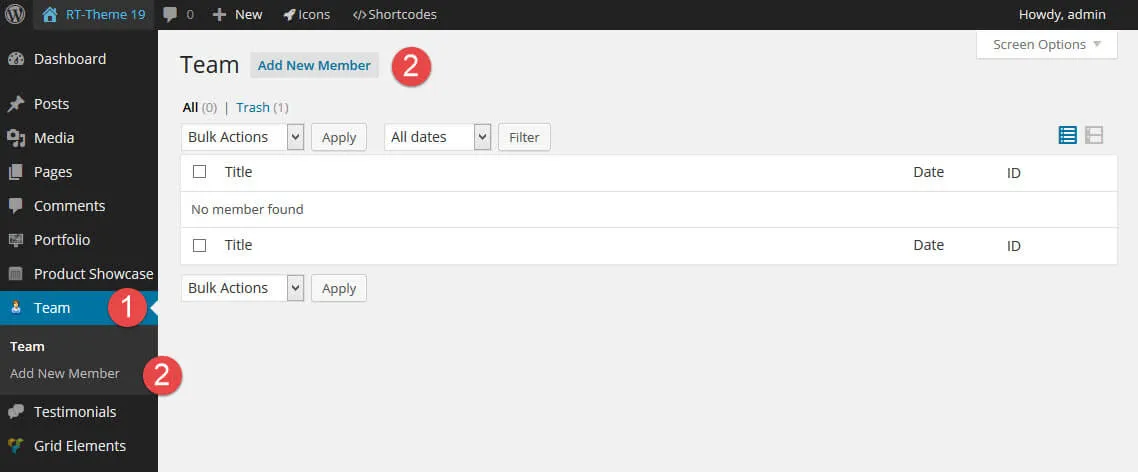
Section titled “Creating a team member”Creating a team member is straightforward. Team members have their own post type, Team.
- In your admin, go to Team (1).
- Click Add New Member, either in the menu or at the top of the member list (2).
Things you should know
Section titled “Things you should know”- Team members have no categories.
- To show team members, use their IDs in the shortcode, or select them one by one in the page builder element settings.
- To add a featured image, click Set featured image in the Featured Image box.
- The short info of a team member (its excerpt) accepts HTML (headings, links, divs). Keep it as simple as possible.
- For each team member you can add:
- a position (job title)
- a short info text for the listing pages, a small excerpt
- links to about 40 social media sites, each with its own icon
- a complete story about the person in the content of the team member post. Any valid HTML and shortcodes are allowed, and you can also design the whole post with page builder elements.
The single team member item
Section titled “The single team member item”A team member has many options.
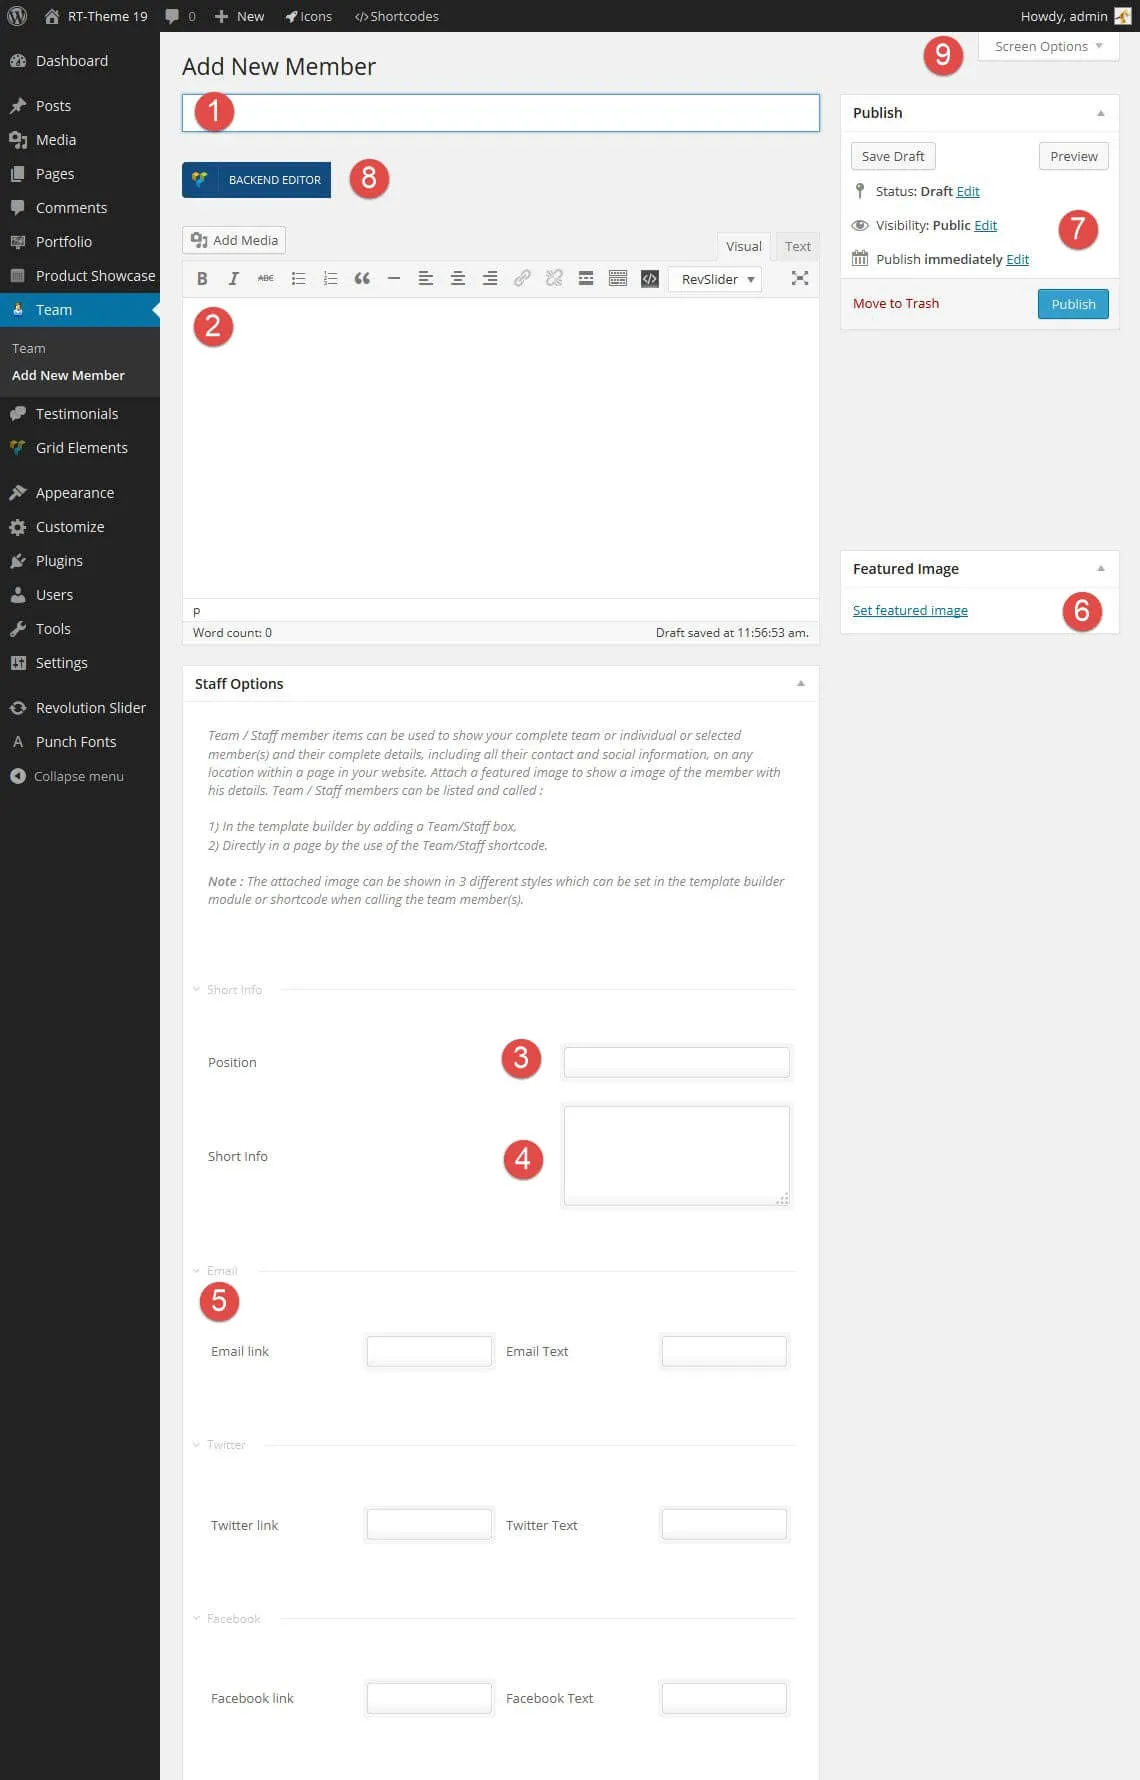
- The title (the name) of the team member.
- The content of the team member: the story you want to tell. It appears on the single team member page.
- The position, the person’s job title.
- The short info for the listing pages.
- The social media icons you want to attach to this team member. The screenshot does not show all of them.
- The featured image of the team member.
- The Publish box: publish the team member to show it on your site. You can also change its date or visibility, save it as a draft, or preview it.
- Switch to WPBakery Page Builder to add page builder elements, or stay in the Classic Editor and add shortcodes or text the normal WordPress way.
- Screen Options, at the top right of the screen: choose which boxes this post type shows.
Two of the social media icons need extra attention:
- Email: enter either a URL or an email address.
- Skype: enter a valid Skype address, with the syntax
skype:skypeid?callorskype:phonenumber?call. Skype was retired in May 2025, so the link only works for people who still have the app.
When you have added the content and settings, publish the team member. It then appears in any team list on your site, that is, on any page where you added the team shortcode or a team element of your page builder.
Creating testimonials
Section titled “Creating testimonials”Testimonials work in a similar way and have their own chapter: see Testimonial List / Post.